My Garage
My Account
Cart
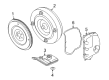
Genuine Ford Flywheel
Clutch Flywheel- Select Vehicle by Model
- Select Vehicle by VIN
Select Vehicle by Model
orMake
Model
Year
Select Vehicle by VIN
For the most accurate results, select vehicle by your VIN (Vehicle Identification Number).
189 Flywheels found


Ford Flywheel Assembly
Part Number: 7T4Z-6375-AA$50.46 MSRP: $72.50You Save: $22.04 (31%)Ships in 1-2 Business DaysProduct Specifications- Other Name: Flywheel Assy; Drive Plate, Flywheel
- Manufacturer Note: 3 Bolt Converter
- Replaces: AA5Z-7000-B, AA5Z-7000-D


Ford Plate Assembly - Converter Drive
Part Number: CV6Z-6375-B$87.98 MSRP: $127.50You Save: $39.52 (31%)Ships in 1-3 Business DaysProduct Specifications- Other Name: Plate Assy - Converter Drive; Drive Plate


Ford Flywheel Assembly
Part Number: BE8Z-6375-B$89.15 MSRP: $137.83You Save: $48.68 (36%)Ships in 1-3 Business DaysProduct Specifications- Other Name: Flywheel Assy; Flywheel

 Product Specifications
- Other Name: Flywheel Assy; Flywheel
- Replaced by: C1BZ-6477-C


Ford Flywheel Assembly
Part Number: 8C3Z-6375-B$576.84 MSRP: $920.00You Save: $343.16 (38%)Ships in 1-3 Business DaysProduct Specifications- Other Name: Flywheel Assy; Flywheel
- Manufacturer Note: 7600 Pilot Bearing Is Serviced In The 6375 Flywheel Asy Only

 Product Specifications
- Other Name: Flywheel Assy; Flywheel
- Replaces: 7R3Z-6375-AA


Ford Flywheel Assembly
Part Number: CV6Z-6477-A$265.55 MSRP: $391.67You Save: $126.12 (33%)Ships in 1-3 Business DaysProduct Specifications- Other Name: Flywheel Assy; Flywheel
- Manufacturer Note: Dual Mass Flywheel
 Product Specifications
- Other Name: Flywheel Assy
- Replaced by: C1BZ-6477-C


Ford FLYWHEEL ASY
Part Number: CV6Z-6375-E$77.86 MSRP: $113.83You Save: $35.97 (32%)Ships in 1-2 Business DaysProduct Specifications- Other Name: Drive Plate, Flywheel
- Replaces: CV6Z-6375-C


Ford Flywheel Assembly
Part Number: 4C3Z-6375-AA$50.00 MSRP: $71.83You Save: $21.83 (31%)Ships in 1 Business DayProduct Specifications- Other Name: Flywheel Assy; Drive Plate, Flywheel
- Manufacturer Note: FLYWHEEL ASY
- Replaces: F6AZ-6375-DA

Ford Flywheel And Ring Gear Assembly
Part Number: DG9Z-6375-B$204.06 MSRP: $298.33You Save: $94.27 (32%)Ships in 1-3 Business DaysProduct Specifications- Other Name: Flywheel And Ring Gear Assy; Drive Plate, Flywheel
- Replaced by: DG9Z-6375-C
- Replaces: DG9Z-6375-A

Ford Flywheel Assembly
Part Number: 2M5Z-6375-AA$362.36 MSRP: $499.22You Save: $136.86 (28%)Ships in 1-2 Business DaysProduct Specifications- Other Name: Flywheel Assy; Flywheel
- Manufacturer Note: (SVT) with split mass flywheel

Ford Flywheel Assembly
Part Number: 1F2Z-6375-BA$205.25 MSRP: $280.46You Save: $75.21 (27%)Ships in 1-2 Business DaysProduct Specifications- Other Name: Flywheel Assy
- Replaced by: 2F2Z-6375-AA
Ford Flywheel And Ring Gear Assembly
Part Number: DG9Z-6375-A$204.06 MSRP: $298.33You Save: $94.27 (32%)Ships in 1-3 Business DaysProduct Specifications- Other Name: Flywheel And Ring Gear Assy
- Replaced by: DG9Z-6375-C

Ford Flywheel Assembly
Part Number: YC3Z-6375-DA$232.96 MSRP: $346.67You Save: $113.71 (33%)Ships in 1-3 Business DaysProduct Specifications- Other Name: Flywheel Assy
- Manufacturer Note: M/T
- Replaced by: 1C3Z-6375-AA

Ford Flywheel Assembly
Part Number: CV6Z-6477-C$301.71 MSRP: $445.00You Save: $143.29 (33%)Ships in 1-3 Business DaysProduct Specifications- Other Name: Flywheel Assy; Flywheel
- Manufacturer Note: Dual Mass Flywheel
Ford FLYWHEEL ASY
Part Number: L1MZ-6477-B$580.16 MSRP: $863.33You Save: $283.17 (33%)Ships in 1-3 Business DaysProduct Specifications- Other Name: Drive Plate

Ford Flywheel Assembly
Part Number: HL3Z-6375-A$54.83 MSRP: $80.17You Save: $25.34 (32%)Ships in 1-3 Business DaysProduct Specifications- Other Name: Flywheel Assy; Drive Plate, Flywheel

Ford FLYWHEEL ASY
Part Number: 1S7Z-6375-E$72.27 MSRP: $109.50You Save: $37.23 (34%)Ships in 1-3 Business DaysProduct Specifications- Other Name: Drive Plate
- Replaces: 1S7Z-6375-D, 1L8Z-6375-AA, 1S7Z-6375-B, 1S7Z-6375-C

Ford FLYWHEEL ASY
Part Number: PC3Z-6375-A$105.56 MSRP: $154.33You Save: $48.77 (32%)Ships in 1-2 Business DaysProduct Specifications- Other Name: Drive Plate, Flywheel
- Replaces: LC3Z-6375-B, LC3Z-6375-A
| Page 1 of 10 |Next >
1-20 of 189 Results
Ford Flywheel Parts Questions & Experts Answers
- Q: How to properly remove and reinstall the flywheel/drive plate in 4.0L pushrod V6 engine on Ford Explorer?A:Raise the vehicle and support it securely on jack stands, ensuring that if equipped with Automatic Ride Control (ARC), the air suspension switch is turned to the OFF position before raising to prevent damage to the system components. For vehicles with manual transmission, remove the pressure plate and clutch disc. Apply alignment marks on the flywheel/drive plate and crankshaft to ensure correct alignment during reinstallation. Remove the bolts securing the flywheel/drive plate to the crankshaft, supporting the heavy flywheel during removal; if the crankshaft turns, wedge a screwdriver through the starter opening to jam the flywheel, noting that 1997 and later models have eight flywheel bolts while earlier models have six. Carefully remove the flywheel/drive plate from the crankshaft, supporting it while removing the last bolt. Clean the flywheel to remove grease and oil, inspecting the surface for cracks, rivet grooves, burned areas, and score marks, with light scoring removable using emery cloth. Check for cracked and broken ring gear teeth, laying the flywheel on a flat surface to check for warpage with a straightedge. Clean and inspect the mating surfaces of the flywheel/drive plate and crankshaft, replacing the crankshaft rear seal if leaking before reinstalling. Position the flywheel/drive plate against the crankshaft, aligning the marks made during removal, and noting that some engines have an alignment dowel or staggered bolt holes for correct installation. Apply thread locking compound to the bolt threads before tightening, using a screwdriver through the starter motor opening to prevent the flywheel/drive plate from turning as the bolts are torqued. The remainder of the installation follows the reverse of the removal procedure.
- Q: How to properly remove and reinstall a flywheel from a crankshaft in 3.5L and 3.7L V6 engine on Ford F-150?A:Raise the vehicle and support it securely on jackstands, then remove the transmission. If it's leaking, now would be a very good time to replace the front pump seal/O-ring. Look for factory paint marks that indicate driveplate-to-crankshaft alignment; if they aren't there, use a center-punch or paint to make alignment marks on the driveplate and crankshaft to ensure correct alignment during reinstallation. Remove the bolts that secure the driveplate to the crankshaft; if the crankshaft turns, use a flywheel holding tool or wedge a screwdriver in the ring gear teeth to jam the driveplate. Remove the driveplate from the crankshaft and check for cracked and broken ring gear teeth. Clean and inspect the mating surfaces of the driveplate and the crankshaft; if the crankshaft rear seal is leaking, replace it before reinstalling the driveplate. Position the driveplate against the crankshaft, ensuring the crankshaft sensor ring is positioned between the driveplate and the engine, and align the marks made during removal. Note that some engines have an alignment dowel or staggered bolt holes to ensure correct installation. Tighten the bolts to the specified torque, and the remainder of installation is the reverse of the removal procedure.
- Q: How to remove and reinstall the flywheel/driveplate in 4.0L pushrod V6 engine on Ford Ranger?A:Raise the vehicle and support it securely on jackstands, then remove the transmission. If it's leaking, now would be a very good time to replace the front pump seal/O-ring for automatic transmissions. Remove the pressure plate and clutch disc for manual transmission equipped vehicles, and check or replace the clutch components and pilot bearing. Make alignment marks on the flywheel/driveplate and crankshaft to ensure correct alignment during reinstallation. Remove the bolts that secure the flywheel/driveplate to the crankshaft; if the crankshaft turns, wedge a screwdriver through the starter opening to jam the flywheel. Carefully remove the flywheel/driveplate from the crankshaft, supporting it while removing the last bolt due to its weight. Clean the flywheel to remove grease and oil, inspecting the surface for cracks, rivet grooves, burned areas, and score marks, with light scoring removable using emery cloth. Check for cracked and broken ring gear teeth, laying the flywheel on a flat surface to check for warpage with a straightedge. Clean and inspect the mating surfaces of the flywheel/driveplate and the crankshaft, replacing the crankshaft rear seal if it is leaking before reinstalling the flywheel/driveplate. Position the flywheel/driveplate against the crankshaft, aligning the marks made during removal, noting that some engines have an alignment dowel or staggered bolt holes for correct installation. Before installing the bolts, apply thread locking compound to the threads. Wedge a screwdriver through the starter motor opening to keep the flywheel/driveplate from turning as you tighten the bolts in a crisscross pattern to the specified torque. The remainder of installation follows the reverse of the removal procedure.


Related Ford Parts

Browse by Model
Aerostar Flywheel Bronco Flywheel Bronco II Flywheel Bronco Sport Flywheel C-Max Flywheel Contour Flywheel Crown Victoria Flywheel E-150 Flywheel E-250 Flywheel E-350/E-350 Super Duty Flywheel E-450 Super Duty Flywheel Econoline Super Duty(1996-1999) Flywheel EcoSport Flywheel Edge Flywheel Escape Flywheel Escort Flywheel Excursion Flywheel Expedition Flywheel Explorer Flywheel Explorer Sport Flywheel Explorer Sport Trac Flywheel F Super Duty Flywheel F-150 Flywheel F-250 Flywheel F-250 Super Duty Flywheel F-350 Flywheel F-350 Super Duty Flywheel F-450 Super Duty Flywheel F-550 Super Duty Flywheel F53 Flywheel F53 Stripped Chassis Flywheel F59 Flywheel Festiva Flywheel Fiesta Flywheel Five Hundred Flywheel Flex Flywheel Focus Flywheel Freestar Flywheel Freestyle Flywheel Fusion Flywheel GT Flywheel Maverick Flywheel Mustang Flywheel Police Interceptor Sedan Flywheel Police Interceptor Utility Flywheel Police Responder Hybrid Flywheel Probe Flywheel Ranger Flywheel SSV Plug-In Hybrid Flywheel Taurus Flywheel Taurus X Flywheel Tempo Flywheel Thunderbird Flywheel Transit Connect Flywheel Transit Flywheel Windstar Flywheel