My Garage
My Account
Cart
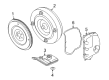
Genuine Ford Fusion Flywheel
Clutch Flywheel- Select Vehicle by Model
- Select Vehicle by VIN
Select Vehicle by Model
orMake
Model
Year
Select Vehicle by VIN
For the most accurate results, select vehicle by your VIN (Vehicle Identification Number).
18 Flywheels found


Ford Fusion FLYWHEEL ASY
Part Number: CV6Z-6375-E$77.86 MSRP: $113.83You Save: $35.97 (32%)Ships in 1-2 Business Days


Ford Fusion FLYWHEEL ASY
Part Number: 1S7Z-6375-D$72.27 MSRP: $109.50You Save: $37.23 (34%)Ships in 1 Business Day


Ford Fusion Flywheel Assembly
Part Number: CV6Z-6375-C$77.86 MSRP: $113.83You Save: $35.97 (32%)Ships in 1-3 Business Days


Ford Fusion Flywheel Assembly
Part Number: 1S7Z-6375-C$72.27 MSRP: $109.50You Save: $37.23 (34%)Ships in 1-3 Business Days


Ford Fusion Flywheel And Ring Gear Assembly
Part Number: 5M6Z-6375-AA$96.59 MSRP: $134.18You Save: $37.59 (29%)Ships in 1-2 Business Days

Ford Fusion Flywheel Assembly
Part Number: 1S7Z-6375-B$72.27 MSRP: $109.50You Save: $37.23 (34%)Ships in 1 Business Day

Ford Fusion Flywheel Assembly
Part Number: 1L8Z-6375-AA$72.27 MSRP: $109.50You Save: $37.23 (34%)Ships in 1 Business Day
Ford Fusion Flywheel And Ring Gear Assembly
Part Number: DG9Z-6375-B$204.06 MSRP: $298.33You Save: $94.27 (32%)Ships in 1-3 Business DaysFord Fusion Flywheel And Ring Gear Assembly
Part Number: DG9Z-6375-A$204.06 MSRP: $298.33You Save: $94.27 (32%)Ships in 1-3 Business Days
Ford Fusion Flywheel Assembly
Part Number: FG9Z-6375-A$57.80 MSRP: $84.50You Save: $26.70 (32%)Ships in 1-3 Business Days


Ford Fusion Flywheel
The Ford Fusion Flywheel helps soften engine pulses and allows for smooth starts and clutching. This Flywheel, which connects to the crankshaft, absorbs energy whose inertia fills the gap due to combustion so the sedan delivers power evenly. The starter motor meshes with a toothy ring gear to turn the crank to ignite, while the face acts as the gripping surface for the clutch disc and base for the pressure plate. Over the model years, many Fusion editions have switched between two styles, the solid and the quieter Dual Mass Flywheel. The Dual Mass version uses separate masses cushioned by springs to tame vibration. If a solid Flywheel develops heat spots or grooves, it can often be resurfaced. In contrast, the Dual Mass Flywheel will usually have to be replaced once its damper or contact face wears. If scoring or cracks worsen, the Flywheel can become unbalanced and a new one restores factory balance. To guarantee smooth and reliable operation of every Fusion every time, ring gear damage or excessive warpage will likewise call for a replacement of the component if you want crisp Ford shifting and reliable Ford starting.
We provide a wide range of Ford Fusion Flywheel at the optimal prices. If you need Ford Fusion Flywheel, you can shop with confidence on our website. All our OEM parts come with a manufacturer's warranty and are delivered to your doorstep with a fast delivery service.
Ford Fusion Flywheel Parts Questions & Experts Answers
- Q: How to remove, inspect, and install the flywheel on Ford Fusion?A:To remove the transaxle, first check components like oil seals and replace them if necessary. For manual transaxle models, remove the clutch and inspect or replace the clutch components and release bearing. Make alignment marks on the flywheel and crankshaft to simplify replacement, as the bolt holes are slightly offset. Hold the flywheel/driveplate stationary while unscrewing the bolts; use a transaxle mounting bolt and a wide-bladed screwdriver to prevent turning. Remove each bolt in turn, ensuring new replacements are obtained for reassembly due to the severe stresses they endure. Carefully remove the heavy flywheel, noting that the driveplate for automatic transaxles is lighter. Clean the flywheel to eliminate grease and oil, inspecting for cracks, rivet grooves, burned areas, and score marks, with light scoring removable using emery cloth. Check for cracked and broken ring gear teeth and verify warpage with a straight-edge. Clean the mating surfaces of the flywheel and crankshaft, replacing the oil seal if leaking, especially in high-mileage engines. While the flywheel is off, clean its inboard face and the crankshaft speed/position sensor. For installation, ensure the engine/transaxle adapter plate is in place, align the flywheel/driveplate on the crankshaft using the marks made during removal, and install new bolts, tightening them by hand. Lock the flywheel using the disassembly method, tightening the bolts in a diagonal sequence and gradually increasing to the final torque in two or three stages. The remainder of reassembly follows the reverse of the removal process.
