My Garage
My Account
Cart
Genuine Ford Fusion Shift Cable
Transmission Shift Cable- Select Vehicle by Model
- Select Vehicle by VIN
Select Vehicle by Model
orMake
Model
Year
Select Vehicle by VIN
For the most accurate results, select vehicle by your VIN (Vehicle Identification Number).
27 Shift Cables found


Ford Fusion Selector Lever Control Cable Assembly
Part Number: DG9Z-7E395-M$94.30 MSRP: $147.58You Save: $53.28 (37%)Ships in 1-2 Business Days

Ford Fusion Selector Lever Control Cable Assembly
Part Number: DG9Z-7E395-W$80.70 MSRP: $105.00You Save: $24.30 (24%)


Ford Fusion Selector Lever Control Cable Assembly
Part Number: DG9Z-7E395-L$40.12 MSRP: $58.65You Save: $18.53 (32%)Ships in 1-2 Business Days

Ford Fusion Selector Lever Control Cable Assembly
Part Number: 6E5Z-7E395-D$111.49 MSRP: $163.00You Save: $51.51 (32%)Ships in 1-3 Business Days

Ford Fusion Shift Control Cable
Part Number: 9E5Z-7E395-C$35.03 MSRP: $50.33You Save: $15.30 (31%)Ships in 1-2 Business Days

Ford Fusion Selector Lever Control Cable Assembly
Part Number: AE5Z-7E395-G$91.54 MSRP: $133.83You Save: $42.29 (32%)

Ford Fusion Shift Control Cable
Part Number: AE5Z-7E395-F$87.63 MSRP: $135.48You Save: $47.85 (36%)Ships in 1-3 Business Days

Ford Fusion Selector Lever Control Cable Assembly
Part Number: 6E5Z-7E395-EA$91.54 MSRP: $133.83You Save: $42.29 (32%)
Ford Fusion Selector Lever Control Cable Assembly
Part Number: 6E5Z-7E395-B$111.49 MSRP: $163.00You Save: $51.51 (32%)Ships in 1-3 Business Days
Ford Fusion Selector Lever Control Cable Assembly
Part Number: DG9Z-7E395-AU$80.70 MSRP: $105.00You Save: $24.30 (24%)Ships in 1-2 Business Days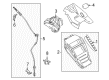
Ford Fusion Selector Lever Control Cable Assembly
Part Number: DP5Z-7E395-H$98.04 MSRP: $143.33You Save: $45.29 (32%)

Ford Fusion Selector Lever Control Cable Assembly
Part Number: DG9Z-7E395-AW$100.91 MSRP: $146.33You Save: $45.42 (32%)
Ford Fusion Selector Lever Control Cable Assembly
Part Number: DP5Z-7E395-E$98.04 MSRP: $143.33You Save: $45.29 (32%)Ships in 1-3 Business DaysFord Fusion Selector Lever Control Cable Assembly
Part Number: DG9Z-7E395-E$40.12 MSRP: $58.65You Save: $18.53 (32%)Ships in 1-2 Business Days
Ford Fusion Selector Lever Control Cable Assembly
Part Number: DG9Z-7E395-P$96.58 MSRP: $146.33You Save: $49.75 (34%)Ships in 1-3 Business DaysFord Fusion Selector Lever Control Cable Assembly
Part Number: DG9Z-7E395-AT$94.51 MSRP: $138.17You Save: $43.66 (32%)Ships in 1-3 Business DaysFord Fusion Selector Lever Control Cable Assembly
Part Number: DG9Z-7E395-Y$19.97 MSRP: $138.17You Save: $118.20 (86%)Ships in 1-2 Business DaysFord Fusion Selector Lever Control Cable Assembly
Part Number: AE5Z-7E395-E$91.54 MSRP: $133.83You Save: $42.29 (32%)Ships in 1-3 Business DaysFord Fusion Selector Lever Control Cable Assembly
Part Number: AE5Z-7E395-B$87.63 MSRP: $135.48You Save: $47.85 (36%)Ships in 1-3 Business Days

Ford Fusion Shift Control Cable
Part Number: 9E5Z-7E395-AA$123.12 MSRP: $180.00You Save: $56.88 (32%)
| Page 1 of 2 |Next >
1-20 of 27 Results
Ford Fusion Shift Cable
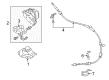
The Shift Cable in Ford Fusion enables the driver to move the gear selector with minimum effort while commanding the transmission to the right gear accurately. The first Ford Fusion models relied on a mechanical linkage rod setup. The automatic versions soon got a Shift Cable running from the console-mounted lever to the transmission manual arm, allowing for a smoother action and freeing up cabin space. As the Fusion family took on front-wheel drive setups, the engineers changed the manual versions to a dual Shift Cable arrangement that navigates under the floorpan. Thus, lever movement is transferred to the transaxle shift forks without the slack that was typical of old rods. In subsequent generations, these assemblages carried a single Shift Cable, using thoughtful electronic interlocks to block release from Park unless the brake pedal is pressed and the ignition is on. That is exactly what modern Ford owners prefer. Every Fusion employs at least one robust Shift Cable to prevent stretching, bending, or breakage while preserving the familiar PRNDL pattern. This is different from more modern Shift-by-Wire approaches that eliminate physical connections.
We provide a wide range of Ford Fusion Shift Cable at the optimal prices. If you need Ford Fusion Shift Cable, you can shop with confidence on our website. All our OEM parts come with a manufacturer's warranty and are delivered to your doorstep with a fast delivery service.
Ford Fusion Shift Cable Parts Questions & Experts Answers
- Q: Is replacing the Shift Cable in the Manual transaxle on Ford Fusion difficult for the home mechanic?A:This procedure is challenging for home mechanics as it involves removing the instrument panel and the HVAC module to replace the cables. First, have the air conditioning refrigerant discharged at a dealer or air conditioning shop. If the vehicle has been driven recently, allow several hours for the engine to cool down before starting. Disconnect both battery cables and wait at least two minutes. Next, remove the battery and battery tray, followed by the center console and the heater core/evaporator core housing. Remove the shift lever and disconnect the shift cables from it, then take out the clips securing the shift linkage cables to the shift lever arms at the transaxle, ensuring not to damage the spring clips. Release the cable housing ends at the transaxle from the support bracket, being careful with the plastic flanges. Disconnect and remove the airbag module in front of the console area, then remove the insulation pad and release the clips securing the airbag module harness. Remove the fasteners securing the transmission cable plate/grommet where the cable passes through the floor, and pull the shift cables through from the inside, noting that the grommet is part of the cable assembly. Installation is the reverse of removal, ensuring to adjust the new cable afterward. Refill and bleed the cooling system and have the refrigerant recharged. For adjustment, set the parking brake, remove the gearshift knob and center console trim panel, slide the safety lock away from the shifter ball stud, and the cable lock away from the shift cable end fitting. Place the shift lever in the center position, ensuring both the lever and transaxle are in Neutral, then push the cable lock onto the cable and slide the safety lock over the primary shift cable lock before reinstalling the center console trim panel and gearshift knob.


