
Why choose FordPartsGiant
- Devoted Service
At FordPartsGiant.com, we strive to make customer satisfaction our #1 goal by providing dedicated customer service. Our core values of success continue to demonstrate our loyalty by building dedicated relationships with all of our current and future customers. We are always ready to assist you with the slightest detail about your vehicle's parts and accessories.
- Reasonable Prices
We are the best online source for discounted prices on factory auto parts and accessories. Not everyone has the money to buy their vehicle quality parts, here at FordPartsGiant.com we make it economical to buy the best parts without sacrificing the quality or hurting your wallet.
- Swift Delivery
FordPartsGiant.com has centrally located distribution centers all across the United States. This gives you quick access to our discounted Mercury Capri parts when you need them. We offer our customers the convenience of having parts delivered straight to their front door. We are committed to having your vehicle up and running in just a couple of days.
Popular Genuine Mercury Capri Parts
- Engine Parts View More >
- Lamps & Wiring Parts View More >
- Wheels & Brakes Parts View More >
- Fuel System & Manifolds Parts View More >
- Speedometer, Bumpers, Mirrors & Wipers Parts View More >
- Automatic Transmission Parts View More >
- Radiator & Grill Parts View More >
- Front Suspension & Steering Parts View More >
- Frame, Exhaust System, Spring & Stabilizer Parts View More >
- Fenders & Hood Parts View More >
Shop Genuine Mercury Capri Parts with FordPartsGiant.com
The Mercury Capri, a product of the Lincoln-Mercury division of Ford, was a versatile model produced from 1970 to 1994, with a brief halt in production from 1987 to 1990. Over three generations, the Capri morphed from a sport compact car to a pony car and finally, a roadster. The Capri was initially marketed as an independent nameplate until its fusion with the Mercury production line in 1979. The first generation offered a 2-door coupe or hatchback body style, with assembly taking place in Cologne, Germany. The vehicle underwent modifications for the American market, including the replacement of rectangular headlights with four circular ones, the addition of grille-mounted turn signals, side marker lights, and Rostyle wheels. The Capri was initially powered by a 1.6L Kent crossflow inline four-cylinder engine, which was upgraded to a 2.0L OHC inline 4-cylinder engine in 1971. By 1972, dealers had the option to choose a 2.6L Cologne V6, marking one of Ford's first V6 engine offerings in America. Compliance with 5-mph bumper standards saw the addition of a reinforced front bumper with a steel tube and shock absorbers. The production of the Capri was temporarily halted in 1987, with the model's return in 1991 as a 2-door roadster, reminiscent of its first-generation design but updated to meet passive restraint requirements, including a driver-side airbag, body-color bumpers, and non-metric gauges on the dashboard.
The Mercury Capri, spanning several models, has a few recurrent issues that users need to be aware of. First and foremost, the engine squealing problem is quite pervasive, especially in the 1983 2.3 turbo model. This issue is characterized by a high-pitched squeal intensifying with engine rpm and becoming especially pronounced when the engine is at its operating temperature. A myriad of potential causes has been identified: tightening of a valve with heat, problematic push rod guide plates, the rear cam plug being deeply inserted during rebuilding, insufficient lubrication, heat-caused tolerance closures, or issues related to the crankshaft. The latter includes concerns about the front pulley, flywheel, flexplate, thrust bearing clearance, torque converter, and even the flywheel teeth. A pragmatic approach to diagnosing this is to remove the accessory belt after the engine has warmed up to check if the squeal remains. The 1983 2.3 turbo version also highlights an engine squeal issue, with investigations pointing towards issues like dust accumulation from the belt on the engine or the power steering pulley's movement. Additionally, painted ribbed pulley parts and how the belt is oriented upon reinstallation might be exacerbating the problem. Regular engine tune-ups are crucial, involving checks on engine components, spark plug replacements, filter changes, and fuel system cleanings. Any anomalies like unusual engine noises or an illuminated engine light should be addressed immediately, with recommendations to replace spark plugs every 30,000 miles, monitor fluid leaks, and maintain consistent driving habits.The 1991-94 Mercury Capri models, particularly the 1991 edition, often face challenges with the alternator and its accompanying belt. Symptoms of an ailing alternator encompass fluctuating voltage readings, unanticipated battery drainage, peculiar metallic sounds, or the belt's struggles due to internal issues. The alternator's replacement involves a systematic process of battery disconnection, accessing the alternator via the IAC, and then reinstalling the new one by connecting its cables first. The 1991 model also has a tensioner to assist in the removal and installation of belts. Yet, a recurring issue is the frequent breakage of the alternator belt. Multiple replacements have been reported across different brands. Misalignment of the pulleys, possibly due to a failing water pump or a deteriorating alternator mount, might be the root cause, leading to uneven belt wear.
Every OEM component is subjected to rigorous quality checks, assuring its safety, resilience, and performance that aligns with your original parts. Looking for affordable OEM Mercury Capri parts, including Air Conditioner, Radios & Shock Absorbers, Body Sides & Quarter? Explore our comprehensive catalogue of genuine Mercury Capri parts, such as Rear Axle & Drive Shaft, Body Front & Floor. All our parts, like Roof, Back, Luggage Compartment & Tailgate, Manual Transmission are covered by the manufacturer's warranty. Plus, our straightforward return policy and speedy delivery service ensure an unparalleled shopping experience. We look forward to your visit!
Mercury Capri Parts Questions & Answers
- Q: How to remove and install the blower motor and assembly in Mercury Capri with and without air conditioning for 1979 through 1984 Mercury Capri?A: For models without AC, remove the right register duct, ventilator control assembly, glovebox liner, and ventilator grille. Detach the ventilator assembly and remove the blower wheel and motor. To install, reverse these steps. For models with AC, remove the glovebox liner, disconnect the vacuum hose, remove the bolt securing the instrument panel, and the trim panel. Remove screws and nuts securing the blower housing and air inlet duct assembly. Disconnect the blower motor wiring and remove the mounting plate. If removed, reinstall the blower wheel, secure it, and install the blower motor. Tape the wiring to the air inlet duct, place the assembly back, connect the vacuum hose, then install the glovebox liner and secure the panels.
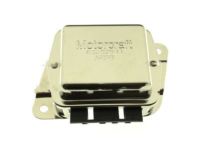
- Q: How do you replace the voltage regulator of lAR-type alternator on Mercury Capri?A: To begin with, you have to remove the alternator and place it on a clean workbench. The voltage regulator/brush holder assembly can be detached by removing the four mounting screws. First, separate the voltage regulator and rubber plugs. After that, separate the brush leads from the holder by removing brush lead retaining screws and nuts. Remember, these screws require a special screwdriver because they have Torx heads in them. To avoid complex situations during the reinstallation of an entirely new voltage regulator, remove both brushes cautiously while avoiding loss of springs. Assuming you are fitting new brushes, place them into old regulator's brush holder then for new voltage regulators insert older brushes into the new regulators' brush holders. Ensure that springs are compressed and that brushes are installed properly in recesses on the brush holder. When fitting the regulator wire use a short wire like a paper clip to hold back brushes in a retracted position.
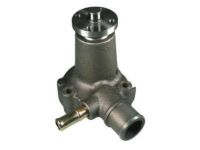
- Q: How to replace a water pump on Mercury Capri?A: A faulty water pump can cause engine overheating. To test the pump, squeeze the upper radiator hose while the engine is running. A working pump will cause a pressure surge. Check for leaks from the pump's weep holes, using a flashlight if necessary. Listen for a howling sound indicating shaft bearing failure, and check for shaft wear by rocking the pulley. Don't confuse drivebelt slippage, which causes a squealing sound, with pump failure. To replace the pump, disconnect the battery, drain the cooling system, remove the fan, shroud, drivebelts, pulley, hoses, brackets, and on a 2.3L engine, the outer timing belt cover. Detach the pump, clean the bolt threads and holes, and compare the new pump to the old one. Clean the engine and pump mating surfaces, apply RTV gasket sealant, and position the new gasket. Install the new pump, being careful not to overtighten the bolts. Reinstall all removed parts, refill the cooling system, check the drivebelt tension, and run the engine to check for leaks.


