Make sure this part fits

Ford E2DZ-7052-A Oil Seal Assembly

1980-1993 Ford E2DZ7052A

Customer Questions & Expert Answers (12)
E2DZ-7052-A Ford Oil Seal Assembly Product Photo 1 of 1
  • Part Description
    Seal Assy - Oil
  • Base No.
    7052
  • Manufacturer
    Ford
Make sure this part fits
$15.39 MSRP: $22.50
You Save: $7.11 (32%)
Ships in 1-3 Business Days
1
ADD TO CART
  • Related Parts
  • Product Specifications
  • Vehicle Fitment
  • Customer Questions & Expert Answers
  • Product Specifications

    BrandGenuine Ford
    Base No.7052
    Manufacturer Part NumberE2DZ-7052-A, E2DZ7052A
    Part DescriptionSeal Assy - Oil
    Other NamesExtension Housing Seal
    Item Dimensions7.1 x 5.3 x 5.1 inches
    Item Weight0.70 Pounds
    ConditionNew
    Fitment TypeDirect Replacement
    ManufacturerFord
    SKUE2DZ-7052-A
    WarrantyThis genuine Ford part is guaranteed by Ford's factory warranty.
    Shipping & ReturnShipping Policy Return Policy
    Warning: California's Proposition 65
  • Vehicle Fitment

    Year Make Model Engine Important vehicle option details
    1990-1993 Ford Bronco6 Cyl 4.9L, 8 Cyl 5.0L, 8 Cyl 5.8L3AT C6, 4AT AOD, 4AT E4OD, 4MT, 5MT
    1992 Ford Crown Victoria8 Cyl 4.6L4AT AOD, 4AT AOD-E
    1990-1993 Ford E-1506 Cyl 4.9L, 8 Cyl 5.0L, 8 Cyl 5.8L3AT C6, 4AT AOD, 4AT E4OD
    1990-1993 Ford E-2506 Cyl 4.9L, 8 Cyl 5.0L, 8 Cyl 5.8L, 8 Cyl 7.3L Diesel, 8 Cyl 7.5L3AT C6, 4AT AOD, 4AT E4OD
    1990-1993 Ford E-350/E-350 Super Duty6 Cyl 4.9L, 8 Cyl 5.8L, 8 Cyl 7.3L Diesel, 8 Cyl 7.5L3AT C6, 4AT AOD, 4AT E4OD
    1990-1993 Ford F-1506 Cyl 3.8L, 6 Cyl 4.9L, 8 Cyl 5.0L, 8 Cyl 5.8L3AT C6, 4AT AOD, 4AT E4OD, 4MT, 5MT
    1990-1993 Ford F-2506 Cyl 4.9L, 8 Cyl 5.0L, 8 Cyl 5.8L, 8 Cyl 7.3L, 8 Cyl 7.5L3AT C6, 4AT AOD, 4AT E4OD, 4MT, 5MT
    1990-1993 Ford F-3506 Cyl 4.9L, 8 Cyl 5.0L, 8 Cyl 5.8L, 8 Cyl 7.3L, 8 Cyl 7.5L3AT C6, 4AT AOD, 4AT E4OD, 4MT, 5MT
    1980-1983 Ford Fairmont4 Cyl 2.3L, 6 Cyl 3.3L, 8 Cyl 4.2L, 8 Cyl 5.0L3AT C3, 3AT C4, 3AT C5, 4MT
    1980-1982 Ford Granada4 Cyl 2.3L, 6 Cyl 3.3L, 6 Cyl 3.8L, 6 Cyl 4.1L, 8 Cyl 4.2L, 8 Cyl 5.0L3AT C3, 3AT C4, 4MT
    View More
  • Customer Questions & Expert Answers

    Q:
    I would like to know is this part gonna fit with my car Posted by FordPartsGiant Specialist
    A:
    You can Select Your Vehicle to check if E2DZ-7052-A fits your vehicle.
    Posted by FordPartsGiant Specialist
    Q:
    How to remove the front transfer case seal for the output shaft on a Ford Bronco? Posted by Customer
    A:
    To remove the oil seal, start by raising the vehicle and supporting it securely on jackstands. If the filler plug is higher than the lowest part of the seal, drain the transaxle to prevent fluid loss. Mark the front driveshaft to transfer case yoke orientation, remove the driveshaft, and swing it out of the way. Hold the yoke with a suitable tool and remove the yoke retaining nut. Remove the front output shaft yoke nut, washer, and rubber seal if applicable. Take out the yoke and slinger from the transfer case output shaft. Remove the seal using a slide-hammer and adapter or by carefully prying it out with a blunt screwdriver. Inspect the oil seal contact surface on the case for any damage and clean it. To replace the seal, apply multi-purpose grease and position it squarely into the case bore with the markings facing outwards. Drive the seal into the bore using an appropriately sized seal driver or equivalent tool. Clean and lightly lubricate the yoke splines, then slip the slinger and yoke over the output shaft and past the new seal until it bottoms. Coat the face of the yoke retaining nut with RTV sealant and apply thread locking compound to the threads. Install the rubber seal, washer, and yoke retaining nut onto the output shaft, tightening it to the specified torque. Install the front driveshaft, refill the transfer case lubricant, and lower the vehicle. If necessary, shift out of 4WD mode before returning the vehicle to normal service.
    Posted by FordPartsGiant Specialist
    Q:
    How to diagnose and replace the Transfer Case Seal on a Ford Thunderbird? Posted by Customer
    A:
    Oil leaks are due to worn of extension housing oil seal and bushing or the speedometer drive gear oil seal and O-ring. The general rule of thumb for these seals is that the repair is straightforward; in most cases, the seals can be changed without having to pull the transmission from the car. The extension housing oil seal is located at the rear of the transmission at the driveshaft connection. If leakage is suspected the vehicle must be raised off of the ground on jackstands securely. A leaking seal will cause transmission lubricant to be present on the front on the driveshaft and dripping at the rear of the transmission. In order to remove the oil seal one has to use the screwdriver or pry bar while being as careful as possible to avoid damaging the splines of the transmission output shaft. If removal is challenging, a further set of special oil seal removal tool might be needed. When fitting the new oil seal use a large pipe or deep socket as a drift to ensure that the oil seal is properly aligned and married to the bore. Before fitting the driveshaft back in, a thin grade of grease should be applied on the splines of the transmission output shaft and the outer diameter of the driveshaft sleeve yoke without putting any pressure on the new seal's lip. The speedometer cable with the driven gear housing will be situated on the side of the extension housing; examine for signs of transmission oil around the cable housing for signs of leakage of the seal and O-ring. Remove speedometer cable connector if available, and with a hook pry out the seal. Last, place a new O-ring in the driven gear housing then put back the driven gear housing with the cable assembly to the extension housing.
    Posted by FordPartsGiant Specialist
    Q:
    How to replace Transfer Case Seal on Lincoln Continental? Posted by Customer
    A:
    Oil leaks can occur due to wear of the extension housing oil seal and bushing, as well as the speedometer drive gear oil seal and O-ring. These seals can be easily replaced without removing the transmission from the vehicle. The extension housing oil seal is located at the rear of the transmission where the driveshaft is attached. If leakage is suspected, the vehicle should be raised and supported securely on jackstands. The oil seal can be pried out of the transmission using a screwdriver or pry bar, or a special removal tool may be required. The new oil seal should be installed using a large socket or pipe as a drift. The splines of the transmission output shaft and the outside of the driveshaft sleeve yoke should be lubricated with lightweight grease before installing the driveshaft. The speedometer driven gear housing or vehicle speed sensor is located on the side of the extension housing. To remove it, the speedometer cable or electrical connector should be disconnected, and the hold-down bolt should be removed. The seal and O-ring can be checked for leaks by looking for transmission oil around the cable housing. The vacuum modulator O-ring can be replaced by removing the vacuum line, hold-down bolt, and modulator. The old O-ring should be removed and the new one should be coated with clean ATF before installation. The manual lever also has a seal, but it is recommended to take the vehicle to a qualified repair shop for replacement. To replace the manual lever seal, the shift linkage should be disconnected and the old seal should be pried out using a small hooked tool. The new seal should be driven into place using a deep socket and hammer. The shift linkage should be reconnected and adjusted before refilling the transmission. Finally, the vehicle can be lowered by removing the jackstands.
    Posted by FordPartsGiant Specialist
    Q:
    How to replace Transfer Case Seal on Lincoln Mark VII? Posted by Customer
    A:
    Oil leaks can occur due to wear of the extension housing oil seal and bushing, as well as the speedometer drive gear oil seal and O-ring. These seals can be easily replaced without removing the transmission from the vehicle. The extension housing oil seal is located at the rear of the transmission where the driveshaft is attached. If leakage is suspected, the vehicle should be raised and supported securely on jackstands. The oil seal can be pried out of the transmission using a screwdriver or pry bar, or a special removal tool may be required. The new oil seal should be installed using a large socket or pipe as a drift. The splines of the transmission output shaft and the outside of the driveshaft sleeve yoke should be lubricated with lightweight grease before installing the driveshaft. The speedometer driven gear housing or vehicle speed sensor is located on the side of the extension housing. To remove it, the speedometer cable or electrical connector should be disconnected, and the hold-down bolt should be removed. The seal and O-ring can be checked for leaks by looking for transmission oil around the cable housing. The vacuum modulator O-ring can be replaced by removing the vacuum line, hold-down bolt, and modulator. The old O-ring should be removed and the new one should be coated with clean ATF before installation. The manual lever also has a seal, but it is recommended to take the vehicle to a qualified repair shop for replacement. To replace the manual lever seal, the shift linkage should be disconnected and the old seal should be pried out using a small hooked tool. The new seal should be driven into place using a deep socket and hammer. The shift linkage should be reconnected and adjusted before refilling the transmission. Finally, the vehicle can be lowered by removing the jackstands.
    Posted by FordPartsGiant Specialist
    Q:
    How to replace Transfer Case Seal on Lincoln Town Car? Posted by Customer
    A:
    Oil leaks can occur due to wear of the extension housing oil seal and bushing, as well as the speedometer drive gear oil seal and O-ring. These seals can be easily replaced without removing the transmission from the vehicle. The extension housing oil seal is located at the rear of the transmission where the driveshaft is attached. If leakage is suspected, the vehicle should be raised and supported securely on jackstands. The oil seal can be pried out of the transmission using a screwdriver or pry bar, or a special removal tool may be required. The new oil seal should be installed using a large socket or pipe as a drift. The splines of the transmission output shaft and the outside of the driveshaft sleeve yoke should be lubricated with lightweight grease before installing the driveshaft. The speedometer driven gear housing or vehicle speed sensor is located on the side of the extension housing. To remove it, the speedometer cable or electrical connector should be disconnected, and the hold-down bolt should be removed. The seal and O-ring can be checked for leaks by looking for transmission oil around the cable housing. The vacuum modulator O-ring can be replaced by removing the vacuum line, hold-down bolt, and modulator. The old O-ring should be removed and the new one should be coated with clean ATF before installation. The manual lever also has a seal, but it is recommended to take the vehicle to a qualified repair shop for replacement. To replace the manual lever seal, the shift linkage should be disconnected and the old seal should be pried out using a small hooked tool. The new seal should be driven into place using a deep socket and hammer. The shift linkage should be reconnected and adjusted before refilling the transmission. Finally, the vehicle can be lowered by removing the jackstands.
    Posted by FordPartsGiant Specialist
    Q:
    How to replace the Transfer Case Seal in the extension housing on Mercury Capri? Posted by Customer
    A:
    Raise the vehicle and support it securely on jackstands. Remove the driveshaft. Use a seal removing tool to take out the oil seal from the end of the extension housing, or alternatively, a wide-bladed screwdriver or chisel can be employed to carefully tap around the flange of the oil seal and separate it from the transmission extension housing. Before installing the new seal, inspect the sealing surface of the universal joint yoke for scoring; if any scoring is found, replace the yoke. Check the counterbore of the housing for burrs and remove them with emery cloth or medium grit wet-or-dry sandpaper. Coat the outside diameter of the seal with RTV sealant. Install the new seal into the extension housing using a large socket or length of pipe of the proper diameter, or a blunt punch and hammer can also be used to tap the new seal into the bore. The remainder of the installation follows the reverse of the removal procedures.
    Posted by FordPartsGiant Specialist
    Q:
    How to diagnose and replace the Transfer Case Seal on a Mercury Cougar? Posted by Customer
    A:
    Oil leaks are due to worn of extension housing oil seal and bushing or the speedometer drive gear oil seal and O-ring. The general rule of thumb for these seals is that the repair is straightforward; in most cases, the seals can be changed without having to pull the transmission from the car. The extension housing oil seal is located at the rear of the transmission at the driveshaft connection. If leakage is suspected the vehicle must be raised off of the ground on jackstands securely. A leaking seal will cause transmission lubricant to be present on the front on the driveshaft and dripping at the rear of the transmission. In order to remove the oil seal one has to use the screwdriver or pry bar while being as careful as possible to avoid damaging the splines of the transmission output shaft. If removal is challenging, a further set of special oil seal removal tool might be needed. When fitting the new oil seal use a large pipe or deep socket as a drift to ensure that the oil seal is properly aligned and married to the bore. Before fitting the driveshaft back in, a thin grade of grease should be applied on the splines of the transmission output shaft and the outer diameter of the driveshaft sleeve yoke without putting any pressure on the new seal's lip. The speedometer cable with the driven gear housing will be situated on the side of the extension housing; examine for signs of transmission oil around the cable housing for signs of leakage of the seal and O-ring. Remove speedometer cable connector if available, and with a hook pry out the seal. Last, place a new O-ring in the driven gear housing then put back the driven gear housing with the cable assembly to the extension housing.
    Posted by FordPartsGiant Specialist
    Q:
    How should the 1993 Ford Bronco flanged seals be removed? Posted by Customer
    A:
    Using a seal remover and slide hammer or tap out an edge of the seal using a dull screwdriver.
    Posted by FordPartsGiant Specialist
    See expert answers on similar Transfer Case Seal
    Q:
    What common issue occurs due to wear of the extension housing oil seal and bushing for the 1992 Ford Crown Victoria? Posted by Customer
    A:
    Oil leaks frequently occur due to wear of the extension housing oil seal and bushing (if equipped), or the speedometer drive gear oil seal and O-ring.
    Posted by FordPartsGiant Specialist
    See expert answers on similar Transfer Case Seal
    Q:
    What are the steps for performing a fuel pressure test for the 1993 Ford F-250? Posted by Customer
    A:
    To perform a fuel pressure test, follow these steps. Obtain a fuel pressure gauge and adapter set (fuel line fittings). Relieve the fuel pressure. Lay a shop towel over any fuel connection to be disassembled to absorb the residual fuel. Check the fuel system's delivery by listening at the fuel filler opening while an assistant turns the ignition key to the On position (engine not running). If no sound is heard, check the fuel pump fuse, relay, and circuit. If the issue persists, there may be a problem in the fuel pump circuit or a faulty fuel pump. Check for battery voltage to the fuel pump relay connector and power relay connector. If present, have the relays tested at a qualified automotive repair shop. If no voltage is present, check the fuses and wiring circuit. For the operating pressure check, attach the fuel pressure gauge to the test port and activate the fuel pump without starting the engine. Note the fuel pressure and measure it again with the engine idling. Detach the vacuum hose from the fuel pressure regulator to check for an increase in pressure. If pressure is too high or low, inspect and replace components accordingly.
    Posted by FordPartsGiant Specialist
    See expert answers on similar Transfer Case Seal
    Q:
    What should you do if the oil seal cannot be removed with a screwdriver or pry bar for the 1988 Mercury Grand Marquis? Posted by Customer
    A:
    A special oil seal removal tool (available at auto parts stores) will be required.
    Posted by FordPartsGiant Specialist
    See expert answers on similar Transfer Case Seal
    If you have any questions about this product, please don't hesitate to ask us. We will be happy to help you!

Genuine Ford Part E2DZ-7052-A, the Right Choice

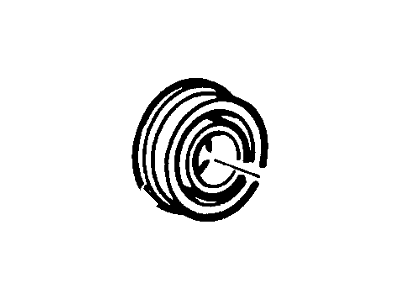
To ensure reliability, purchase part # E2DZ-7052-A Oil Seal Assembly. It is also called Transfer Case Seal, Automatic Transmission Seal. OEM parts are of high quality and known for their longevity. This is because they are built to the Ford standards which are relatively high and undergo rigorous quality control testing. This part fits specific Ford Bronco, E-350/E-350 Super Duty, F-150 models. It fits Lincoln Continental, Mark VI, Versailles. It also fits Mercury Bobcat, Capri, Cougar.

FordPartsGiant.com is a leading supplier of genuine components and accessories such as E2DZ7052A Oil Seal Assembly. Looking to purchase quality low-cost OEM Ford parts? You have just found the right place. For detailed Ford parts information, click here.

Why choose Ford Parts Giant

  • Dedicated Service

    Your complete satisfaction is our #1 goal

  • Lowest Prices

    Best deals on genuine OE parts from dealerships

  • Fast Delivery

    Orders are processed and delivered promptly