My Garage
My Account
Cart
Genuine Ford Bronco Transfer Case Seal
Transfer Case Output Shaft Seal- Select Vehicle by Model
- Select Vehicle by VIN
Select Vehicle by Model
orMake
Model
Year
Select Vehicle by VIN
For the most accurate results, select vehicle by your VIN (Vehicle Identification Number).
11 Transfer Case Seals found


Ford Bronco Oil Seal Assembly
Part Number: F6TZ-7052-A$18.24 MSRP: $26.67You Save: $8.43 (32%)Ships in 1-2 Business Days

Ford Bronco Oil Seal Assembly
Part Number: E2DZ-7052-A$15.80 MSRP: $22.50You Save: $6.70 (30%)Ships in 1-3 Business Days

Ford Bronco Seal
Part Number: 6L2Z-7B215-AA$18.24 MSRP: $26.67You Save: $8.43 (32%)Ships in 1-3 Business Days


Ford Bronco Oil Seal Assembly
Part Number: D5AZ-7052-A$18.24 MSRP: $26.67You Save: $8.43 (32%)Ships in 1-2 Business Days

Ford Bronco Seal
Part Number: E7TZ-7B215-B$18.24 MSRP: $26.67You Save: $8.43 (32%)Ships in 1 Business Day


Ford Bronco Dust Seal
Part Number: L1MZ-3C084-A$12.54 MSRP: $18.17You Save: $5.63 (31%)Ships in 1-3 Business Days


Ford Bronco Seal
Part Number: E3TZ-7B215-G$4.79 MSRP: $11.25You Save: $6.46 (58%)Ships in 1-3 Business Days
Ford Bronco Seal
Part Number: JB3Z-7B215-A$28.08 MSRP: $40.00You Save: $11.92 (30%)Ships in 1-3 Business Days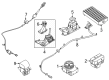
Ford Bronco Seal
Part Number: MB3Z-7B215-A$17.04 MSRP: $26.67You Save: $9.63 (37%)Ships in 1-2 Business DaysFord Bronco Seal
Part Number: E8TZ-7B215-A$21.65 MSRP: $30.83You Save: $9.18 (30%)Ships in 1 Business DayFord Bronco Seal
Part Number: MB3Z-7B215-B$1.59 MSRP: $2.27You Save: $0.68 (30%)Ships in 1-2 Business Days
Ford Bronco Transfer Case Seal
The Ford Bronco Transfer Case Seal is designed to seal lubricant within the transfer gears. This seal prevents puddles from forming under the case and gear damage caused by a loss of fluid. By creating a tight seal around the output shaft, a malfunctioning Transfer Case Seal will quickly let fluid escape. A good Transfer Case Seal prevents the leak, which would otherwise cause a drop in fluid level, a loss of cooling and lubrication, and ultimately overheating or gear slippage similar to a leak in transmission fluid. Ford offered the Bronco with a manual transmission early on and fitted newer models with automatics. Both the original classic Bronco and variants that are just out are using the same circular lip type Transfer Case Seal. Ford fans know that through the decades, the main design has not changed. It consists of a snug rubberized ring that rides the shaft and holds back the oil. To perform a replacement, the vehicle must be lifted to free the driveshaft. The faulty unit is pried out, the housing cleaned, and the new Transfer Case Seal pressed in evenly. Finally, with grease on both the seal and shaft, the truck can be reassembled. Any careful Ford owner can do this to keep a modern Bronco rolling leak free.
We provide a wide range of Ford Bronco Transfer Case Seal at the optimal prices. If you need Ford Bronco Transfer Case Seal, you can shop with confidence on our website. All our OEM parts come with a manufacturer's warranty and are delivered to your doorstep with a fast delivery service.
Ford Bronco Transfer Case Seal Parts Questions & Experts Answers
- Q: How to remove and replace the rear transfer case seal on a Ford Bronco?A:Raise the vehicle and support it securely on jackstands. Drain the transaxle fluid if the filler plug is higher than the lowest part of the seal to prevent fluid loss during seal removal. Mark the rear driveshaft to transfer case yoke orientation, remove the driveshaft from the yoke and swing it out of the way. Remove the driveshaft at the rear axle and slide the driveshaft out of the transfer case extension housing. Hold the rear yoke with a suitable tool and remove the center retaining nut. Remove the yoke nut and washer. Remove the yoke and slinger from the transfer case rear output shaft. Remove early model non-flanged seals with a slide-hammer and adapter or carefully pry the seal out of the case bore with a blunt screwdriver. Remove later model flanged seals using a seal remover and slide hammer or tap out an edge of the seal using a dull screwdriver. Inspect the oil seal contact surface on the case for scoring or burrs and remove them with emery cloth or fine sandpaper. Apply multi-purpose grease to the oil seal and position it squarely into the case bore. Drive the seal squarely into the bore using an appropriately sized seal driver, large socket, or pipe section. Clean the yoke splines and lubricate lightly with multi-purpose grease, then slip the slinger and yoke over the output shaft and carefully past the new seal until it bottoms. Coat the face of the yoke retaining nut with RTV sealant and apply thread locking compound to the threads. Install the rubber seal, washer, and yoke retaining nut onto the output shaft. Tighten the retaining nut to the torque. Install the rear driveshaft. Check and refill the transfer case lubricant as necessary. Remove the jackstands and lower the vehicle. Shift out of 4WD and unlock hubs before returning the vehicle to normal service.

Related Ford Bronco Parts


Browse by Year
2024 Transfer Case Seal 2023 Transfer Case Seal 2022 Transfer Case Seal 2021 Transfer Case Seal 1996 Transfer Case Seal 1995 Transfer Case Seal 1994 Transfer Case Seal 1993 Transfer Case Seal 1992 Transfer Case Seal 1991 Transfer Case Seal 1990 Transfer Case Seal 1989 Transfer Case Seal 1988 Transfer Case Seal 1987 Transfer Case Seal 1986 Transfer Case Seal 1985 Transfer Case Seal 1984 Transfer Case Seal 1983 Transfer Case Seal 1982 Transfer Case Seal 1981 Transfer Case Seal 1980 Transfer Case Seal