

My Garage
My Account
Cart
Genuine Ford Tie Rod End
Steering Rod End- Select Vehicle by Model
- Select Vehicle by VIN
Select Vehicle by Model
orMake
Model
Year
Select Vehicle by VIN
For the most accurate results, select vehicle by your VIN (Vehicle Identification Number).
245 Tie Rod Ends found


 Product Specifications
- Other Name: End - Spindle Rod Connecting; Inner Tie Rod, Outer Tie Rod
- Position: Passenger Side
- Replaces: 5C3Z-3A131-HA, 7C3Z-3A131-H, AC3Z-3A131-H, MEOE-124, MEOE-203, MEOE-220


Ford Outer Tie Rod
Part Number: 7L1Z-3A130-L$94.50 MSRP: $153.09You Save: $58.59 (39%)Ships in 1-2 Business DaysProduct Specifications- Other Name: End - Spindle Rod Connecting; Outer Tie Rod
- Position: Driver Side


Ford Outer Tie Rod
Part Number: BB5Z-3A130-B$69.14 MSRP: $112.00You Save: $42.86 (39%)Ships in 1 Business DayProduct Specifications- Other Name: End - Spindle Rod Connecting; Outer Tie Rod
- Position: Passenger Side/Driver Side
- Replaces: BB5Z-3A130-A, MEF-21

 Product Specifications
- Other Name: End - Spindle Rod Connecting; Outer Tie Rod
- Position: Passenger Side
- Replaces: BC3Z-3A131-G


Ford Outer Tie Rod
Part Number: 7L1Z-3A130-R$93.94 MSRP: $152.18You Save: $58.24 (39%)Ships in 1-2 Business DaysProduct Specifications- Other Name: End - Spindle Rod Connecting; Outer Tie Rod
- Position: Passenger Side


 Product Specifications
- Other Name: End Assembly - Drag Link Rod; Outer Tie Rod
- Manufacturer Note: RH - Outer
- Position: Passenger Side
- Replaced by: 8C2Z-3A131-F
- Replaces: 6C2Z-3A131-B


Ford Outer Tie Rod
Part Number: 7T4Z-3A130-B$55.78 MSRP: $90.36You Save: $34.58 (39%)Ships in 1-2 Business DaysProduct Specifications- Other Name: End - Spindle Rod Connecting; Outer Tie Rod
- Position: Driver Side


Ford Inner Tie Rod
Part Number: 8C2Z-3A130-D$112.48 MSRP: $156.55You Save: $44.07 (29%)Ships in 1 Business DayProduct Specifications- Other Name: End - Spindle Rod Connecting; Inner Tie Rod
- Manufacturer Note: LH - Inner
- Position: Driver Side
- Replaced by: 8C2Z-3A130-E
- Replaces: 7C2Z-3A130-A, MEOE-156

 Product Specifications
- Other Name: End Assembly - Drag Link Rod; Drag Link End, Outer Tie Rod, Tie Rod
- Position: Passenger Side
- Replaced by: PC3Z-3A131-J

Ford Spindle Rod Connecting End
Part Number: BC3Z-3A131-G$159.82 MSRP: $238.18You Save: $78.36 (33%)Ships in 1 Business DayProduct Specifications- Other Name: End - Spindle Rod Connecting
- Position: Passenger Side,Outer
- Replaced by: HC3Z-3A131-G


Ford Outer Tie Rod
Part Number: 7T4Z-3A130-A$54.66 MSRP: $88.55You Save: $33.89 (39%)Ships in 1-2 Business DaysProduct Specifications- Other Name: End - Spindle Rod Connecting; Outer Tie Rod
- Position: Passenger Side

 Product Specifications
- Other Name: Rod - Tie; Outer Tie Rod
- Manufacturer Note: LH - Outer
- Position: Driver Side


Ford Outer Tie Rod
Part Number: 6C2Z-3A131-C$46.87 MSRP: $76.91You Save: $30.04 (40%)Ships in 1 Business DayProduct Specifications- Other Name: End Assembly - Drag Link Rod; Outer Tie Rod
- Manufacturer Note: LH - Outer
- Position: Driver Side
- Replaces: F2UZ-3A131-A


Ford Outer Tie Rod
Part Number: 4L3Z-3A130-CA$69.70 MSRP: $112.91You Save: $43.21 (39%)Ships in 1-2 Business DaysProduct Specifications- Other Name: End - Spindle Rod Connecting; Outer Tie Rod


Ford Outer Tie Rod
Part Number: DG9Z-3A130-B$54.55 MSRP: $88.36You Save: $33.81 (39%)Ships in 1-2 Business DaysProduct Specifications- Other Name: End - Spindle Rod Connecting; Outer Tie Rod
- Manufacturer Note: LH - Outer
- Position: Driver Side
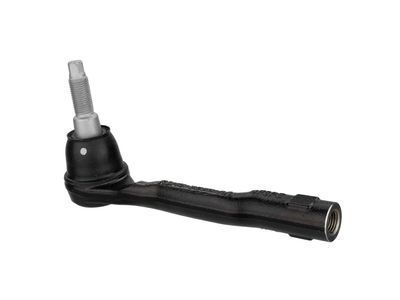
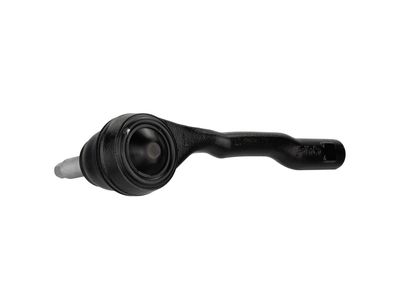
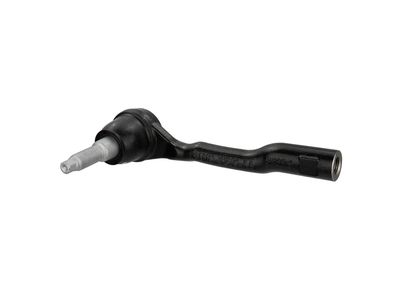


Ford Outer Tie Rod
Part Number: R1MZ-3A130-B$80.36 MSRP: $130.18You Save: $49.82 (39%)Ships in 1-2 Business DaysProduct Specifications- Other Name: End - Spindle Rod Connecting; Outer Tie Rod
- Position: Driver Side
- Replaces: L1MZ-3A130-C, MEF-539, L1MZ-3A130-E


Ford Outer Tie Rod
Part Number: 8C2Z-3A131-C$54.78 MSRP: $88.73You Save: $33.95 (39%)Ships in 1 Business DayProduct Specifications- Other Name: End Assembly - Drag Link Rod; Outer Tie Rod
- Manufacturer Note: LH - Outer
- Position: Driver Side
- Replaced by: 8C2Z-3A131-E
- Replaces: 7C2Z-3A131-C


Ford Spindle Rod Connecting End
Part Number: AC3Z-3A131-AA$73.74 MSRP: $119.45You Save: $45.71 (39%)Product Specifications- Other Name: End - Spindle Rod Connecting; Outer Tie Rod
- Position: Driver Side
- Replaced by: PU2Z-3V130-A


Ford Outer Tie Rod
Part Number: HL3Z-3A130-A$59.15 MSRP: $95.82You Save: $36.67 (39%)Ships in 1-3 Business DaysProduct Specifications- Other Name: End - Spindle Rod Connecting; Outer Tie Rod
- Manufacturer Note: RH/LH
- Position: Passenger Side/Driver Side


Ford Outer Tie Rod
Part Number: FR3Z-3A130-A$31.88 MSRP: $51.64You Save: $19.76 (39%)Ships in 1-2 Business DaysProduct Specifications- Other Name: End - Spindle Rod Connecting; Outer Tie Rod
- Manufacturer Note: RH/LH
- Position: Passenger Side/Driver Side
| Page 1 of 13 |Next >
1-20 of 245 Results
Ford Tie Rod End Parts Questions & Experts Answers
- Q:How to remove and install a tie rod end on the Ford Ranger?Posted by Nijat S.A:To remove the tie-rod end, first loosen the front wheel lug nuts on the side to be dismantled, then raise the front of the vehicle and support it securely on jackstands, blocking the rear wheels and setting the parking brake. Next, remove the front wheel, then take out the cotter pin and loosen the nut on the tie-rod end stud, discarding the cotter pin. Loosen the tie-rod end jam nut and back it off several turns while holding the tie-rod with locking pliers. Disconnect the tie-rod from the steering spindle using a Pitman arm puller. If installing a new tie-rod end, count and record the number of turns it takes to back the tie-rod end off the connecting rod; if reusing the same tie-rod end, apply a paint mark on the threads adjacent to it before unscrewing. For installation, if using the old tie-rod end, screw it into the connecting rod until adjacent to the paint mark; if using a new tie-rod end, screw it in the same number of turns noted during removal. Install the tie-rod onto the steering spindle, ensuring the front wheels and steering wheel are straight and the tie-rod stud is seated in the taper to prevent rotation while tightening the nut. Install a new nut on the stud and tighten it to the specified torque, then install a new cotter pin and bend the ends over completely. Securely tighten the jam nut, install the wheel and lug nuts, lower the vehicle, and tighten the lug nuts to the specified torque. Finally, have the front end alignment checked by a dealership service department or an alignment shop.Answered by Ford Parts Specialist Patrick / Jun 10, 2023

Related Ford Parts
 Ford Wheel Seal
 Ford Tie Rod
 Ford Steering Knuckle
 Ford Ball Joint
 Ford Pitman Arm
 Ford Rack And Pinion
 Ford Drag Link
 Ford Center Link
 Ford Rack and Pinion Boot
 Ford Power Steering Control Valve
 Ford Tie Rod Adjusting Sleeve
 Ford Electric Power Steering Motor
Browse by Model
Aerostar Tie Rod End Bronco II Tie Rod End Bronco Sport Tie Rod End Bronco Tie Rod End C-Max Tie Rod End Contour Tie Rod End Crown Victoria Tie Rod End E-150 Tie Rod End E-250 Tie Rod End E-350/E-350 Super Duty Tie Rod End E-450 Super Duty Tie Rod End E-550 Super Duty Tie Rod End E-Transit Tie Rod End Econoline Super Duty(1996-1999) Tie Rod End EcoSport Tie Rod End Edge Tie Rod End Escape Tie Rod End Escort Tie Rod End Excursion Tie Rod End EXP Tie Rod End Expedition Tie Rod End Explorer Sport Trac Tie Rod End Explorer Tie Rod End F Super Duty Tie Rod End F-150 Lightning Tie Rod End F-150 Tie Rod End F-250 Super Duty Tie Rod End F-250 Tie Rod End F-350 Super Duty Tie Rod End F-350 Tie Rod End F-450 Super Duty Tie Rod End F-550 Super Duty Tie Rod End F53 Tie Rod End Fiesta Tie Rod End Five Hundred Tie Rod End Flex Tie Rod End Focus Tie Rod End Freestar Tie Rod End Freestyle Tie Rod End Fusion Tie Rod End GT Tie Rod End Maverick Tie Rod End Mustang Tie Rod End Police Interceptor Sedan Tie Rod End Police Interceptor Utility Tie Rod End Police Responder Hybrid Tie Rod End Probe Tie Rod End Ranger Tie Rod End SSV Plug-In Hybrid Tie Rod End Taurus Tie Rod End Taurus X Tie Rod End Tempo Tie Rod End Thunderbird Tie Rod End Transit Connect Tie Rod End Transit Tie Rod End Windstar Tie Rod End