My Garage
My Account
Cart
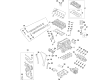
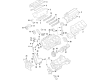
Genuine Ford Explorer Oil Pan
Oil Drain Pan- Select Vehicle by Model
- Select Vehicle by VIN
Select Vehicle by Model
orMake
Model
Year
Select Vehicle by VIN
For the most accurate results, select vehicle by your VIN (Vehicle Identification Number).
24 Oil Pans found


Ford Explorer Engine Oil Pan Assembly
Part Number: CJ5Z-6675-B$183.70 MSRP: $278.33You Save: $94.63 (34%)Ships in 1-2 Business Days

Ford Explorer Engine Oil Pan Assembly
Part Number: CJ5Z-6675-A$183.70 MSRP: $278.33You Save: $94.63 (34%)Ships in 1-2 Business Days


Ford Explorer Engine Oil Pan Assembly
Part Number: 1L2Z-6675-FA$45.67 MSRP: $65.62You Save: $19.95 (31%)Ships in 1-3 Business Days


Ford Explorer Engine Oil Pan Assembly
Part Number: 9L3Z-6675-B$115.32 MSRP: $171.60You Save: $56.28 (33%)Ships in 1-3 Business Days
Ford Explorer Frame Assembly
Part Number: 1L5Z-6675-AA$145.46 MSRP: $212.67You Save: $67.21 (32%)Ships in 1-3 Business Days


Ford Explorer Engine Oil Pan Assembly
Part Number: GB5Z-6675-A$141.36 MSRP: $206.67You Save: $65.31 (32%)Ships in 1-3 Business Days


Ford Explorer Engine Oil Pan Assembly
Part Number: DG1Z-6675-E$109.78 MSRP: $160.50You Save: $50.72 (32%)Ships in 1-2 Business Days


Ford Explorer Engine Oil Pan Assembly
Part Number: BG1Z-6675-D$157.32 MSRP: $230.00You Save: $72.68 (32%)Ships in 1-3 Business Days


Ford Explorer Engine Oil Pan Assembly
Part Number: AT4Z-6675-C$149.23 MSRP: $218.17You Save: $68.94 (32%)Ships in 1-3 Business Days
Ford Explorer Bulkhead Assembly - Front
Part Number: 1L5Z-6675-DA$83.84 MSRP: $129.62You Save: $45.78 (36%)Ships in 1-2 Business Days
Ford Explorer Engine Oil Pan Assembly
Part Number: F77Z-6675-AC$83.84 MSRP: $129.62You Save: $45.78 (36%)Ships in 1-2 Business Days
Ford Explorer Engine Oil Pan Assembly
Part Number: BB5Z-6675-A$183.70 MSRP: $278.33You Save: $94.63 (34%)Ships in 1-2 Business Days

Ford Explorer Engine Oil Pan Assembly
Part Number: L1MZ-6675-C$128.82 MSRP: $188.33You Save: $59.51 (32%)Ships in 1-2 Business Days
Ford Explorer Engine Oil Pan Assembly
Part Number: LB5Z-6675-C$191.52 MSRP: $280.00You Save: $88.48 (32%)Ships in 1-3 Business DaysFord Explorer Engine Oil Pan Assembly
Part Number: LB5Z-6675-D$139.19 MSRP: $203.50You Save: $64.31 (32%)Ships in 1-3 Business Days
Ford Explorer Engine Oil Pan Assembly
Part Number: L1MZ-6675-B$172.14 MSRP: $251.67You Save: $79.53 (32%)Ships in 1-3 Business Days
Ford Explorer Engine Oil Pan Assembly
Part Number: PB5Z-6675-A$155.04 MSRP: $226.67You Save: $71.63 (32%)Ships in 1-2 Business Days
Ford Explorer Engine Oil Pan Assembly
Part Number: BG1Z-6675-C$157.32 MSRP: $230.00You Save: $72.68 (32%)Ships in 1-3 Business DaysFord Explorer Engine Oil Pan Assembly
Part Number: PB5Z-6675-B$193.80 MSRP: $283.33You Save: $89.53 (32%)Ships in 1-2 Business Days

Ford Explorer Engine Oil Pan Assembly
Part Number: 5R3Z-6675-AA$45.67 MSRP: $65.62You Save: $19.95 (31%)
| Page 1 of 2 |Next >
1-20 of 24 Results
Ford Explorer Oil Pan
The Oil Pan is in the Ford Explorer that functions as a storage container for the engine oil which is vital in the maintainance and cooling of the many parts within the engine. In a wet sump oil system which is used in most Ford Explorer models the oil settles in the oil pan after it is drawn through a pickup tube by the oil pump and before it drains back into the Oil Pump Pan it circulates in the engine. It also allows for the right levels of oil needed by the engine to be retained at all times. Conventional Ford Explorer Oil Pans were manufactured from stamped steel but recent models integrate cast aluminum for the same purpose. As for the basic function, it has not changed, however, increased usage of the materials in question is a sign of further developments in engineering designed to enhance not only the efficacy but the durability of the final product.
We provide a wide range of Ford Explorer Oil Pan at the optimal prices. If you need Ford Explorer Oil Pan, you can shop with confidence on our website. All our OEM parts come with a manufacturer's warranty and are delivered to your doorstep with a fast delivery service.
Ford Explorer Oil Pan Parts Questions & Experts Answers
- Q: How to remove and install the oil pan and Oil Pan Baffle in 4.0L pushrod V6 engine on Ford Explorer?A:To remove the engine from the vehicle, first take out the oil pan fasteners and detach the oil pan from the engine, using a Tor bit for the bolts on each side of the crankshaft rear oil seal and a Tone driver for the two adjacent bolts. If needed, remove the baffle fasteners to take out the baffle, which is secured to the main bearing caps. For installation, be cautious as two oil pan bolts are attached to the transmission, requiring the correct selection of spacers to prevent damage or leaks. Clean all old gasket material from the oil pan and its mounting surface with a gasket scraper, and remove any residue with a solvent. Position the oil pan on the engine block, then use a straightedge across the transmission mounting surface and one of the oil pan-to-transmission bolt mounting pads to measure the gap with a feeler gauge. Repeat this for the other mounting pad and select spacers to compensate for the gap, available in three thicknesses. Apply a thin bead of ATV sealant to the outside edge of the gasket surface and around the crankshaft rear oil seal at the rear of the engine, as well as to the seams and corners of the front seal cover and engine block-to-timing-chain cover. Install a new oil pan gasket, secure the oil pan fasteners evenly to the specified torque, and ensure the long screw next to the crankshaft rear oil seal is properly positioned. Finally, install the spacers on the mounting pads before bolting the engine to the transmission.

Related Ford Explorer Parts
 Ford Explorer Oil Filter
 Ford Explorer Rod Bearing
 Ford Explorer Piston Ring Set
 Ford Explorer Crankshaft Thrust Washer Set
 Ford Explorer Drain Plug
 Ford Explorer Dipstick
 Ford Explorer Oil Cooler
 Ford Explorer Crankshaft Pulley
 Ford Explorer Oil Pressure Switch
 Ford Explorer Oil Pump
 Ford Explorer Drain Plug Washer
 Ford Explorer Dipstick Tube
Browse by Year
2025 Oil Pan 2024 Oil Pan 2023 Oil Pan 2022 Oil Pan 2021 Oil Pan 2020 Oil Pan 2019 Oil Pan 2018 Oil Pan 2017 Oil Pan 2016 Oil Pan 2015 Oil Pan 2014 Oil Pan 2013 Oil Pan 2012 Oil Pan 2011 Oil Pan 2010 Oil Pan 2009 Oil Pan 2008 Oil Pan 2007 Oil Pan 2006 Oil Pan 2005 Oil Pan 2004 Oil Pan 2003 Oil Pan 2002 Oil Pan 2001 Oil Pan 2000 Oil Pan 1999 Oil Pan 1998 Oil Pan 1997 Oil Pan 1996 Oil Pan 1995 Oil Pan 1994 Oil Pan