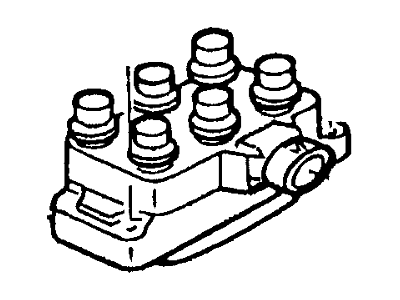
Make sure this part fits your vehicle

Mercury F7PZ-12029-AA Coil Assembly - Ignition

1986-1995 Mercury F7PZ12029AA

Ford F7PZ-12029-AA Coil Assembly - Ignition
  • Part Description
    Coil Assy - Ignition
  • Base No.
    12029
  • Replaces
    F5ZZ-12029-A, F5FZ-12029-A, F32Z-12029-A
  • Manufacturer
    Ford
Customer Questions & Answers
$40.81 MSRP: $65.09
You Save: $24.28 (38%)
1
ADD TO CART
Ships in 1-2 Business Days
  • Product Specifications

    BrandGenuine Mercury
    Base No.12029
    Manufacturer Part NumberF7PZ-12029-AA, F7PZ12029AA
    Part DescriptionCoil Assy - Ignition
    Other NamesCoil, Ignition Coil
    Item Dimensions5.4 x 3.4 x 3.3 inches
    Item Weight2.20 Pounds
    ConditionNew
    Fitment TypeDirect Replacement
    ReplacesF5ZZ-12029-A, F5FZ-12029-A, F32Z-12029-A
    ManufacturerFord
    SKUF7PZ-12029-AA
    WarrantyThis genuine Ford part is guaranteed by Ford's factory warranty.
    Shipping & ReturnShipping Policy Return Policy
    Warning: California’s Proposition 65
  • Vehicle Fitment

    Year Make Model Engine Important vehicle option details
    1988-1994 Mercury Cougar6 Cyl 3.8L, 8 Cyl 5.0L4AT, 4AT AOD, 4AT AODE, 5MT
    1987-1991 Mercury Grand Marquis8 Cyl 5.0L, 8 Cyl 5.8L4AT AOD
    1987-1995 Mercury Sable6 Cyl 3.0L, 6 Cyl 3.8L4AT 4F50N, 4AT AX4N, 4AT AX4S, 4AT AXOD, 4AT AXOD-E
    1986-1994 Mercury Topaz4 Cyl 2.3L, 6 Cyl 3.0L3AT ATX, 5MT
    1988-1989 Mercury Tracer4 Cyl 1.6L3AT ATX, 4MT, 5MT

Customer Questions & Answers

Q:
Is the the correct part for the attached VIN? Posted by FordPartsGiant Specialist
A:
You can Select Your Vehicle to check if F7PZ-12029-AA fits your vehicle.
Posted by FordPartsGiant Specialist
Q:
How to replace Ignition Coil and Ignition Control Module on Ford Bronco? Posted by Customer
A:
Before replacing ignition system components, check with your dealer service department to see if your vehicle qualifies for a Federally mandated extended warranty of 5 years or 50,000 miles. For vehicles with Electronic Engine Control (EEC), be aware that disconnecting the battery may cause the Powertrain Control Module (PCM) to lose its memory, resulting in abnormal driving symptoms for the first 10 miles or so until the PCM relearns its adaptive strategy.To replace the Duraspark ignition coil, disconnect the negative battery cable, mark the wires at the coil using coded tape, remove the coil-to-distributor high-tension lead, disconnect the connections at the coil, and remove the retaining bolts holding the coil bracket. Then, remove the coil from the bracket and install the new coil, applying a thin layer of silicone grease to the inside of the coil-to-distributor high-tension lead boot during reinstallation.For the Duraspark ignition module, detach the cable from the negative battery terminal, unplug the module connectors (depending on whether it's the standard or universal module), remove the mounting screws, and then install the new module.For the Duraspark stator assembly on V8 engines, remove the negative battery cable, distributor cap, rotor, distributor connector from the wiring harness, and cap adjuster. Use a gear puller to remove the armature from the sleeve and plate assembly, and then remove the E-clip retaining the diaphragm rod to the stator assembly. Remove the ground strap screw, wire retaining clip, and lift the stator assembly off the lower plate assembly. Clean the lower plate assembly if it will be reused and install the stator assembly, armature, and other components in reverse order.For V6 engines, the process is similar but includes additional steps to remove the lower plate assembly and stator assembly from the distributor base.To replace the TFI-IV ignition coil, locate the coil assembly, unplug the electrical connector and coil wire, remove the retaining screws, and detach the coil. Then, install the new coil, making sure to apply a thin coat of silicone dielectric grease to the inside of the coil-to-distributor high-tension lead boot.For the TFI-IV ignition control module (distributor-mounted or remote-mounted), follow the specified steps for removal and installation. Apply silicone dielectric grease to the back of the module before installing it.To replace the TFI-IV or DI distributor stator (PIP sensor), remove the distributor cap and wires, then follow the specific steps for removal and installation of the stator assembly, distributor shaft, and other components. Check for wear or damage and replace any faulty parts as needed.Make sure to follow the instructions carefully and ensure that the correct parts are used for each component replacement.
Posted by FordPartsGiant Specialist
Q:
How do you install the coil for the 1989 Mercury Cougar? Posted by Customer
A:
For installation, simply reverse the removal steps.
Posted by FordPartsGiant Specialist
See expert answers on similar Ignition Coil
Q:
How to test and replace ignition coils in different types of ignition systems on Lincoln Town Car? Posted by Customer
A:
For breaker points type ignition systems, start by marking the wires and terminals with numbered tape. Then, remove the primary wires and high-tension wire from the coil. Take out the coil assembly and clean the outer case, checking for cracks or damage. Inspect the coil primary terminals and the coil tower terminal for corrosion, cleaning with a wire brush if necessary. Use an ohmmeter to check the coil primary resistance and compare it to the specifications. Do the same for the coil secondary resistance. If the resistances are not as specified, replace the coil. Keep all coil terminals and wire leads clean, tight, and dry. Install the coil back in its mount and reconnect the wires. For breakerless type ignition systems, check the primary and secondary coil resistance. Disconnect the wires from the coil and use an ohmmeter to measure the resistance across the coil primary terminals. The resistance should match the specifications. Then, connect the ohmmeter between the negative primary terminal and the secondary terminal and check the resistance. If the resistances are not as specified, replace the coil. Measure the resistance from the positive primary terminal to the case of the ignition coil. If the resistance is less than specified, replace the coil. Reconnect the ignition coil wires. For electronic distributorless ignition (EDIS) systems, start by disconnecting the electrical connector(s) from the coil. Use an ohmmeter to check the resistance between the coil primary terminal and the outer terminal. The resistance should match the specifications. Then, connect the ohmmeter between the secondary terminals of each coil pack and check the resistance. If the resistances are not as specified, replace the coil. To replace the coil, disconnect the negative cable from the battery and disconnect the ignition coil electrical connector(s) from each individual coil pack. Disconnect the ignition wires and remove the bolts securing the ignition coil to the mounting bracket. Install the new coil, making sure to coat the interior of the rubber boot with silicone dielectric compound and properly insert each spark plug wire into the corresponding terminal.
Posted by FordPartsGiant Specialist
Q:
How do you replace the coil in the electronic distributorless ignition (EDIS) system for the 1995 Mercury Grand Marquis? Posted by Customer
A:
To replace the coil in the EDIS system, start by disconnecting the negative cable from the battery. Then, disconnect the ignition coil electrical connectors from each individual coil pack and disconnect the ignition wires. Remove the bolts securing the ignition coil and install the new coil following the reverse of the removal procedure.
Posted by FordPartsGiant Specialist
See expert answers on similar Ignition Coil
If you have any questions about this product, please don't hesitate to ask us. We will be happy to help you!

Genuine Ford Part F7PZ-12029-AA, the Right Choice

Your vehicle deserves only genuine OEM Ford parts and accessories. To ensure reliability, purchase Ford part # F7PZ-12029-AA Coil Assembly - Ignition with base parts number 12029. It is sometimes referred to as Mercury Ignition Coil. Our Ford parts and accessories are expedited directly from authorized Ford dealers strategically located all across the U.S. and are backed by the manufacturer's 12 month, 12,000 mile warranty. OEM Ford parts are the best for restoring your vehicle to factory condition performance. This part fits specific Mercury Cougar, Sable, Tracer models.

Affordable, reliable and built to last, Ford part # F7PZ12029AA Coil Assembly - Ignition stands out as the smart option. FordPartsGiant.com is your prime online source with the biggest and best selection of genuine Ford parts and accessories at giant discounted prices. We have the OEM Ford parts and accessories you need at the wholesale prices. FordPartsGiant.com has you covered no matter what type of Ford vehicle you drive. For detailed Mercury parts information, click here.

Why choose Ford Parts Giant

  • Dedicated Service

    Your complete satisfaction is our #1 goal

  • Lowest Prices

    Best deals on genuine OE parts from dealerships

  • Fast Delivery

    Orders are processed and delivered promptly