My Garage
My Account
Cart
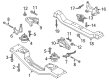
Genuine Ford Motor And Transmission Mount
Motor and Trans Mount- Select Vehicle by Model
- Select Vehicle by VIN
Select Vehicle by Model
orMake
Model
Year
Select Vehicle by VIN
For the most accurate results, select vehicle by your VIN (Vehicle Identification Number).
1227 Motor And Transmission Mounts found


Ford Engine Front Support Bracket
Part Number: GB5Z-6038-A$109.91 MSRP: $143.00You Save: $33.09 (24%)Product Specifications- Other Name: BRACKET - ENGINE FRONT SUPPORT; Front Mount, Mount
- Position: Front
- Replaces: BB5Z-6038-A, BB5Z-6038-E, DB5Z-6038-A, FB5Z-6038-A


 Product Specifications
- Other Name: Insulator Assy
- Replaces: DB5Z-6038-B, BB5Z-6038-B


Ford Engine Front Support Bracket
Part Number: BV6Z-6038-A$117.85 MSRP: $153.33You Save: $35.48 (24%)Product Specifications- Other Name: Bracket - Engine Front Support; Front Mount, Motor Mount, Mount
- Position: Front


 Product Specifications
- Other Name: Torque Arm
- Replaces: BB5Z-6068-C, BB5Z-6068-A


Ford Transmission Extension Housing
Part Number: AV6Z-6068-A$71.74 MSRP: $93.33You Save: $21.59 (24%)Product Specifications- Other Name: Housing - Transmission Extension


 Product Specifications
- Other Name: Bracket - Insulator Mounting; Motor Mount, Mount
- Manufacturer Note: For Warm Climates Only
- Replaces: 5S4Z-6038-CA


Ford Engine Motor Mount Bracket Torque Strut
Part Number: 8M8Z-6038-A$111.83 MSRP: $175.00You Save: $63.17 (37%)Ships in 1-2 Business DaysProduct Specifications- Other Name: Bracket - Engine Mounting
- Manufacturer Note: Bracket
- Position: Passenger Side


Ford Engine Front Support Bracket
Part Number: CV6Z-6038-B$91.72 MSRP: $119.33You Save: $27.61 (24%)Product Specifications- Other Name: Bracket - Engine Front Support; Front Mount, Motor Mount, Mount
- Position: Front
- Replaces: DV6Z-6038-A


 Product Specifications
- Other Name: Bracket - Engine Front Support; Front Mount, Mount
- Position: Front
- Replaces: 6E5Z-6038-CA, 6E5Z-6061-BA, 6E5Z-6038-CK


Ford Engine Front Support Bracket
Part Number: FB5Z-6038-A$109.91 MSRP: $143.00You Save: $33.09 (24%)Product Specifications- Other Name: Bracket - Engine Front Support
- Position: Front
- Replaced by: GB5Z-6038-A


 Product Specifications
- Other Name: Insulator Assy; Mount
- Replaces: 4R3Z-6038-DA


Ford Engine Front Support Bracket
Part Number: DB5Z-6038-A$109.91 MSRP: $143.00You Save: $33.09 (24%)Product Specifications- Other Name: Bracket - Engine Front Support
- Position: Front
- Replaced by: GB5Z-6038-A

 Product Specifications
- Other Name: Insulator Assy
- Replaced by: FB5Z-6038-B


 Product Specifications
- Position: Lower
- Replaces: DP5Z-6068-B, DP5Z-6068-G

 Product Specifications
- Other Name: Insulator Assy; Side Mount
- Position: Passenger Side

Ford Engine Support Insulator Assembly
Part Number: LK4Z-6068-A$117.73 MSRP: $153.17You Save: $35.44 (24%)Product Specifications- Other Name: INSULATOR ASY - ENGINE SUPPORT; Mount, Transmission Mount
- Replaces: CK4Z-6068-E, CK4Z-6068-B

Ford BRACKET - ENGINE SUPPORT
Part Number: CK4Z-6096-E$147.32 MSRP: $191.67You Save: $44.35 (24%)Ships in 1-2 Business DaysProduct Specifications- Other Name: Front Mount, Motor Mount
- Replaces: CK4Z-6096-B, CK4Z-6096-D, CK4Z-6096-A, CK4Z-6096-C


Ford Engine Support Insulator Assembly
Part Number: 7A2Z-6038-CA$62.70 MSRP: $91.67You Save: $28.97 (32%)Product Specifications- Other Name: Insulator Assembly - Engine Support; Front Mount, Motor Mount
- Position: Driver Side
- Replaces: 7A2Z-6038-A, 7A2Z-6038-C


 Product Specifications
- Other Name: Insulator Assy; Front Mount, Mount
- Manufacturer Note: RH, front, police, taxi, fleet, limo - severe duty
- Position: Passenger Side
| Page 1 of 62 |Next >
1-20 of 1227 Results
Ford Motor And Transmission Mount Parts Questions & Experts Answers
- Q: How to inspect and replace the engine mount and motor and transmission mount in the front of a 2.3L and 2.0L engine on Ford Focus?A:The engine/transmission mounts should not commonly need inspection or replacement until they are broken or worn but in the event of a broken mount or mount that is worn significantly the mount must be replaced at once with a view of preventing a damage or wear out of the drive line assembly. It is often possible to lift an individual mount and replace it repeatedly and independently Even if several of the mounts are displaced confirming that they should be reunited they will require to be reassembled and their fasteners tightened at the positions which are indicated during their removal. During reassembly the total weight of the engine/transmission unit should not be put on the mounts until all the units come into correct alignment over the marks made at the time of removal of the engine/transmission unit, and the mounting bolts must be tightened up to the prescribed torque. In this case, the engine/transmission unit should be lifted slightly off the mounts to reduce the load upon it, and the car in turn should be firmly placed on axle stands. A jack with a block of wood should be placed directly under the oil pan to lift the engine/transmission just enough in order to offload some weight from the mountings. As for the modes of the vehicle operation, the mounts should be inspected for the cracks, the hardened rubber, the separation from the metal parts of the vehicle or the relative movement of the mount brackets relative to the engine/transmission or the body. If there is movement, the motor should be lowered at that point and the fasteners securing it examined and probably tightened. For replacement, the engine should be supported beneath the oil pan with some form of jackstand. The coolant expansion bottle is anchored to the right-hand mount and the mount operational position is marked on the automobile. The locking nuts of the engine casing should be loosened and the retaining bolts to the inner fender panel of the vehicle should be removed to pull-out the mounting with the engine/transmission supported. In assembly all the nuts and bolts must be tightened to the required torque first is the locking nuts to the engine casing then the mounting bracket to inner fender retaining bolts. In the case of the left-hand mount, few modifications are needed; the air intake hose has to be disconnected and the air cleaner assembly has to be taken off. After the transmission is supported, center retaining nut should be turned counter clockwise to be loosened for the removal of the mount and the outer retaining nut for the dismount of the mount in the mounting bracket. The mounting bracket can be removed by the removal of retaining bolts which are tightened on the bracket. At the time of installation, new self-locking nuts must be used, and all the bolts screwed to the required torque. For the rear mount it has to be removed by loosening the center bolt which is on the subframe and on the transmission and when putting it back it has to be tightened to the required torque.
- Q: How to replace the motor and transmission mount in the automatic transmission on a Ford Ranger?A:Insert a large screwdriver or pry bar into the space between the transmission extension housing and the crossmember to pry the transmission up slightly, detaching the transmission mount from the frame crossmember. The transmission should not move away from the mount much at all. To replace the mount, remove the nuts attaching it to the crossmember and the bolts connecting it to the transmission. Raise the transmission slightly with a jack and remove the mount, noting which holes are used in the crossmember for proper alignment during installation. Installation is the reverse of the removal procedure, ensuring that the nuts and bolts are tightened securely.


Related Ford Parts
 Ford Brake Pedal
 Ford Car Key
 Ford License Plate
 Ford Clock Spring
 Ford Spare Wheel
 Ford Spoiler
 Ford Air Bag
 Ford Engine Cover
 Ford Sunroof
 Ford Air Bag Control Module
Browse by Model
Aerostar Motor And Transmission Mount Aspire Motor And Transmission Mount Bronco II Motor And Transmission Mount Bronco Motor And Transmission Mount Bronco Sport Motor And Transmission Mount C-Max Motor And Transmission Mount Contour Motor And Transmission Mount Crown Victoria Motor And Transmission Mount E-150 Motor And Transmission Mount E-250 Motor And Transmission Mount E-350/E-350 Super Duty Motor And Transmission Mount E-450 Super Duty Motor And Transmission Mount E-550 Super Duty Motor And Transmission Mount Econoline Super Duty(1996-1999) Motor And Transmission Mount EcoSport Motor And Transmission Mount Edge Motor And Transmission Mount Escape Motor And Transmission Mount Escort Motor And Transmission Mount Excursion Motor And Transmission Mount Expedition Motor And Transmission Mount Explorer Motor And Transmission Mount Explorer Sport Motor And Transmission Mount Explorer Sport Trac Motor And Transmission Mount F Super Duty Motor And Transmission Mount F-150 Motor And Transmission Mount F-250 Motor And Transmission Mount F-250 Super Duty Motor And Transmission Mount F-350 Motor And Transmission Mount F-350 Super Duty Motor And Transmission Mount F-450 Super Duty Motor And Transmission Mount F-550 Super Duty Motor And Transmission Mount F53 Motor And Transmission Mount F53 Stripped Chassis Motor And Transmission Mount F59 Motor And Transmission Mount Festiva Motor And Transmission Mount Fiesta Motor And Transmission Mount Five Hundred Motor And Transmission Mount Flex Motor And Transmission Mount Focus Motor And Transmission Mount Freestar Motor And Transmission Mount Freestyle Motor And Transmission Mount Fusion Motor And Transmission Mount GT Motor And Transmission Mount Maverick Motor And Transmission Mount Mustang Motor And Transmission Mount Police Interceptor Sedan Motor And Transmission Mount Police Interceptor Utility Motor And Transmission Mount Police Responder Hybrid Motor And Transmission Mount Probe Motor And Transmission Mount Ranger Motor And Transmission Mount SSV Plug-In Hybrid Motor And Transmission Mount Taurus Motor And Transmission Mount Taurus X Motor And Transmission Mount Tempo Motor And Transmission Mount Thunderbird Motor And Transmission Mount Transit Connect Motor And Transmission Mount Transit Motor And Transmission Mount Windstar Motor And Transmission Mount