My Garage
My Account
Cart
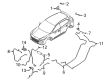
Genuine Ford Antenna
Radio Antenna- Select Vehicle by Model
- Select Vehicle by VIN
Select Vehicle by Model
orMake
Model
Year
Select Vehicle by VIN
For the most accurate results, select vehicle by your VIN (Vehicle Identification Number).
149 Antennas found


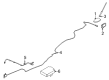
Ford Vehicle Security System - Upgrade - able, Bi - Directional Remote Start Antenna Kit
Part Number: DL3Z-15603-C$68.85 MSRP: $85.00You Save: $16.15 (19%)Product Specifications- Other Name: Aerial Assy; Antenna
- Replaces: CL3Z-19G364-B, 9G1Z-15603-A, DL3Z-15603-B, 9G1Z-19C757-A


Ford Aerial Assembly
Part Number: JL1Z-19A390-BCPTM$72.68 MSRP: $85.00You Save: $12.32 (15%)Ships in 1-3 Business DaysProduct Specifications- Other Name: Antenna
- Replaces: JL1Z-19A390-BBPTM


Ford Radio Antenna Stanchion
Part Number: FM5Z-18936-F$79.80 MSRP: $116.67You Save: $36.87 (32%)Ships in 1-2 Business DaysProduct Specifications- Other Name: STANCHION - RADIO ANTENNA; Antenna, Antenna Base, Base
- Replaces: CP9Z-18936-B, FM5Z-18936-B, FM5Z-18936-D


 Product Specifications
- Other Name: Kit - Aerial
- Replaced by: MCPZ-18813-D


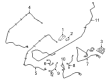
Ford Rod Assy - Replacement - Aerial
Part Number: 1F1Z-18A886-AA$25.36 MSRP: $34.65You Save: $9.29 (27%)Product Specifications- Other Name: Antenna Mast

 Product Specifications
- Other Name: Kit - Aerial
- Replaced by: MCPZ-18813-D

 Product Specifications
- Replaced by: FR3Z-18813-AE


Ford Aerial Without Cable
Part Number: DS7Z-18813-A$14.95 MSRP: $21.30You Save: $6.35 (30%)Ships in 1 Business DayProduct Specifications- Other Name: Antenna Mast
- Manufacturer Note: 10" (254 MM)

Ford Aerial Assembly
Part Number: JD9Z-19A390-AAPTM$68.40 MSRP: $80.00You Save: $11.60 (15%)Ships in 1-3 Business DaysProduct Specifications- Other Name: Antenna
- Manufacturer Note: Paint to match

Ford Aerial Assembly
Part Number: ML3Z-19A390-B$94.49 MSRP: $148.43You Save: $53.94 (37%)Ships in 1-2 Business DaysProduct Specifications- Other Name: AERIAL ASY; Antenna, Gps Antenna
- Position: Passenger Side
- Replaces: ML3Z-19A390-GD, ML3Z-19A390-A

Ford Aerial Assembly
Part Number: LJ6Z-19A390-B$79.63 MSRP: $124.63You Save: $45.00 (37%)Ships in 1-2 Business DaysProduct Specifications- Other Name: AERIAL ASY; Antenna Assembly
Ford Aerial Assembly
Part Number: JL7Z-19A390-DDPTM$79.23 MSRP: $122.50You Save: $43.27 (36%)Ships in 1-3 Business DaysProduct Specifications- Other Name: Antenna
 Product Specifications
- Other Name: Kit - Aerial
- Manufacturer Note: Black Coated
- Replaced by: MCPZ-18813-A

Ford Rod Assembly - Replacement - Aerial
Part Number: FR3Z-18A886-A$22.42 MSRP: $30.64You Save: $8.22 (27%)Product Specifications- Other Name: Rod Assy - Replacement - Aerial
- Replaced by: GR3Z-18A886-A


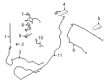
Ford Remote Start System Ultra-Long-Range Extender Antenna Kit
Part Number: JS7Z-15603-A$30.71 MSRP: $35.00You Save: $4.29 (13%)Product Specifications- Other Name: Aerial Assy; Antenna

 Product Specifications
- Other Name: Aerial Assy


Ford Remote Start - RFR Antenna Kit Vehicle Security System - Upgradeable, Remote Start RFR Antenna Kit
Part Number: DA8Z-15603-A$35.10 MSRP: $40.00You Save: $4.90 (13%)Product Specifications- Other Name: Aerial Assy
 Product Specifications
- Other Name: Mast
- Product Specifications
- Other Name: Antenna, Antenna Assembly
- Product Specifications
- Other Name: Antenna Assembly, Manual Antenna
| Page 1 of 8 |Next >
1-20 of 149 Results
About Ford Antenna
The most critical component to keeping a car running smoothly is the Antenna. Without a working Ford Antenna, your vehicle can suffer major performance issues and even automotive breakdown. With regular maintenance and replacement, you can save big by avoiding the hassle of an expensive repair jobs in the future.
Ford Antenna Parts Questions & Experts Answers
- Q: How to remove and install the antenna and Antenna Cable on Ford Ranger?A:First, for the 2010 and the earlier models, turn under the instrument panel, release the antenna cable at the lead-in connector, and free it from the plastic clips. This too is attached through the use of a small screw that is located at the back of the device There is a cap that needs to be unscrewed to remove the antenna. Attach a string or wire at the radio end of the coax and use this to help pull the new cable through the same run. Take out the three screws losing the antenna base to the body; gently pull the antenna cable together with the antenna base and the gasket through the body slot. If required, remove the antenna lead-in cable from the radio and if possible slide out of the clips. For the 2011 models, in order to remove the antenna you must unscrew the antenna from the base, use a small screw driver to remove the base cover and take out the screws to detach the antenna base from the cowl. Remove the connector of the antenna cable from the base then have a string or wire to attach to the extremity of the cable for the new connection. Take out the radio and exit the antenna cable at the back of the radio unit. Pop the glove box wide open, take the gasket at the back and pull out the cable through the existing hole. As in removal, installation is the reverse and requires the provision of a new gasket when reinstalling and when attaching the string or wire to the newer antenna cable, one must pull it back through the hole into place before releasing the string or wire.

Related Ford Parts


Browse by Model
Bronco Antenna Bronco II Antenna Bronco Sport Antenna C-Max Antenna Contour Antenna Crown Victoria Antenna E-150 Antenna E-250 Antenna E-350/E-350 Super Duty Antenna E-450 Super Duty Antenna E-550 Super Duty Antenna E-Transit Antenna Econoline Super Duty(1996-1999) Antenna EcoSport Antenna Edge Antenna Escape Antenna Escort Antenna Excursion Antenna EXP Antenna Expedition Antenna Explorer Antenna Explorer Sport Antenna Explorer Sport Trac Antenna F Super Duty Antenna F-150 Antenna F-150 Lightning Antenna F-250 Antenna F-250 Super Duty Antenna F-350 Antenna F-350 Super Duty Antenna F-450 Super Duty Antenna F-550 Super Duty Antenna Fairmont Antenna Fiesta Antenna Five Hundred Antenna Flex Antenna Focus Antenna Freestar Antenna Freestyle Antenna Fusion Antenna Granada Antenna GT Antenna Maverick Antenna Mustang Antenna Mustang Mach-E Antenna Pinto Antenna Police Interceptor Sedan Antenna Police Interceptor Utility Antenna Police Responder Hybrid Antenna Probe Antenna Ranger Antenna SSV Plug-In Hybrid Antenna Taurus Antenna Taurus X Antenna Tempo Antenna Thunderbird Antenna Transit Antenna Transit Connect Antenna Windstar Antenna