My Garage
My Account
Cart
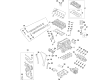
Genuine Ford Edge Crankshaft Seal
- Select Vehicle by Model
- Select Vehicle by VIN
Select Vehicle by Model
orMake
Model
Year
Select Vehicle by VIN
For the most accurate results, select vehicle by your VIN (Vehicle Identification Number).
14 Crankshaft Seals found


Ford Edge Crankshaft Oil Seal Assembly Front
Part Number: CM5Z-6700-E$13.46 MSRP: $17.50You Save: $4.04 (24%)Ships in 1-3 Business Days


Ford Edge SEAL ASY - CRANKSHAFT OIL
Part Number: 1S7Z-6A321-B$88.52 MSRP: $115.17You Save: $26.65 (24%)

Ford Edge Crankshaft Oil Seal Assembly Front
Part Number: XW4Z-6700-AA$11.38 MSRP: $16.22You Save: $4.84 (30%)


Ford Edge Crankshaft Oil Seal Retainer
Part Number: JT4Z-6335-B$33.58 MSRP: $47.83You Save: $14.25 (30%)Ships in 1-3 Business Days


Ford Edge Crankshaft Oil Seal Assembly Front
Part Number: XW4Z-6700-B$5.39 MSRP: $7.68You Save: $2.29 (30%)


Ford Edge Crankshaft Oil Seal Assembly
Part Number: AT4Z-6701-A$30.78 MSRP: $45.00You Save: $14.22 (32%)Ships in 1 Business Day


Ford Edge Crankshaft Oil Seal Retainer
Part Number: 1S7Z-6K301-BA$78.77 MSRP: $115.17You Save: $36.40 (32%)

Ford Edge Retainer - Crankshaft
Part Number: AT4Z-6K301-B$39.44 MSRP: $56.67You Save: $17.23 (31%)Ships in 1-2 Business Days


Ford Edge Crankshaft Oil Seal Retainer
Part Number: 1S7Z-6K301-AA$78.77 MSRP: $115.17You Save: $36.40 (32%)Ships in 1 Business Day


Ford Edge Crankshaft Oil Seal Retainer
Part Number: 7T4Z-6K301-A$39.44 MSRP: $56.67You Save: $17.23 (31%)Ships in 1-2 Business Days
Ford Edge Crankshaft Oil Seal Retainer
Part Number: JT4Z-6335-C$36.77 MSRP: $47.83You Save: $11.06 (24%)Ships in 1-2 Business Days
Ford Edge Crankshaft Oil Seal Retainer
Part Number: FT4Z-6335-A$36.77 MSRP: $47.83You Save: $11.06 (24%)
Ford Edge Crankshaft Seal
The Crankshaft Seal in Ford Edge is yet another model of automobiles that is installed in front of the engine and its purpose is to prevent oil leakage from the crankcase. This round type seal is typically made of metal with some rubber content it's important for ensuring the flow of oil to the engine hence decreasing friction and subsequent wearing out of the various parts of the engine. Eventually, a Ford Edge can be built with a defective Crankshaft Seal, and there are symptoms of oil leakage or other problems, mainly if the car is old enough. However, it is noteworthy that some existing distinctions between designs of different models of Ford Edge are possible due to progress in materials or engineering. Checking of the Crankshaft Seal and replace when necessary are recommended for Ford Edge to achieve maximum performance of the vehicle's engine.
We provide a wide range of Ford Edge Crankshaft Seal at the optimal prices. If you need Ford Edge Crankshaft Seal, you can shop with confidence on our website. All our OEM parts come with a manufacturer's warranty and are delivered to your doorstep with a fast delivery service.
Ford Edge Crankshaft Seal Parts Questions & Experts Answers
- Q: How to install a rear Crankshaft Seal in a four cylinder engine on Ford Edge?A:The one-piece rear Crankshaft Seal is pressed into the rear Crankshaft Seal carrier mounted at the rear of the block. Begin by removing the transaxle and the driveplate, followed by the Oil Pan. Unbolt the Crankshaft Seal and carrier, then clean the mating surface for the Crankshaft Seal carrier on the cylinder block and the crankshaft, ensuring to carefully remove and polish any burrs or raised edges on the crankshaft that may have caused the seal to fall. Lightly coat the inside lip of the new seal with clean engine oil and use a thin, durable two-inch wide plastic strip or a cut two-liter plastic beverage bottle around the inside circumference of the seal to act as a liner for installation. With the plastic seal liner or tool in place, carefully move the new carrier (with seal factory-installed) into position by sliding it onto the contact surface of the crankshaft. Install the Crankshaft Seal carrier bolts and finger tighten them while holding the carrier in place, ensuring the bottom of the seal carrier aligns precisely with the bottom edge of the engine block for a flush fit before tightening the carrier mounting bolts, as improper alignment may lead to oil pan leaks. Carefully remove the plastic liner or tool to allow the new seal to contact the crankshaft mating surface correctly, then tighten the Crankshaft Seal carrier to the specified torque using the proper sequence. The remainder of the installation follows the reverse order of removal.

Related Ford Edge Parts
 Ford Edge Crankshaft Thrust Washer Set
 Ford Edge Cylinder Head Bolts
 Ford Edge Cruise Control Switch
 Ford Edge Crankshaft Pulley
 Ford Edge Crankshaft Position Sensor
 Ford Edge CV Joint
 Ford Edge Cylinder Head
 Ford Edge Crankcase Breather Hose
 Ford Edge Crankshaft Gear
 Ford Edge CV Boot
 Ford Edge Crankshaft
Browse by Year
2024 Crankshaft Seal 2023 Crankshaft Seal 2022 Crankshaft Seal 2021 Crankshaft Seal 2020 Crankshaft Seal 2019 Crankshaft Seal 2018 Crankshaft Seal 2017 Crankshaft Seal 2016 Crankshaft Seal 2015 Crankshaft Seal 2014 Crankshaft Seal 2013 Crankshaft Seal 2012 Crankshaft Seal 2011 Crankshaft Seal 2010 Crankshaft Seal 2009 Crankshaft Seal 2008 Crankshaft Seal 2007 Crankshaft Seal