
Why choose FordPartsGiant
- Devoted Service
At FordPartsGiant.com, we strive to make customer satisfaction our #1 goal by providing dedicated customer service. Our core values of success continue to demonstrate our loyalty by building dedicated relationships with all of our current and future customers. We are always ready to assist you with the slightest detail about your vehicle's parts and accessories.
- Reasonable Prices
We are the best online source for discounted prices on factory auto parts and accessories. Not everyone has the money to buy their vehicle quality parts, here at FordPartsGiant.com we make it economical to buy the best parts without sacrificing the quality or hurting your wallet.
- Swift Delivery
FordPartsGiant.com has centrally located distribution centers all across the United States. This gives you quick access to our discounted Ford Crown Victoria parts when you need them. We offer our customers the convenience of having parts delivered straight to their front door. We are committed to having your vehicle up and running in just a couple of days.
Popular Genuine Ford Crown Victoria Parts
- Engine Parts View More >
- Chassis Parts View More >
- Electrical Parts View More >
- Body And Paint Parts View More >
- Lamps & Wiring Parts View More >
- Wheels & Brakes Parts View More >
- Fuel System & Manifolds Parts View More >
- Speedometer, Bumpers, Mirrors & Wipers Parts View More >
- Transmission Parts View More >
Shop Genuine Ford Crown Victoria Parts with FordPartsGiant.com
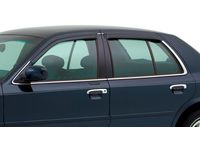
The Ford Crown Victoria is a luxury sedan that has enjoyed multiple iterations throughout Ford's history. Initially introduced as a two-door model between 1955 and 1956, the Crown Victoria nameplate was later used for all LTD sedans in North America from 1983 to 1991, with distinguishing stainless steel cladding on the V-pillars. After a 23-year hiatus, the Crown Victoria was reintroduced to the market in the 1980s, with sales beginning in 1991. These models were offered as either two- or four-door sedans, and a Lifeguard safety package was available as an option. As part of a significant restructuring, the Crown Victoria became a separate model line dedicated to mid-size and large models. The vehicle underwent several revisions throughout its production, including dashboard updates and engine modifications for lower trim levels and pricier variants. Despite never having a full-fledged hot-rod edition to avoid cannibalizing sales of other high-performance models, several redesigned versions were released. One of its standout years saw over 150,000 units sold in the UK, landing it in second place in the sales charts. The Crown Victoria retained the Panther chassis from the previous version but underwent significant updates for improved ride and handling characteristics, with modifications to the steering and suspension and the introduction of disc brakes on all four wheels. Available in Base and LX versions, the vehicle boasted standard features such as a one-key door opener, hidden radio antenna, rear fog filter, and tinted windows. The LX version offered optional automatic air conditioning and a JBL sound system.
Common problems tend to emerge with time and use, even in a robust vehicle like the Ford Crown Victoria. Many owners have reported issues with the engine, such as dramatically increased oil consumption, rough idling, power loss during acceleration, and unsettling ticking noises from the cylinder head. If you encounter similar signs, inspecting the rocker arm, exhaust valve, intake valve, spark plug, and rod bearing could be necessary. Another common issue is slipping transmission and failing suspension system, identified by indicators not matching the gear, difficulty removing the key from the ignition, intense vibrations while driving, uneven tire wear, and fluid leakage. These symptoms typically point to the need for an inspection of the shift cable and shock absorber. Besides these, the Crown Victoria also experiences wear in parts like the front and rear door strikers, often revealed through rattling doors or difficulty closing them. For safety, replacing these components promptly when they show signs of wear is advisable.
OEM parts are engineered to comply with official Ford factory standards, guaranteeing easy installation and an impeccable fit. We offer all genuine Crown Victoria parts at the unbeatable prices. Need to return a part? No worries, we offer a hassle-free return policy. Please shop with confidence as all our OEM parts are backed by the manufacturer's warranty and are shipped straight to your door step.
Ford Crown Victoria Parts Questions & Answers
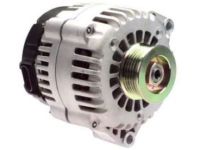
- Q: How to remove and install an alternator on Ford Crown Victoria?A: Detach the cable from the negative terminal of the battery. Unplug the electrical connectors from the alternator and mark each connector before unplugging them. Loosen the alternator bolts and separate the bracket from the intake manifold. Remove the drivebelt and, on 4.6L engines, the ignition wire assembly from the intake manifold area. Remove the adjustment and pivot bolts to separate the alternator from the engine. Installation is the reverse of removal. After the alternator is installed, adjust the drivebelt tension.
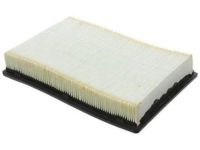
- Q: How do you replace the filter element in Ford Crown Victoria?A: Buy a new filter for your engine. Lift off the filter housing cover by removing the clips. Take out the filter element from the housing. Clean the inside of the air cleaner housing using a soft cloth. Insert the new air filter element into the housing. If it is marked TOP, ensure that the side faces up. Cover back into place and snap in tabs or lift up clips to secure.
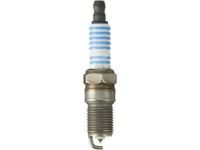
- Q: What are the key steps to follow when replacing spark plugs on Ford Crown Victoria?A: Firstly, check the specifications before you replace the spark plugs to make sure that you are using the right ones, allow the engine to cool down before proceeding further, examine the new bulbs for flaws and adjust their gap appropriately, and lastly, take off the wire without breaking anything. In addition, blow out any dirt from the interested hole, pull it out with a socket without hurting any other thing around by mistake and gather some anti-seize compound, then put wire back. Now do this for all of the plugs.


