My Garage
My Account
Cart
Genuine Lincoln Navigator Piston
Engine Pistons- Select Vehicle by Model
- Select Vehicle by VIN
Select Vehicle by Model
orMake
Model
Year
Select Vehicle by VIN
For the most accurate results, select vehicle by your VIN (Vehicle Identification Number).
31 Pistons found


Lincoln Navigator Piston
Part Number: 3L3Z-6108-CC$54.49 MSRP: $78.28You Save: $23.79 (31%)Ships in 1-3 Business Days


Lincoln Navigator Piston And Pin Assembly
Part Number: 2L3Z-6108-AA$112.36 MSRP: $164.27You Save: $51.91 (32%)

Lincoln Navigator Piston
Part Number: HL7Z-6108-F$193.12 MSRP: $282.33You Save: $89.21 (32%)Ships in 1-2 Business Days

Lincoln Navigator Piston And Pin Assembly
Part Number: XL3Z-6108-EA$169.29 MSRP: $247.50You Save: $78.21 (32%)


Lincoln Navigator Piston And Pin Assembly
Part Number: XL3Z-6108-KA$118.63 MSRP: $173.43You Save: $54.80 (32%)
Lincoln Navigator Piston And Pin Assembly
Part Number: HL7Z-6108-H$133.62 MSRP: $207.17You Save: $73.55 (36%)Ships in 1-3 Business Days
Lincoln Navigator Piston
Part Number: 3L3Z-6108-DB$120.64 MSRP: $182.78You Save: $62.14 (34%)Ships in 1-2 Business Days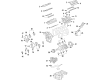
Lincoln Navigator PISTON AND PIN ASY
Part Number: HL7Z-6108-K$193.12 MSRP: $282.33You Save: $89.21 (32%)
Lincoln Navigator Piston And Pin Assembly
Part Number: XL3Z-6108-DA$175.56 MSRP: $256.67You Save: $81.11 (32%)Lincoln Navigator Piston And Pin Assembly
Part Number: XL7Z-6108-CA$22.10 MSRP: $30.71You Save: $8.61 (29%)Ships in 1-2 Business DaysLincoln Navigator Piston
Part Number: HL7Z-6108-J$152.99 MSRP: $223.67You Save: $70.68 (32%)Ships in 1-3 Business DaysLincoln Navigator Piston
Part Number: NL3Z-6108-A$173.05 MSRP: $253.00You Save: $79.95 (32%)Ships in 1-2 Business DaysLincoln Navigator Piston
Part Number: HL7Z-6108-G$141.70 MSRP: $207.17You Save: $65.47 (32%)Ships in 1-3 Business DaysLincoln Navigator PISTON AND PIN ASY
Part Number: NL3Z-6108-C$173.05 MSRP: $253.00You Save: $79.95 (32%)Ships in 1-2 Business Days

| Page 1 of 2 |Next >
1-20 of 31 Results
Lincoln Navigator Piston
The Piston in Lincoln Navigator automobiles are part and parcel of internal combustion engines since they offer the leverage upon which combustion energy is harnessed to provide energy for the automobiles' movement. Transforming force exerted by expanding gaseous pressures into the direction of crankshaft, the Lincoln Navigator's Piston also holds the primary responsibility of enhancing the engine performance under higher pressures and temperature conditions. In the course of its production various types of Pistons have been used in Lincoln Navigator for instance trunk pistons which provide side forces and have the functionality of oil rings which act as lubricants. Furthermore, special racing pistons may also be used for performance improvements, which gravitates to light weight while at the same time being strong enough to support high RPM's. The kind of Piston that is used has a close relationship with the efficiency and durability of the Lincoln Navigator which is why careful engineering in its creation cannot be overemphasized.
We provide a wide range of Lincoln Navigator Piston at the optimal prices. If you need Lincoln Navigator Piston, you can shop with confidence on our website. All our OEM parts come with a manufacturer's warranty and are delivered to your doorstep with a fast delivery service.
Lincoln Navigator Piston Parts Questions & Experts Answers
- Q: How to install the Piston on Lincoln Navigator?A:The connecting rod bolts on all engines are 'torque-to-yield' bolts and therefore once tightened and loosened they have to be replaced with new ones. It is important to note that the cylinder walls should be wiped clean before the piston/connecting rod assemblies are put in position, that top edge of each cylinder is chamfered and that the Crankshaft should ideally be fitted at this stage. Take off the cap from number one connecting rod and clean the bearing surface and the surface should be clean. Clean the back side of the new upper bearing insert and put it in its position so that the tab is inserted in the recess in the rod. Perform this for the rod cap but without applying any lubricant. As correctly align the gap of the piston ring, apply oil on the piston and the ring before finalizing the piston ring compressor. Turn the crankshaft to the bottom dead centre and lubricate the cylinder walls with engine oil. Place the piston/connecting rod assembly into the cylinder bore with the piston mark of the barrel positioned to face front of engine. Remove the old rod bolts, use them to align and make sure the ring compressor seals the block. Ease the piston into the cylinder, giving the correct alignment to the connecting rod on the crankshaft journal without applying force that may harm the piston or the rings. Plastigage is to be fitted after installation of the connecting Rod Bearing to measure the oil clearance of the mating surfaces. Fasten the bolts using a counter clockwise procedure to the recommended torque three times before removing the rod cap gently so as not to affect the Plastigage. It is possible to measure the width of the destroyed Plastigage to understand the oil clearance and compare it with the usual parameters. If the clearance is incorrect the first thing that should be looked for is dirt or oil that may be interfering with the journal diameter. Remove any Plastigage material from the bearing surfaces of the small end of the connecting rod, apply a layer of grease or assembly lube to the bearing faces and replace the rod cap with new bolts as well as tighten them to the recommended torque setting. The same process is repeated on the other pistons/connecting rods to be ensured that they are clean and properly aligned during assembly. Once all the assemblies have been installed, try to rotate the crankshaft and look out for binding, finally check the connecting rod end play against the relevant specifications to see if it is correct. If new rods or a crankshaft were installed new end play must be achieved at an automotive machine shop if the above-stated end play is inadequate.

Related Lincoln Navigator Parts
 Lincoln Navigator Power Steering Pump
 Lincoln Navigator Power Steering Hose
 Lincoln Navigator PCV Hose
 Lincoln Navigator Piston Ring Set
 Lincoln Navigator PCV Valve
 Lincoln Navigator Pinion Washer
 Lincoln Navigator PCV Valve Elbow
 Lincoln Navigator PCV Valve Hose
 Lincoln Navigator Pinion Bearing
 Lincoln Navigator Pressure Plate