My Garage
My Account
Cart
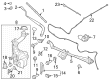
Genuine Ford Ranger Washer Pump
Windshield Washer Pump- Select Vehicle by Model
- Select Vehicle by VIN
Select Vehicle by Model
orMake
Model
Year
Select Vehicle by VIN
For the most accurate results, select vehicle by your VIN (Vehicle Identification Number).
8 Washer Pumps found


Ford Ranger Motor And Pump Assembly
Part Number: 8C3Z-17664-A$33.05 MSRP: $46.91You Save: $13.86 (30%)


Ford Ranger Motor And Pump Assembly
Part Number: 7R3Z-17664-A$30.23 MSRP: $42.91You Save: $12.68 (30%)Ships in 1 Business Day


Ford Ranger Motor And Pump Assembly
Part Number: 6F1Z-17664-A$30.23 MSRP: $42.91You Save: $12.68 (30%)Ships in 1 Business Day

Ford Ranger Motor And Pump Assembly
Part Number: JL3Z-17664-A$48.82 MSRP: $79.09You Save: $30.27 (39%)Ships in 1 Business Day


Ford Ranger Motor And Pump Assembly
Part Number: EOAZ-17664-A$212.94 MSRP: $296.36You Save: $83.42 (29%)Ships in 1-2 Business Days
Ford Ranger MOTOR AND PUMP ASY
Part Number: JL3Z-17664-B$69.54 MSRP: $110.91You Save: $41.37 (38%)Ships in 1-2 Business Days

Ford Ranger Motor And Pump Assembly
Part Number: E5TZ-17664-B$21.29 MSRP: $33.09You Save: $11.80 (36%)
Ford Ranger Washer Pump
The Ford Ranger Washer Pump directs washer fluid toward the windshield to ensure drivers maintain a clear view of the road ahead. The Washer Pump is installed at the bottom of the reservoir. It uses an electric motor and small impeller to draw liquid and send it through narrow hoses to the nozzles. A simple tap of the steering stalk activates the Washer Pump, supplying a perfect pressurized solution to clean off dirt and insects. Ford kept to a single basic pump layout throughout the pickup's production run to avoid confusion among Ranger owners. Swapping an old Washer Pump is a cinch whether you're working on a 1990s Ranger or a recent model. The mounting grommet and wiring connections are unchanged. You'll generally pay at low price for replacement Washer Pump parts and for common labor, keeping most Ford owners' overall repair costs in check. The Ford team checks the connector and tops up fluids as part of their regular maintenance so that every unit primes immediately and gives every Ranger windshield clarity.
We provide a wide range of Ford Ranger Washer Pump at the optimal prices. If you need Ford Ranger Washer Pump, you can shop with confidence on our website. All our OEM parts come with a manufacturer's warranty and are delivered to your doorstep with a fast delivery service.
Ford Ranger Washer Pump Parts Questions & Experts Answers
- Q: How to replace the washer pump motor and Washer Reservoir on Ford Ranger?A:Insert a small screwdriver and release the electrical connector tabs then disconnect the electrical connector of the washer pump. Disconnect the small hose at the base of the washer reservoir and pump motor assembly and cover the hose to avoid any spillage of the fluids Removal of two screws holding the washer reservoir and pump motor assembly to the fenderwell will see the component come off. Dump the washer fluid in a clean container for its reuse in case it is not contaminated. Remove the seal ring by twisting and pulling the pump motor out of the reservoir receptacle with special attention taken to the fact that in later models, the rubber grommet could be used instead of the seal ring and consequently does not need to be removed. Take hold of one wall round the electrical terminal with pliers and draw out the motor, seal and impeller assembly out of the reservoir with one condition, that if the impeller and seal come apart, you could join them again. To ensure that the reservoir is clean free from debris, it should be rinsed with water and checked for things such as inclusions. Check the pump chamber, if the motor you are going to install is old, clean the chamber if needed. Assembling this device is quite easy; you should apply powdered graphite on the outer side of the seal so that you will easily place it well onto the two halves of the motor end cap and when placing the seal ensure that the small projection fits into the slot in the reservoir before the seal is placed firmly. By tightening the retaining ring to the motor and the plate with the help of the 1-inch 12-point socket the hose should be connected to the fitting which is situated at the bottom of the reservior and finally the reservior should be fitted in the engine compartment with the two screws. Last but not the least, plug in the electrical connector while on the same note it is advised not to activate the pump should the reservoir isn't filled. Next, fill up the reservoir, turn on the pump and look for the leaks.

Related Ford Ranger Parts
 Ford Ranger Windshield Washer Nozzle
 Ford Ranger Windshield Wiper
 Ford Ranger Wiper Arm
 Ford Ranger Wiper Pivot
 Ford Ranger Washer Reservoir
 Ford Ranger Wiper Motor
Browse by Year
2025 Washer Pump 2024 Washer Pump 2023 Washer Pump 2022 Washer Pump 2021 Washer Pump 2020 Washer Pump 2019 Washer Pump 2011 Washer Pump 2010 Washer Pump 2009 Washer Pump 2008 Washer Pump 2007 Washer Pump 2006 Washer Pump 2005 Washer Pump 2004 Washer Pump 1997 Washer Pump 1996 Washer Pump 1995 Washer Pump 1994 Washer Pump 1993 Washer Pump 1992 Washer Pump 1991 Washer Pump 1990 Washer Pump