My Garage
My Account
Cart
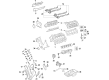
Genuine Ford Mustang Piston
Engine Pistons- Select Vehicle by Model
- Select Vehicle by VIN
Select Vehicle by Model
orMake
Model
Year
Select Vehicle by VIN
For the most accurate results, select vehicle by your VIN (Vehicle Identification Number).
82 Pistons found


Ford Mustang Piston
Part Number: BA5Z-6108-L$78.88 MSRP: $115.32You Save: $36.44 (32%)Ships in 1-2 Business Days


Ford Mustang Piston
Part Number: BR3Z-6108-FC$69.97 MSRP: $102.30You Save: $32.33 (32%)Ships in 1-3 Business Days


Ford Mustang Piston
Part Number: BA5Z-6108-A$78.88 MSRP: $115.32You Save: $36.44 (32%)Ships in 1-2 Business Days

Ford Mustang Piston
Part Number: EJ7Z-6108-C$423.86 MSRP: $625.17You Save: $201.31 (33%)Ships in 1-3 Business Days
Ford Mustang Piston
Part Number: KR3Z-6108-B$223.01 MSRP: $341.00You Save: $117.99 (35%)Ships in 1-3 Business Days
Ford Mustang Piston
Part Number: EJ7Z-6108-E$423.86 MSRP: $625.17You Save: $201.31 (33%)Ships in 1-3 Business Days
Ford Mustang Piston And Pin Assembly
Part Number: 2L2Z-6108-AA$8.78 MSRP: $12.20You Save: $3.42 (29%)Ships in 1-2 Business Days
Ford Mustang Piston
Part Number: BA5Z-6108-M$75.99 MSRP: $178.38You Save: $102.39 (58%)Ships in 1-3 Business DaysFord Mustang Piston & Pin Assembly
Part Number: XL3Z6108FA$18.43 MSRP: $25.61You Save: $7.18 (29%)Ships in 1-2 Business Days
Ford Mustang Piston
Part Number: EJ7Z-6108-A$423.86 MSRP: $625.17You Save: $201.31 (33%)Ships in 1-3 Business DaysFord Mustang Piston
Part Number: BA5Z-6108-B$75.99 MSRP: $178.38You Save: $102.39 (58%)Ships in 1-3 Business Days
Ford Mustang Piston And Pin Assembly
Part Number: 2L2Z-6108-HA$25.49 MSRP: $35.41You Save: $9.92 (29%)Ships in 1-2 Business Days
Ford Mustang Piston & Pin Assembly
Part Number: F2ZZ6108DB$27.08 MSRP: $37.62You Save: $10.54 (29%)Ships in 1-2 Business DaysFord Mustang Piston And Pin Assembly
Part Number: GR3Z-6108-G$196.08 MSRP: $286.67You Save: $90.59 (32%)Ships in 1-3 Business DaysFord Mustang Piston
Part Number: GR3Z-6108-H$270.97 MSRP: $399.67You Save: $128.70 (33%)Ships in 1-3 Business Days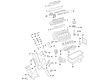
Ford Mustang Piston
Part Number: ML3Z-6108-F$216.28 MSRP: $319.00You Save: $102.72 (33%)Ships in 1-2 Business Days

| Page 1 of 5 |Next >
1-20 of 82 Results
Ford Mustang Piston
The Piston in the Ford Mustang vehicles is one of the vital parts of the internal combustion engine with the responsibility of converting combustion power into the energy required for the movement of the vehicle. In order to transfer such forces in relation to expanding gases to the crankshaft, the Ford Mustang Piston works majorly in the mechanics of performance enhancing of the entire car's engine. Generally made of aluminum for its reliability, durability and light weight, few racing versions are made of forged or billet. Several years and various modifications of Ford Mustang have used different sorts of pistons, trunk pistons for petrol and diesel engines which stabilise side forces and contain Oil Rings. Also, in high speed petrol engines slippers pistons are employed to improve balance and strength. The Racing pistons are unique as they are built to handle high RPM as the Ford Mustang line demonstrates many distinctive approaches to the designs in order to achieve performance and sturdiness.
We provide a wide range of Ford Mustang Piston at the optimal prices. If you need Ford Mustang Piston, you can shop with confidence on our website. All our OEM parts come with a manufacturer's warranty and are delivered to your doorstep with a fast delivery service.
Ford Mustang Piston Parts Questions & Experts Answers
- Q: How to remove and install piston/connecting rod assemblies on Ford Mustang?A:Before dismantling of the piston and connecting rod assemblies, the cylinder heads and oil pan have to be disconnected. There should also be checked any ridges at the highest point of ring travel with fingernail; these ridges should be eliminated by the use of a ridge reamer because the failure to do so may cause breaking of the piston. Upon removing the said ridges, position the engine in a way that the Crankshaft will be upwards then, take off the main bearing cap support brace. Examine the piston pin bore hole clearance by using feeler gauges, and compared the same with required specifications; if it exceeds it then new connecting rod may be required. Locate the connecting rods and the caps distinctly and thereafter, loosen evenly, the connecting rod cap bolts or nuts with the old bolts being used to measure clearance while the new bolts can be used to finally tighten the cap bolts.. To do this, carefully unbolt the screw for the connecting rod cap and bearing insert, followed by letting the connecting rod/Piston assembly to be extracted from the top Lateral opening of the engine. After the removal of the connecting rod assembly, replace the caps and bearing inserts that you have removed to the corresponding rods; it is advisable to retain the original inserts so that they will not suffer from mishandling. The pistons and connecting rods are now ready to have a look at and refurbish if necessary. Before fitting, new piston rings should be inspected with a view to measuring the ring end gaps as well as ensuring that the piston ring side clearance it right. The piston/connecting rod assemblies, and new rings are laid out in sets based on the intended installation. Place the top ring in the first cylinder so that it is in line with the cylinder wall, check the end-gap using feeler gauges. If the gap is too small then with extra caution use a file to increase the size of the ring ends. Do this for every ring and make sure of the right setting whereby the oil control ring comes first followed by the middle and the last one ought to have the right markings facing the correct direction. Cylinder Walls, The edges of it should be chamfered and with crank shaft in position before Piston/Connecting Rod Assemblies are fitted. Remove the old bearing inserts from the connecting rod small end and cap and do not apply lubricant to the new bearing insert before pressing them into place making sure that they fit properly. The gaps of the piston ring should lie around the piston, the piston and the ring need to be lubricated and the use of the piston ring compressor is made during this process. Place the piston/connecting rod assembly into the cylinder bore, ensuring that the 'weight designation' mark is aligned with the front of the engine and tap the piston gently into position while gently lowering the connecting rod onto the crankshaft journal. Place a Plastigage at the connecting rod bearing oil clearance, clean the surfaces if there is grease or assembly lube. Place the rod cap back in position and if its bolts where removed or nuts were loosened then replace them and tighten them to the recommended torque tightness. Perform the same process for other assemblies and please make sure that they are clean and faced the right way. Following installation, align the crankshaft and turn it over to fit and to check for any binding especially under the connecting rod journal and also check on the connecting rod end play and rectify it if necessary. Last, the main bearing cap support brace and bolt down tight to the adequate torque of the bolt is placed.

Related Ford Mustang Parts
 Ford Mustang Power Steering Pump
 Ford Mustang Piston Ring Set
 Ford Mustang PCV Valve
 Ford Mustang Power Steering Hose
 Ford Mustang Pilot Bearing
 Ford Mustang PCV Hose
 Ford Mustang PCV Valve Hose
 Ford Mustang PCV Valve Elbow
 Ford Mustang Pinion Bearing
 Ford Mustang Pinion Washer
 Ford Mustang Pressure Plate
 Ford Mustang Pushrod
Browse by Year
2025 Piston 2024 Piston 2023 Piston 2022 Piston 2021 Piston 2020 Piston 2019 Piston 2018 Piston 2017 Piston 2016 Piston 2015 Piston 2014 Piston 2013 Piston 2012 Piston 2011 Piston 2010 Piston 2009 Piston 2008 Piston 2007 Piston 2006 Piston 2005 Piston 2004 Piston 2003 Piston 2002 Piston 2001 Piston 2000 Piston 1999 Piston 1998 Piston 1997 Piston 1996 Piston 1995 Piston 1994 Piston 1993 Piston 1992 Piston 1991 Piston 1990 Piston 1989 Piston 1988 Piston 1987 Piston 1986 Piston 1985 Piston 1984 Piston 1983 Piston 1982 Piston