My Garage
My Account
Cart
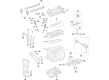
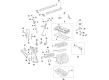
Genuine Ford Fusion Oil Pan
Oil Drain Pan- Select Vehicle by Model
- Select Vehicle by VIN
Select Vehicle by Model
orMake
Model
Year
Select Vehicle by VIN
For the most accurate results, select vehicle by your VIN (Vehicle Identification Number).
14 Oil Pans found


Ford Fusion Engine Oil Pan Assembly
Part Number: 7T4Z-6675-A$130.08 MSRP: $201.67You Save: $71.59 (36%)Ships in 1-3 Business Days


Ford Fusion Engine Oil Pan Assembly
Part Number: CP9Z-6675-A$117.04 MSRP: $180.95You Save: $63.91 (36%)Ships in 1 Business Day

Ford Fusion Engine Oil Pan Assembly
Part Number: CJ5Z-6675-B$183.70 MSRP: $278.33You Save: $94.63 (34%)Ships in 1-2 Business Days

Ford Fusion Engine Oil Pan Assembly
Part Number: CJ5Z-6675-A$183.70 MSRP: $278.33You Save: $94.63 (34%)Ships in 1-2 Business Days

Ford Fusion Engine Oil Pan Assembly
Part Number: DS7Z-6675-A$132.56 MSRP: $193.80You Save: $61.24 (32%)Ships in 1-3 Business Days


Ford Fusion Engine Oil Pan Assembly
Part Number: 9L8Z-6675-A$140.22 MSRP: $205.00You Save: $64.78 (32%)Ships in 1-2 Business Days


Ford Fusion Engine Oil Pan Assembly
Part Number: FT4Z-6675-C$132.24 MSRP: $193.33You Save: $61.09 (32%)


Ford Fusion Engine Oil Pan Assembly
Part Number: 8E5Z-6675-A$134.52 MSRP: $196.67You Save: $62.15 (32%)Ships in 1-3 Business Days


Ford Fusion Engine Oil Pan Assembly
Part Number: 6E5Z-6675-CA$140.22 MSRP: $205.00You Save: $64.78 (32%)Ships in 1-2 Business Days
Ford Fusion Engine Oil Pan Assembly
Part Number: CJ5Z-6675-G$187.88 MSRP: $278.33You Save: $90.45 (33%)Ships in 1-2 Business Days
Ford Fusion Engine Oil Pan Assembly
Part Number: CM5Z-6675-D$115.63 MSRP: $180.95You Save: $65.32 (37%)Ships in 1 Business DayFord Fusion Engine Oil Pan Assembly
Part Number: 9E5Z-6675-B$129.80 MSRP: $196.67You Save: $66.87 (34%)Ships in 1-3 Business Days
Ford Fusion Engine Oil Pan Assembly
Part Number: 6M8Z-6675-AB$130.42 MSRP: $190.67You Save: $60.25 (32%)Ships in 1-2 Business DaysFord Fusion Engine Oil Pan Assembly
Part Number: 9E5Z-6675-A$134.52 MSRP: $196.67You Save: $62.15 (32%)Ships in 1-3 Business Days
Ford Fusion Oil Pan
The Oil Pan in Ford Fusion cars is an important container that stores and supplies engine oil to make sure that all the parts of the engine are well lubricated and cool. The wet sump lubrication system commonly used by most Ford Fusion models includes the Oil Pan which gathers oil pulled by a pickup tube by the oil pump before it circulates through the engine then is returned into the pan. This design ensures there is constant supply of oil which is very crucial for efficient running of an engine. In earlier models Ford Fusion Oil Pans were mostly fabricated from stamped steel, however more contemporary improve and technological breakthroughs led to cast aluminum becoming more popular in many of the newer model cars. Although the basic role has not changed, the shift to the development of more advanced substrates can be attributed to the development in the design and engineering of the substrates to better suit the modern day road conditions. In general, the Oil Pan is used in Ford Fusion to lubricate the engine to prepare it for optimum performance and durability.
We provide a wide range of Ford Fusion Oil Pan at the optimal prices. If you need Ford Fusion Oil Pan, you can shop with confidence on our website. All our OEM parts come with a manufacturer's warranty and are delivered to your doorstep with a fast delivery service.
Ford Fusion Oil Pan Parts Questions & Experts Answers
- Q: How to remove and install the oil pan in four cylinder engine on Ford Fusion?A:To remove the oil pan, begin by raising the vehicle and securely supporting it on jackstands. For 1.5L and 1.6L engines, lift the engine cover off the ballstuds and remove it. Drain the engine oil and, for the same engine types, remove and discard the oil filter, then clean and install the engine oil drain plug. Next, remove the engine lower splash shield. For 2.0L models, take off the air conditioning compressor drive belt and remove the compressor mounting bolts, moving the compressor aside. On 1.5L engines, detach the charge air cooler coolant pump from the oil pan and remove the four oil pan-to-bellhousing bolts. For 2.0L, 2.3L, and 2.6L engines, remove the air filter housing and, if equipped with an automatic transaxle, take out the battery and battery tray. Slightly move the transaxle back from the engine while supporting the engine from above and the transaxle with a floor jack. Loosen the upper engine-to-transaxle mounting bolts and the left and right-side engine-to-bellhousing bolts. Remove the remaining oil pan-to-bellhousing bolts and the timing chain cover-to-oil pan fasteners, then pry between the engine and transaxle until the bellhousing separates from the block. Progressively unscrew the oil pan retaining bolts, using a rubber mallet to loosen the seal, and lower the oil pan carefully to avoid damage. For installation, clean and degrease the mating surfaces of the lower engine block and oil pan, applying a 1/8-inch wide bead of sealant to the oil pan flange. Install the oil pan bolts finger tight, then secure the timing chain cover-to-oil pan fasteners and tighten the oil pan-to-engine block bolts in a criss-cross pattern. Tighten the oil pan-to-bellhousing bolts and the transaxle to engine bolts evenly. Finally, lower the vehicle and allow the sealant to cure for at least 1 hour before refilling the engine with oil, trimming any excess sealant and installing a new oil filter.

Related Ford Fusion Parts
 Ford Fusion Oil Filter
 Ford Fusion Rod Bearing
 Ford Fusion Crankshaft Thrust Washer Set
 Ford Fusion Dipstick
 Ford Fusion Oil Pump
 Ford Fusion Drain Plug
 Ford Fusion Oil Cooler
 Ford Fusion Crankshaft Pulley
 Ford Fusion Oil Pressure Switch
 Ford Fusion Drain Plug Washer
 Ford Fusion Piston Ring Set
 Ford Fusion Dipstick Tube