My Garage
My Account
Cart
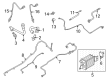
Genuine Ford F-150 Oxygen Sensors
Oxygen O2 Sensor- Select Vehicle by Model
- Select Vehicle by VIN
Select Vehicle by Model
orMake
Model
Year
Select Vehicle by VIN
For the most accurate results, select vehicle by your VIN (Vehicle Identification Number).
54 Oxygen Sensors found


Ford F-150 Sensor Assembly
Part Number: F85Z-9G444-BA$70.61 MSRP: $96.49You Save: $25.88 (27%)Ships in 1 Business Day


Ford F-150 Exhaust Gas Oxygen Sensor
Part Number: JL3Z-9G444-B$54.45 MSRP: $77.27You Save: $22.82 (30%)Ships in 1-2 Business Days

Ford F-150 Exhaust Gas Oxygen Sensor
Part Number: F85Z-9G444-F$70.61 MSRP: $96.49You Save: $25.88 (27%)Ships in 1 Business Day


Ford F-150 Exhaust Gas Oxygen Sensor
Part Number: 9L3Z-9G444-B$106.19 MSRP: $278.18You Save: $171.99 (62%)Ships in 1-2 Business Days


Ford F-150 Sensor - Hego
Part Number: 8F9Z-9F472-H$88.11 MSRP: $142.73You Save: $54.62 (39%)Ships in 1 Business Day


Ford F-150 Sensor - Hego
Part Number: E1GZ-9F472-B$148.16 MSRP: $240.00You Save: $91.84 (39%)Ships in 1 Business Day


Ford F-150 Sensor - Hego
Part Number: 8F9Z-9F472-G$86.32 MSRP: $139.82You Save: $53.50 (39%)Ships in 1 Business Day


Ford F-150 Sensor - Hego
Part Number: BL3Z-9F472-A$158.26 MSRP: $256.36You Save: $98.10 (39%)Ships in 1-2 Business Days


Ford F-150 Sensor - Hego
Part Number: F1FZ-9F472-A$90.01 MSRP: $145.82You Save: $55.81 (39%)Ships in 1 Business Day


Ford F-150 Exhaust Gas Oxygen Sensor
Part Number: BE5Z-9G444-A$82.39 MSRP: $133.45You Save: $51.06 (39%)Ships in 1 Business Day


Ford F-150 Sensor - Hego
Part Number: FR3Z-9F472-A$92.04 MSRP: $149.09You Save: $57.05 (39%)Ships in 1 Business Day


Ford F-150 Exhaust Gas Oxygen Sensor
Part Number: FL3Z-9G444-C$85.75 MSRP: $138.91You Save: $53.16 (39%)Ships in 1 Business Day


Ford F-150 Sensor - Hego
Part Number: 8F9Z-9F472-B$101.69 MSRP: $164.73You Save: $63.04 (39%)Ships in 1 Business Day


Ford F-150 Exhaust Gas Oxygen Sensor
Part Number: BL3Z-9G444-A$84.52 MSRP: $136.91You Save: $52.39 (39%)Ships in 1-2 Business Days


Ford F-150 Exhaust Gas Oxygen Sensor
Part Number: FL3Z-9G444-D$43.32 MSRP: $70.18You Save: $26.86 (39%)Ships in 1 Business Day

Ford F-150 Sensor - Hego
Part Number: FL3Z-9F472-A$60.05 MSRP: $97.27You Save: $37.22 (39%)Ships in 1 Business Day


Ford F-150 Sensor - Hego
Part Number: 8F9Z-9F472-D$134.69 MSRP: $218.18You Save: $83.49 (39%)Ships in 1 Business Day


Ford F-150 Exhaust Gas Oxygen Sensor
Part Number: 4L3Z-9G444-AA$50.17 MSRP: $81.27You Save: $31.10 (39%)Ships in 1 Business Day
Ford F-150 Exhaust Gas Oxygen Sensor
Part Number: ML3Z-9G444-A$68.25 MSRP: $110.55You Save: $42.30 (39%)Ships in 1-2 Business Days
| Page 1 of 3 |Next >
1-20 of 54 Results
Ford F-150 Oxygen Sensors
The Oxygen Sensors in the Ford F-150 is very important in ensuring that the levels of unburned oxygen in the engine exhaust are accurately measured to enable the right blend of air and fuel to be availed to the engine in order to reduce emissions. This form of sensor enables the engine control computer to be notified on the oxygen hole and the levels of the mixture that is either rich or lean so that the fuel injector time can be adjusted as required. Google search for this specific vehicle produced results that the Ford F-150 models incorporate Oxygen Sensorss that may be either narrow-band or wide-band zirconium dioxide. Narrow-band sensors supply switched rich/lean signals while the wide-band sensors supply a full range of air-fuel mixture. These sensors may also degrade with time thus leading to emission of more fuel and lower fuel consumption. It is recommended that the Oxygen Sensors of Ford F-150 vehicles be checked often and that it be serviced when needed so that it can perform well.
We provide a wide range of Ford F-150 Oxygen Sensors at the optimal prices. If you need Ford F-150 Oxygen Sensors, you can shop with confidence on our website. All our OEM parts come with a manufacturer's warranty and are delivered to your doorstep with a fast delivery service.
Ford F-150 Oxygen Sensors Parts Questions & Experts Answers
- Q: What is the general information and replacement procedure for servicing an oxygen sensors on the Ford F-150?A:When servicing an oxygen sensor, exercise special care as it has a permanently attached pigtail and electrical connector that cannot be removed; any damage to these components will ruin the sensor. Keep grease, dirt, and other contaminants away from the electrical connector and the louvered end of the sensor, and avoid using any cleaning solvents on it. Handle the sensor gently to prevent dropping or rough handling, and ensure the silicone boot is installed correctly to prevent melting and ensure proper operation. For replacement, note that an oxygen sensor may be difficult to loosen when the engine is cold due to contraction in the exhaust manifold or Catalytic Converter; running the engine briefly can help. Begin by disconnecting the cable from the negative battery terminal and securely raising the vehicle on jackstands. There are two upstream oxygen sensors located on the exhaust manifolds, and to disconnect one, trace the electrical lead to the connector, depress the release tab, and pull it off. Use a special oxygen sensor socket to unscrew the sensor, and after removal, clean the threads of the sensor bore. If reinstalling the old sensor, apply anti-seize compound to the threads; for a new sensor, this is unnecessary as they come pre-coated. Installation follows the reverse order of removal, ensuring the sensor is tightened to the specified torque. Similarly, for the two downstream oxygen sensors located on the catalytic converters or in the exhaust pipes, trace the electrical lead to the connector, disconnect it, and then unscrew the sensor. Clean the threads of the sensor bore after removal, apply anti-seize compound if reinstalling the old sensor, and remember that new sensors do not require this. Installation is again the reverse of removal, ensuring proper torque is applied.

Related Ford F-150 Parts
 Ford F-150 Camshaft Position Sensor
 Ford F-150 Throttle Position Sensor
 Ford F-150 Temperature Sender
 Ford F-150 Parking Assist Distance Sensor
 Ford F-150 Mass Air Flow Sensor
 Ford F-150 Vehicle Speed Sensor
 Ford F-150 MAP Sensor
 Ford F-150 Coolant Temperature Sensor
 Ford F-150 Crankshaft Position Sensor
 Ford F-150 Knock Sensor
 Ford F-150 Fuel Temperature Sensor
Browse by Year
2025 Oxygen Sensors 2024 Oxygen Sensors 2023 Oxygen Sensors 2022 Oxygen Sensors 2021 Oxygen Sensors 2020 Oxygen Sensors 2019 Oxygen Sensors 2018 Oxygen Sensors 2017 Oxygen Sensors 2016 Oxygen Sensors 2015 Oxygen Sensors 2014 Oxygen Sensors 2013 Oxygen Sensors 2012 Oxygen Sensors 2011 Oxygen Sensors 2010 Oxygen Sensors 2009 Oxygen Sensors 2008 Oxygen Sensors 2007 Oxygen Sensors 2006 Oxygen Sensors 2005 Oxygen Sensors 2004 Oxygen Sensors 2003 Oxygen Sensors 2002 Oxygen Sensors 2001 Oxygen Sensors 2000 Oxygen Sensors 1999 Oxygen Sensors 1998 Oxygen Sensors 1997 Oxygen Sensors 1996 Oxygen Sensors 1989 Oxygen Sensors 1988 Oxygen Sensors 1987 Oxygen Sensors