My Garage
My Account
Cart
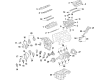
Genuine Ford F-150 Oil Pan
Oil Drain Pan- Select Vehicle by Model
- Select Vehicle by VIN
Select Vehicle by Model
orMake
Model
Year
Select Vehicle by VIN
For the most accurate results, select vehicle by your VIN (Vehicle Identification Number).
39 Oil Pans found


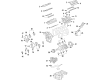
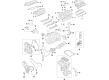
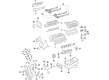
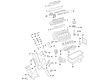
Ford F-150 Engine Oil Pan Assembly
Part Number: ML3Z-6675-D$147.32 MSRP: $191.67You Save: $44.35 (24%)Ships in 1-2 Business Days


Ford F-150 Engine Oil Pan Assembly
Part Number: 3L3Z-6675-CA$89.15 MSRP: $130.33You Save: $41.18 (32%)Ships in 1-3 Business Days


Ford F-150 Engine Oil Pan Assembly
Part Number: BR3Z-6675-P$147.32 MSRP: $191.67You Save: $44.35 (24%)
Ford F-150 Engine Oil Pan Assembly
Part Number: BR3Z-6675-B$147.32 MSRP: $191.67You Save: $44.35 (24%)

Ford F-150 Engine Oil Pan Assembly
Part Number: AL3Z-6675-A$117.50 MSRP: $181.67You Save: $64.17 (36%)Ships in 1-3 Business Days
Ford F-150 Engine Oil Pan Assembly
Part Number: BR3Z-6675-RA$147.32 MSRP: $191.67You Save: $44.35 (24%)

Ford F-150 Engine Oil Pan Assembly
Part Number: XL3Z-6675-DA$89.15 MSRP: $130.33You Save: $41.18 (32%)Ships in 1-3 Business Days

Ford F-150 Engine Oil Pan Assembly
Part Number: BL3Z-6675-A$80.01 MSRP: $116.97You Save: $36.96 (32%)Ships in 1-2 Business Days


Ford F-150 Engine Oil Pan Assembly
Part Number: 9L3Z-6675-B$115.32 MSRP: $171.60You Save: $56.28 (33%)Ships in 1-3 Business Days

Ford F-150 Engine Oil Pan Assembly
Part Number: HL3Z-6675-A$116.45 MSRP: $151.50You Save: $35.05 (24%)


Ford F-150 Engine Oil Pan Assembly
Part Number: BR3Z-6675-A$81.62 MSRP: $119.33You Save: $37.71 (32%)Ships in 1-2 Business Days


Ford F-150 Engine Oil Pan Assembly
Part Number: 9L3Z-6675-A$130.90 MSRP: $198.33You Save: $67.43 (34%)

Ford F-150 Engine Oil Pan Assembly
Part Number: FL3Z-6675-A$105.54 MSRP: $163.17You Save: $57.63 (36%)


Ford F-150 Engine Oil Pan Assembly
Part Number: XL1Z-6675-CA$185.99 MSRP: $258.37You Save: $72.38 (29%)Ships in 1-2 Business Days
Ford F-150 STIFFENER
Part Number: JL3Z-6K040-B$304.59 MSRP: $476.67You Save: $172.08 (37%)Ships in 1-3 Business Days
Ford F-150 Engine Oil Pan Assembly
Part Number: JR3Z-6675-E$213.93 MSRP: $278.33You Save: $64.40 (24%)
Ford F-150 Engine Oil Pan Assembly
Part Number: ML3Z-6675-C$132.92 MSRP: $194.33You Save: $61.41 (32%)Ships in 1-2 Business Days
Ford F-150 Engine Oil Pan Assembly
Part Number: JL3Z-6675-C$45.71 MSRP: $66.83You Save: $21.12 (32%)Ships in 1-3 Business Days

Ford F-150 Engine Oil Pan Assembly
Part Number: NR7Z-6675-B$771.68 MSRP: $1148.33You Save: $376.65 (33%)Ships in 1-2 Business Days
Ford F-150 Engine Oil Pan Assembly
Part Number: ML3Z-6675-J$139.08 MSRP: $203.33You Save: $64.25 (32%)Ships in 1-2 Business Days
| Page 1 of 2 |Next >
1-20 of 39 Results
Ford F-150 Oil Pan
The Oil Pan is used in Ford F-150 to hold the engine oil for provision adequate lubrication for moving parts in the car. For most of the F-150 models, there is the wet sump system that entails an oil pan below the engine where the oil pump draws the oil and circulates the same within the engine. This design aid in the proper continuous lubrication as well as cooling of components within the engine. Traditionally, F-150 oil pans were built with stamped steel, but progress has changed and cast aluminum is used on many of today's engines. It is possible to conclude that the evolution of the materials in this context increases durability and efficiency. As for the wet sump system, the oil pan geometry should be such that at any given driving conditions the oil cannot surge or be cut off from the pump. In general, the Ford F-150 oil pan plays a critical role in the vehicle's functioning and durability of the engine.
We provide a wide range of Ford F-150 Oil Pan at the optimal prices. If you need Ford F-150 Oil Pan, you can shop with confidence on our website. All our OEM parts come with a manufacturer's warranty and are delivered to your doorstep with a fast delivery service.
Ford F-150 Oil Pan Parts Questions & Experts Answers
- Q: How to remove and install the oil pan in V8 engine on Ford F-150?A:To remove the oil pan, first disconnect the cable from the negative battery terminal, then raise the vehicle and support it securely on jackstands. Drain the engine oil and remove the oil filter, followed by the skid plate if equipped, and the front crossmember. For 2010 and earlier 4WD models, remove the front axle assembly; for 2011 and later models, support the front differential with a floor jack, chain it to the jack, remove the front axle support bushing bolts, and lower the front axle while ensuring no vacuum lines or wiring are stretched. Next, remove the oil level dipstick, lower the front stabilizer bar if applicable, and disconnect any hoses or wiring harness attached to the oil pan rail. Remove the oil pan mounting bolts and carefully separate the oil pan from the engine block using a large rubber mallet or a wood block and hammer, avoiding prying to prevent damage. For installation, use a gasket scraper to remove old gasket material and sealant from the pan and engine block, taking care not to gouge surfaces. Clean the mating surfaces and apply RTV sealant to the corner seams where the rear seal retainer and front cover meet the engine block, ensuring to secure the oil pan within 5 minutes of applying the sealant. Position the oil pan against the engine block, install the bolts finger tight, check for gasket shifting, and then tighten the bolts in a spiral pattern starting from the center. The remainder of the installation follows the reverse order of removal. Allow at least 90 minutes for the RTV to dry before refilling the engine with oil and starting it, then check for oil leaks at the oil pan after driving the vehicle.

Related Ford F-150 Parts
 Ford F-150 Drain Plug
 Ford F-150 Oil Filter
 Ford F-150 Rod Bearing
 Ford F-150 Piston Ring Set
 Ford F-150 Crankshaft Thrust Washer Set
 Ford F-150 Dipstick Tube
 Ford F-150 Oil Cooler
 Ford F-150 Dipstick
 Ford F-150 Oil Pump
 Ford F-150 Oil Pressure Switch
 Ford F-150 Crankshaft Pulley
 Ford F-150 Drain Plug Washer
Browse by Year
2025 Oil Pan 2024 Oil Pan 2023 Oil Pan 2022 Oil Pan 2021 Oil Pan 2020 Oil Pan 2019 Oil Pan 2018 Oil Pan 2017 Oil Pan 2016 Oil Pan 2015 Oil Pan 2014 Oil Pan 2013 Oil Pan 2012 Oil Pan 2011 Oil Pan 2010 Oil Pan 2009 Oil Pan 2008 Oil Pan 2007 Oil Pan 2006 Oil Pan 2005 Oil Pan 2004 Oil Pan 2003 Oil Pan 2002 Oil Pan 2001 Oil Pan 2000 Oil Pan 1999 Oil Pan 1998 Oil Pan 1997 Oil Pan 1996 Oil Pan 1995 Oil Pan 1994 Oil Pan 1993 Oil Pan 1992 Oil Pan 1991 Oil Pan 1990 Oil Pan 1989 Oil Pan 1988 Oil Pan 1987 Oil Pan 1986 Oil Pan 1985 Oil Pan 1984 Oil Pan 1983 Oil Pan 1982 Oil Pan 1981 Oil Pan 1980 Oil Pan