My Garage
My Account
Cart
Genuine Ford F-150 Exhaust Manifold
Engine Exhaust Manifold- Select Vehicle by Model
- Select Vehicle by VIN
Select Vehicle by Model
orMake
Model
Year
Select Vehicle by VIN
For the most accurate results, select vehicle by your VIN (Vehicle Identification Number).
71 Exhaust Manifolds found


Ford F-150 Exhaust Manifold Assembly
Part Number: BC3Z-9431-DA$116.45 MSRP: $151.50You Save: $35.05 (24%)


Ford F-150 Exhaust Manifold Assembly
Part Number: BL3Z-9431-C$96.59 MSRP: $149.33You Save: $52.74 (36%)Ships in 1-3 Business Days


Ford F-150 Exhaust Manifold Assembly
Part Number: FL3Z-9430-B$164.48 MSRP: $255.00You Save: $90.52 (36%)Ships in 1-3 Business Days


Ford F-150 Exhaust Manifold Assembly
Part Number: BC3Z-9431-A$103.63 MSRP: $151.50You Save: $47.87 (32%)Ships in 1 Business Day

Ford F-150 Exhaust Manifold Assembly
Part Number: 7C2Z-9431-A$73.30 MSRP: $107.17You Save: $33.87 (32%)Ships in 1-3 Business Days

Ford F-150 Exhaust Manifold Assembly
Part Number: BL3Z-9431-A$96.59 MSRP: $149.33You Save: $52.74 (36%)Ships in 1-3 Business Days
Ford F-150 Exhaust Manifold Assembly
Part Number: BC3Z-9430-DA$103.63 MSRP: $151.50You Save: $47.87 (32%)


Ford F-150 Exhaust Manifold Assembly
Part Number: 7L1Z-9431-A$178.98 MSRP: $261.67You Save: $82.69 (32%)


Ford F-150 Exhaust Manifold Assembly
Part Number: BX2Z-9430-A$98.61 MSRP: $144.17You Save: $45.56 (32%)Ships in 1-2 Business Days

Ford F-150 Exhaust Manifold Assembly
Part Number: JL3Z-9431-C$184.68 MSRP: $270.00You Save: $85.32 (32%)Ships in 1-2 Business Days
Ford F-150 Exhaust Manifold Assembly
Part Number: JL3Z-9430-D$133.30 MSRP: $206.67You Save: $73.37 (36%)Ships in 1-3 Business Days
Ford F-150 Exhaust Manifold Assembly
Part Number: ML3Z-9430-A$392.11 MSRP: $578.33You Save: $186.22 (33%)Ships in 1-2 Business Days
Ford F-150 Exhaust Manifold Assembly
Part Number: F65Z-9430-A$38.99 MSRP: $53.28You Save: $14.29 (27%)Ford F-150 Exhaust Manifold Assembly
Part Number: FL3Z-9430-A$164.48 MSRP: $255.00You Save: $90.52 (36%)Ships in 1-3 Business DaysFord F-150 Exhaust Manifold Assembly
Part Number: JL7Z-9430-B$277.95 MSRP: $425.00You Save: $147.05 (35%)Ships in 1-3 Business DaysFord F-150 Exhaust Manifold Assembly
Part Number: JL7Z-9430-A$277.95 MSRP: $425.00You Save: $147.05 (35%)Ford F-150 Exhaust Manifold Assembly
Part Number: FL3Z-9431-A$175.56 MSRP: $256.67You Save: $81.11 (32%)Ships in 1-3 Business Days
Ford F-150 Exhaust Manifold Assembly
Part Number: JL3Z-9431-B$122.89 MSRP: $190.00You Save: $67.11 (36%)Ships in 1-3 Business Days


Ford F-150 Exhaust Manifold Assembly
Part Number: 4L1Z-9430-A$112.75 MSRP: $164.83You Save: $52.08 (32%)
| Page 1 of 4 |Next >
1-20 of 71 Results
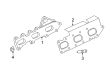
Ford F-150 Exhaust Manifold
The Ford F-150 Exhaust Manifold is vital in connecting cylinders of the engine so that the exhaust gases can be channeled through a single pipe so as to improve performance of the engine. The exhaust manifold failure results in underperformance and high noise when the studs, which fix the manifold, loosen up and develop cracks thus causing leaks and producing a ticking noise especially at light loads. Through the years, the Ford F-150 has had its exhaust manifolds in types such as cast iron and stainless steel while headers took over, claiming to have greater flow rate and lesser resistance. Further, thermal insulations including ceramic paint, ceramic coatings, and wraps have been used to some extent with different levels of efficiency and stability. Despite this, some headers can therefore increase the velocity of the exhaust gases and the efficiency of the engine, however, wrong insulation can cause the exhaust manifold to wear out way ahead of time.
We provide a wide range of Ford F-150 Exhaust Manifold at the optimal prices. If you need Ford F-150 Exhaust Manifold, you can shop with confidence on our website. All our OEM parts come with a manufacturer's warranty and are delivered to your doorstep with a fast delivery service.
Ford F-150 Exhaust Manifold Parts Questions & Experts Answers
- Q: How to remove and install an exhaust manifold in 3.5L and 3.7L V6 engine on Ford F-150?A:Disconnect the cable from the negative battery terminal. Loosen the wheel lug nuts on the side of the vehicle from which the exhaust manifold is to be removed, then raise the vehicle and support it securely on jackstands. Disconnect the oxygen sensor electrical connectors. Working under the vehicle, apply penetrating oil to the exhaust Y-pipe-to-manifold (or Turbocharger) studs and nuts, as they are usually rusty. Remove the nuts holding the exhaust Y-pipe to the exhaust manifolds or turbochargers, and from below, remove the two exhaust Y-pipe-to-manifold nuts. Remove the wheel and the inner fender liner. For 3.5L engines, remove the turbocharger and then remove the two bolts to take off the exhaust manifold heat shield. Remove the manifold mounting nuts and detach the manifold from the Cylinder Head, noting that the manufacturer recommends removing the exhaust manifold mounting studs from the cylinder heads and installing new studs. Remove the exhaust gaskets and clean the gasket surfaces on the manifold and cylinder heads. Check the exhaust manifold for cracks and ensure all the stud threads are clean and undamaged, as the mating surfaces must be clean before reinstalling the manifolds. Position the exhaust manifold and new gasket over the studs on the cylinder head and install the mounting nuts. When tightening the nuts, tighten the center pair first, then the front pair, and finally the rear pair, to the specified torque. The remaining installation steps are the reverse of removal. Start the engine and check for exhaust leaks.

Related Ford F-150 Parts
 Ford F-150 Emblem
 Ford F-150 EGR Valve
 Ford F-150 Door Handle
 Ford F-150 Headlight
 Ford F-150 Seat Belt
 Ford F-150 Catalytic Converter
 Ford F-150 Window Regulator
 Ford F-150 Bumper
 Ford F-150 Door Check
 Ford F-150 Lift Support
 Ford F-150 Clock Spring
 Ford F-150 Spare Wheel
Browse by Year
2025 Exhaust Manifold 2024 Exhaust Manifold 2023 Exhaust Manifold 2022 Exhaust Manifold 2021 Exhaust Manifold 2020 Exhaust Manifold 2019 Exhaust Manifold 2018 Exhaust Manifold 2017 Exhaust Manifold 2016 Exhaust Manifold 2015 Exhaust Manifold 2014 Exhaust Manifold 2013 Exhaust Manifold 2012 Exhaust Manifold 2011 Exhaust Manifold 2010 Exhaust Manifold 2009 Exhaust Manifold 2008 Exhaust Manifold 2007 Exhaust Manifold 2006 Exhaust Manifold 2005 Exhaust Manifold 2004 Exhaust Manifold 2003 Exhaust Manifold 2002 Exhaust Manifold 2001 Exhaust Manifold 2000 Exhaust Manifold 1999 Exhaust Manifold 1998 Exhaust Manifold 1997 Exhaust Manifold 1996 Exhaust Manifold 1995 Exhaust Manifold 1994 Exhaust Manifold 1993 Exhaust Manifold 1992 Exhaust Manifold 1991 Exhaust Manifold 1990 Exhaust Manifold 1989 Exhaust Manifold 1988 Exhaust Manifold 1987 Exhaust Manifold 1986 Exhaust Manifold 1985 Exhaust Manifold 1984 Exhaust Manifold 1983 Exhaust Manifold 1982 Exhaust Manifold 1981 Exhaust Manifold