My Garage
My Account
Cart
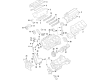
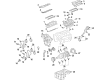
Genuine Ford Explorer Crankshaft
Crank Shaft- Select Vehicle by Model
- Select Vehicle by VIN
Select Vehicle by Model
orMake
Model
Year
Select Vehicle by VIN
For the most accurate results, select vehicle by your VIN (Vehicle Identification Number).
26 Crankshafts found


Ford Explorer Crankshaft Assembly
Part Number: AG9Z-6303-A$643.72 MSRP: $1026.67You Save: $382.95 (38%)Ships in 1-3 Business Days

Ford Explorer Crankshaft Assembly
Part Number: 5L2Z-6303-AA$306.00 MSRP: $425.09You Save: $119.09 (29%)Ships in 1-2 Business Days

Ford Explorer Crankshaft Assembly
Part Number: HR3Z-6303-F$263.29 MSRP: $388.33You Save: $125.04 (33%)

Ford Explorer Crankshaft Assembly
Part Number: HL3Z-6303-A$253.12 MSRP: $373.33You Save: $120.21 (33%)Ships in 1-3 Business Days
Ford Explorer Crankshaft Assembly
Part Number: HR3Z-6303-B$263.29 MSRP: $388.33You Save: $125.04 (33%)
Ford Explorer Crankshaft Assembly
Part Number: FB5Z-6303-A$219.22 MSRP: $323.33You Save: $104.11 (33%)
Ford Explorer Crankshaft Assembly
Part Number: XL2Z-6303-AA$216.96 MSRP: $320.00You Save: $103.04 (33%)
Ford Explorer Crankshaft Assembly
Part Number: F7TZ-6303-AC$216.96 MSRP: $320.00You Save: $103.04 (33%)
Ford Explorer Crankshaft Assembly
Part Number: L1MZ-6303-D$198.36 MSRP: $290.00You Save: $91.64 (32%)Ships in 1-3 Business DaysFord Explorer Crankshaft Assembly
Part Number: HL3Z-6303-C$255.38 MSRP: $376.67You Save: $121.29 (33%)Ships in 1-3 Business Days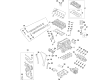
Ford Explorer Crankshaft Assembly
Part Number: PB5Z-6303-A$349.17 MSRP: $515.00You Save: $165.83 (33%)Ships in 1-2 Business Days


Ford Explorer Crankshaft Assembly
Part Number: 2C5Z-6303-BA$292.11 MSRP: $430.83You Save: $138.72 (33%)

Ford Explorer Crankshaft Assembly
Part Number: 2C5Z-6303-AA$292.11 MSRP: $430.83You Save: $138.72 (33%)Ford Explorer Crankshaft Assembly
Part Number: LB5Z-6303-B$319.79 MSRP: $471.67You Save: $151.88 (33%)

| Page 1 of 2 |Next >
1-20 of 26 Results
Ford Explorer Crankshaft
The actions of your Ford Explorer Crankshaft are similar in nature to that of the engine's bearings. It transforms the up and down motion of the pistons into smooth rotational motion. This rotational motion is what's sent to the transmission, axle shafts, and wheels. This component is fabricated for the life of the SUV. It rotates on its axis inside the cylinder block. The connecting rods fastened to offset throws enable motion conversion. Ford has historically applied a cast iron Crankshaft for low output engines in its lineup because of its cost and adequate strength. On the other hand, high horsepower versions come with a forged steel Crankshaft that can cope with more stress. Both variants are located deep within the block and maintained in oil to prevent metal to metal contact. Oil changes on any Ford Explorer should not be neglected as dirt can cut down flow and cause journals to be scored, leading to knock or a harsh vibration which warns that failure is on its way or close. If damage occurs, the Explorer Crankshaft must be replaced with the engine out. Main bearing caps are numbered, new bearings coated with moly grease added, and subsequently held down to measured torque. The engine block is then rotated to check free spin before refitting to the chassis. Regular maintenance ensures a precise and balanced Crankshaft for every Ford Explorer, keeping the vehicle ready to hit the road.
We provide a wide range of Ford Explorer Crankshaft at the optimal prices. If you need Ford Explorer Crankshaft, you can shop with confidence on our website. All our OEM parts come with a manufacturer's warranty and are delivered to your doorstep with a fast delivery service.
Ford Explorer Crankshaft Parts Questions & Experts Answers
- Q: How to properly inspect and prepare a crankshaft for reassembly on Ford Explorer?A:Remove all burrs from the crankshaft oil holes using a stone, file, or scraper to ensure the oil holes are chamfered, preventing sharp edges from gouging or scratching the new bearings. Clean the crankshaft with solvent and dry it with compressed air if available, ensuring to clean the oil holes with a stiff brush and flush them with solvent. Check the main and connecting rod bearing journals for uneven wear, scoring, pits, and cracks, and inspect the rest of the crankshaft for cracks and other damage, which should be magnafluxed by an automotive machine shop to reveal hidden issues. Measure the diameter of the main and connecting rod journals with a micrometer, comparing the results to the specified limits, and check for taper and out-of-round conditions by measuring at several points around each journal's circumference, including each end near the crank throws. If the journals are damaged, tapered, out-of-round, or worn beyond the specified limits, have the crankshaft reground by an automotive machine shop, ensuring the correct size bearing inserts are used if reconditioned. Inspect the oil seal journals at each end of the crankshaft for wear and damage; if grooves, nicks, or scratches are present, the new seal may leak upon reassembly, and an automotive machine shop may be able to repair the journal with a thin sleeve, or a new or different crankshaft may need to be installed if repair isn't feasible. Finally, examine the main and rod bearing inserts.

Related Ford Explorer Parts
 Ford Explorer Rod Bearing
 Ford Explorer Piston Ring Set
 Ford Explorer Crankshaft Thrust Washer Set
 Ford Explorer Oil Pump Gasket
 Ford Explorer Crankshaft Pulley
 Ford Explorer Crankshaft Gear
 Ford Explorer Oil Pump
 Ford Explorer Oil Pan
 Ford Explorer Cam Gear
 Ford Explorer Camshaft
 Ford Explorer Oil Pan Gasket
Browse by Year
2025 Crankshaft 2024 Crankshaft 2023 Crankshaft 2022 Crankshaft 2021 Crankshaft 2020 Crankshaft 2019 Crankshaft 2018 Crankshaft 2017 Crankshaft 2016 Crankshaft 2015 Crankshaft 2014 Crankshaft 2013 Crankshaft 2012 Crankshaft 2011 Crankshaft 2010 Crankshaft 2009 Crankshaft 2008 Crankshaft 2007 Crankshaft 2006 Crankshaft 2005 Crankshaft 2004 Crankshaft 2003 Crankshaft 2002 Crankshaft 2001 Crankshaft 2000 Crankshaft 1999 Crankshaft 1998 Crankshaft 1997 Crankshaft 1996 Crankshaft 1995 Crankshaft 1994 Crankshaft 1993 Crankshaft 1992 Crankshaft 1991 Crankshaft