My Garage
My Account
Cart
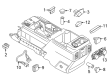
Genuine Ford Expedition Transfer Case
Speed Transfer Case- Select Vehicle by Model
- Select Vehicle by VIN
Select Vehicle by Model
orMake
Model
Year
Select Vehicle by VIN
For the most accurate results, select vehicle by your VIN (Vehicle Identification Number).
61 Transfer Cases found


Ford Expedition Transmission Case Assembly
Part Number: FL3Z-7005-M$644.34 MSRP: $885.08You Save: $240.74 (28%)Ships in 1-3 Business Days

Ford Expedition Transmission Case Assembly
Part Number: 8L1Z-7005-AA$683.76 MSRP: $939.23You Save: $255.47 (28%)Ships in 1-3 Business Days


Ford Expedition Transmission Extension Housing
Part Number: F3LY-7A039-A$293.35 MSRP: $432.67You Save: $139.32 (33%)


Ford Expedition Transfer Case Assembly
Part Number: CL3Z-7A195-D$1632.96 MSRP: $2243.08You Save: $610.12 (28%)Ships in 1-3 Business Days


Ford Expedition Case Assembly-Transmission
Part Number: FL3Z-7005-C$1083.04 MSRP: $1487.69You Save: $404.65 (28%)

Ford Expedition Transmission Extension Housing
Part Number: F81Z-7A039-JA$289.46 MSRP: $402.11You Save: $112.65 (29%)Ships in 1-2 Business Days


Ford Expedition Transmission Case Assembly
Part Number: 8L1Z-7005-BA$676.37 MSRP: $929.08You Save: $252.71 (28%)
Ford Expedition Transfer Case Assembly
Part Number: JL1Z-7A195-C$2033.92 MSRP: $2793.85You Save: $759.93 (28%)Ships in 1-3 Business DaysFord Expedition Transfer Case Assembly
Part Number: JL1Z-7A195-B$2033.92 MSRP: $2793.85You Save: $759.93 (28%)
Ford Expedition Transmission Case Assembly
Part Number: GL3Z-7005-A$763.84 MSRP: $1049.23You Save: $285.39 (28%)Ships in 1-3 Business DaysFord Expedition Transmission Case Assembly
Part Number: 7L1Z-7005-B$683.76 MSRP: $939.23You Save: $255.47 (28%)Ships in 1-3 Business Days
Ford Expedition Transmission Case Assembly
Part Number: FL3Z-7005-A$2683.52 MSRP: $3686.15You Save: $1002.63 (28%)Ships in 1-3 Business DaysFord Expedition Transmission Case Assembly
Part Number: FL3Z-7005-B$2683.52 MSRP: $3686.15You Save: $1002.63 (28%)Ships in 1-3 Business Days
Ford Expedition Transfer Case Assembly
Part Number: CL3Z-7A195-B$1632.96 MSRP: $2243.08You Save: $610.12 (28%)Ships in 1-3 Business DaysFord Expedition Transfer Case Assembly
Part Number: CL3Z-7A195-BA$1632.96 MSRP: $2243.08You Save: $610.12 (28%)Ships in 1-3 Business DaysFord Expedition Transmission Case Assembly
Part Number: BL3Z-7005-C$693.62 MSRP: $952.77You Save: $259.15 (28%)Ships in 1-3 Business DaysFord Expedition Transmission Case Assembly
Part Number: 7L1Z-7005-A$676.37 MSRP: $929.08You Save: $252.71 (28%)Ships in 1-3 Business Days
Ford Expedition Transmission Case Assembly
Part Number: BL3Z-7005-K$866.10 MSRP: $1189.69You Save: $323.59 (28%)Ships in 1-3 Business DaysFord Expedition Transmission Case Assembly
Part Number: BL3Z-7005-G$866.10 MSRP: $1189.69You Save: $323.59 (28%)Ships in 1-3 Business Days
| Page 1 of 4 |Next >
1-20 of 61 Results
Ford Expedition Transfer Case
The Ford Expedition Transfer Case transmits engine torque to both the axles, allowing the SUV to effortlessly transfer from paved roads to rugged trails. The Ford Expedition Transfer Case was a part-time affair for early models, allowing you to select 2WD for dry pavement. If the weather turned unfavorable, 4WD High or Low could get you through the muck and mud, snow, or a slow rock crawl via a lever that linked directly to the unit's gears or chain. Subsequent versions of the Expedition featured a selector mounted on the dash and a motor inside the Transfer Case. This enabled quicker mode changes at low speeds, although a complete stop was still necessary for Low range. The full-time and AWD models appeared, each of which added a center differential or viscous coupling in the Transfer Case so the front and rear shafts could spin at differing rates and avoid driveline bind when cruising. Today's Ford owners appreciate the mixture of durability and adaptability. Therefore, the massive Ford Expedition is always kept prepped for work or adventure. Moreover, Ford is constantly refining the technology of its drivetrains so that every Expedition gets a dependable Transfer Case.
We provide a wide range of Ford Expedition Transfer Case at the optimal prices. If you need Ford Expedition Transfer Case, you can shop with confidence on our website. All our OEM parts come with a manufacturer's warranty and are delivered to your doorstep with a fast delivery service.
Ford Expedition Transfer Case Parts Questions & Experts Answers
- Q: How to remove and install the transfer case on Ford Expedition?A:If the vehicle is equipped with air suspension, turn off the air suspension system using the switch located in the area of the right kick panel. Raise the vehicle and support it securely on jackstands. Remove the transfer skid plate bolts, then take off the skid plate. Drain the transfer case lubricant. Remove the front driveshaft shield, followed by the front and rear driveshafts. Take out the torsion bars and the rear torsion bar support. For manual shift vehicles, disconnect the shift rod. Unplug the electrical connector from the vehicle speed sensor, and for manual-shift vehicles, also unplug the electrical connector from the 4WD indicator switch and the transfer case coil. For electric-shift vehicles, unplug the electric shift motor connector. Support the transfer case with a jack, preferably a special jack designed for this purpose, using safety chains or tie-downs to steady it. Remove the transfer case-to-transmission bolts. Make a final check to ensure all wires and hoses have been disconnected from the transfer case, then move the transfer case and jack toward the rear of the vehicle until the transfer case is clear of the transmission, keeping it level during this process. Once the input shaft is clear, lower the transfer case and remove it from underneath. Installation is the reverse of removal, ensuring to tighten the transmission-to-transfer case bolts to the specified torque.

Related Ford Expedition Parts
 Ford Expedition Transfer Case Seal
 Ford Expedition Transfer Case Shim
 Ford Expedition Input Shaft Bearing
 Ford Expedition Output Shaft Bearing
 Ford Expedition Transfer Case Output Shaft Snap Ring
Browse by Year
2024 Transfer Case 2023 Transfer Case 2022 Transfer Case 2021 Transfer Case 2020 Transfer Case 2019 Transfer Case 2018 Transfer Case 2017 Transfer Case 2016 Transfer Case 2015 Transfer Case 2014 Transfer Case 2013 Transfer Case 2012 Transfer Case 2011 Transfer Case 2010 Transfer Case 2009 Transfer Case 2008 Transfer Case 2007 Transfer Case 2006 Transfer Case 2005 Transfer Case 2004 Transfer Case 2003 Transfer Case 2002 Transfer Case 2001 Transfer Case 2000 Transfer Case 1999 Transfer Case 1998 Transfer Case 1997 Transfer Case