
My Garage
My Account
Cart
Genuine Ford Excursion Fuel Tank
Gas Tank- Select Vehicle by Model
- Select Vehicle by VIN
Select Vehicle by Model
orMake
Model
Year
Select Vehicle by VIN
For the most accurate results, select vehicle by your VIN (Vehicle Identification Number).
6 Fuel Tanks found
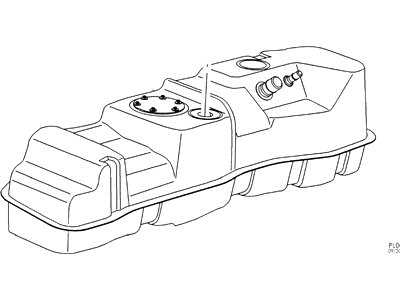
Ford Excursion Fuel Tank
Fuel tank of Ford Excursion vehicles are responsible to store fuel and to supply it to the engine in correct amounts when needed. It commonly contains objects like the electric fuel pump and fuel gauge sender, also, the fuel tank incorporates baffles so as to reduce noise and inadequate fuel movement. This component is also well used in the Evaporative Emission Control System (EVAP) that is used to minimize the emission of fuel vapor. Fuel tanks used in Ford Excursion are available in metallic and non-metallic type where metallic tanks are made from steel stamps and welded whereas the non-metallic tanks are made from HDPE. Each type has its strength and weaknesses, for instance metal tank can corrode and rust, on the other hand plastic tank can crack under vise conditions. Fuel tanks for Ford Excursion can include used products which are fit for the car and built to proper standards that are required for the vehicle.
We provide a wide range of Ford Excursion Fuel Tank at the best prices possible. If you need Ford Excursion Fuel Tank, you can shop with confidence on our website. All our OEM parts come with a manufacturer's warranty and are delivered to your door step with a fast delivery service.
Ford Excursion Fuel Tank Parts Questions & Experts Answers
- Q: What steps should be followed to safely remove a fuel tank on Ford Excursion?A:Before starting the procedure, ensure the gauge indicates that the tank is empty or nearly empty. If removal is necessary when the tank is full, siphon any remaining fuel into an approved container. First, relieve the fuel system pressure based on the vehicle type. Remove the fuel filler cap to relieve tank pressure, then disconnect the negative battery cable. If the tank is full, siphon the fuel. Raise the vehicle securely on jackstands. The fuel tank's location may vary depending on the model. Remove the fuel tank skid plate mounting bolts and lower the assembly. Detach the fuel tank filler hose and vapor hose from the filler neck and tank, and separate the splash panel from the fenderwell. Use a floor jack to support the tank, then disconnect the fuel lines and EVAP vapor lines, ensuring to disconnect the fuel tank pressure sensor if equipped. Disconnect the electric Fuel Pump and sending unit electrical connector, which may require lowering the tank slightly for access. Remove the bolts retaining the fuel tank straps, and for diesel auxiliary tanks, remove the cover strap bolts and drop the tank and straps as a complete assembly. Lower the tank enough to unplug any vapor lines or wire harness brackets that are hard to reach. Slowly lower the jack while steadying the tank and remove it from the vehicle. If replacing the tank or having it cleaned or repaired, follow the appropriate procedures. To install, reverse the removal steps, using clean engine oil as an assembly aid for the fuel filler neck. Ensure any heat shields are correctly assembled onto the tank before reinstalling it, and carefully angle the filler neck into the filler pipe assembly while lifting the tank into place.


