My Garage
My Account
Cart
Genuine Ford Edge Hood
Engine Hood- Select Vehicle by Model
- Select Vehicle by VIN
Select Vehicle by Model
orMake
Model
Year
Select Vehicle by VIN
For the most accurate results, select vehicle by your VIN (Vehicle Identification Number).
6 Hoods found


Ford Edge Hood Assembly
Part Number: CT4Z-16612-A$678.53 MSRP: $1082.18You Save: $403.65 (38%)Ships in 1-2 Business Days
Ford Edge Hood Assembly
Part Number: 7T4Z-16612-A$625.61 MSRP: $997.78You Save: $372.17 (38%)Ships in 1-2 Business DaysFord Edge Hood Assembly
Part Number: BT4Z-16612-A$678.53 MSRP: $1082.18You Save: $403.65 (38%)Ships in 1-2 Business Days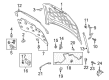
Ford Edge Hood Assembly
Part Number: KT4Z-16612-B$724.33 MSRP: $1077.87You Save: $353.54 (33%)Ships in 1-2 Business Days
Ford Edge Hood
The Ford Edge Hood protects the SUV's powertrain against rain, snow, hail, and gravel while allowing owners quick access to check up on the components underneath. The early Ford models comprised a basic steel Hood panel assembled with a supporting frame, latch, and prop rod for manual lifting, which was a good weight, strength, and cost compromise. Later versions of Edge received aluminum skins that are lighter than the earlier ones and incorporated gas struts to allow for a smooth rise and hold of the Hood without the old rod while making servicing a piece of cake. Throughout the years, drainage channels molded along the underside work to redirect moisture and discharge away from sensitive wiring while a wrap-around lip fits tightly on a rubber seal to prevent moisture ingress. Designers applied the broad surface for the signature Edge frontal character line so the Hood does double duty as a weather barrier and style piece. It is very important to keep the panel straight and free from rust, as damage will cause gaps that will let harmful substances get into the engine. Routine assessments help to keep any Ford operating well as a sound Hood helps every Ford Edge remain on the ready.
We provide a wide range of Ford Edge Hood at the optimal prices. If you need Ford Edge Hood, you can shop with confidence on our website. All our OEM parts come with a manufacturer's warranty and are delivered to your doorstep with a fast delivery service.
Ford Edge Hood Parts Questions & Experts Answers
- Q: How to remove and install the hood on Ford Edge?A:The hood is awkward to remove and install, so at least two people should perform this procedure. Begin by opening the hood and placing blankets or pads over the fenders and cowl area to protect the body and paint. Make marks around the hood hinge for proper alignment during reinstallation. If equipped, disconnect the windshield wiper hose connection and hose retaining clip from the hood. Use a small screwdriver to detach the retaining clips at both ends of the support strut, then pry or pull sharply to detach it from the vehicle. Have an assistant support one side of the hood while you grasp the lower corner and brace it with your shoulder, taking turns to remove the hinge-to-hood bolts and lift off the hood. For installation, align the hinge bolts with the marks made earlier. Fore-and-aft and side-to-side adjustments can be made by moving the hinges after loosening the hinge-to-body bolts; adjust the hood gradually and tighten the bolts before checking the position. The hood can also be adjusted vertically using the two height adjustment cushions on the underside, turning them clockwise to lower or counterclockwise to raise the hood. Periodically lubricate the Hood Latch assembly and hinges with white lithium-base grease to prevent binding and wear. To remove and install the hood support struts, open the hood and support it securely, then detach the retaining clips at both ends of the support strut and pry or pull sharply to detach it from the ballstuds, with installation being the reverse of removal.


