

My Garage
My Account
Cart
Genuine 1994 Ford Ranger Oil Pan
Oil Drain Pan- Select Vehicle by Model
- Select Vehicle by VIN
Select Vehicle by Model
orMake
Model
Year
Select Vehicle by VIN
For the most accurate results, select vehicle by your VIN (Vehicle Identification Number).
4 Oil Pans found

 Product Specifications
- Other Name: Pan Assy - Engine Oil; Oil Pan
- Manufacturer Note: W/ low oil sensor
- Base No.: 6675
- Item Weight: 11.70 Pounds
- Item Dimensions: 9.2 x 10.2 x 18.4 inches
- Condition: New
- Fitment Type: Direct Replacement
- SKU: F59Z-6675-A
- Warranty: This genuine part is guaranteed by Ford's factory warranty.
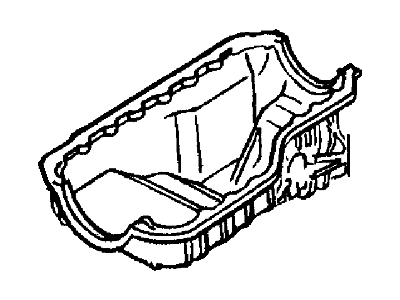 Product Specifications
- Other Name: Pan Assy - Engine Oil; Oil Pan
- Manufacturer Note: W/O low oil level sender, OHV
- Base No.: 6675
- Item Weight: 10.00 Pounds
- Item Dimensions: 8.2 x 12.0 x 20.3 inches
- Condition: New
- Fitment Type: Direct Replacement
- SKU: F5TZ-6675-B
- Warranty: This genuine part is guaranteed by Ford's factory warranty.
- Product Specifications
- Other Name: Pan Assy - Engine Oil; Oil Pan
- Item Weight: 11.80 Pounds
- Item Dimensions: 21.2 x 13.5 x 9.3 inches
- Condition: New
- Fitment Type: Direct Replacement
- SKU: F4TZ6675B
- Warranty: This genuine part is guaranteed by Ford's factory warranty.
 Product Specifications
- Other Name: Pan Assy - Engine Oil; Oil Pan
- Base No.: 6675
- Item Weight: 7.80 Pounds
- Item Dimensions: 24.9 x 16.5 x 13.0 inches
- Condition: New
- Fitment Type: Direct Replacement
- SKU: F37Z-6675-A
- Warranty: This genuine part is guaranteed by Ford's factory warranty.
1994 Ford Ranger Oil Pan
At FordPartsGiant.com, you will find an extensive inventory of genuine 1994 Ford Ranger Oil Pan offered at competitive prices online. These manufacturer-backed OEM 1994 Ford Ranger Oil Pan ensure your satisfaction with their quality and come with a hassle-free return policy and expedited delivery service, guaranteeing a delightful shopping experience.
1994 Ford Ranger Oil Pan Parts Questions & Experts Answers
- Q:How to remove the oil pan in DOHC four cylinder engine on 1994 Ford Ranger?Posted by Logan Z.A:It is necessary to pull out the engine in order to remove the oil pan on this engine, though in some 2006 and later-model trucks, you can accomplish this by disconnecting the left-side engine shock and lifting the engine just enough to take the weight off the right-side motor mount. The process begins by removing the engine oil and then washing the oil drain plug, and making a mental reminder to replace the oil filter before filling the engine with the oil. In case of stream IV, for the 2011 models, it is recommended that the cooling fan be taken off. Next remove the engine oil dipstick, the bolts that hold the dipstick tube and if the tube was not removed during the process you also remove the tube. All oil pan bolts should be unbolted and all electronics harnesses that hinder its removal should be disconnected; additional the author suggests loosening the transmission to block bolts a little in order to ease out the whole process. It is best to lift the oil pan by flexing at the casting protrusions to avoid damaging the mating surfaces, as there is no gasket between the oil pan and the engine block and they are bolted together with sealant. For installation, the oil pan together with the mating surfaces of the engine block and the bolts must be clean and free from sealant and oil. After all equipment is cleaned, spread a 2.5 mm thick layer of sealant to the oil pan, and the oil pan must be assembled to the engine block within 4 minutes so that you don't have to apply sealant again. Tighten all the bolts to manufacturers recommended torque and in the correct manner then fit the dipstick tube and dipstick making sure that on the ring gasket you apply some clean engine oil. Last but not the least replace the engine, add oil to the crank case and fit a new oil filter.Answered by Ford Parts Specialist John / Aug 23, 2025
Related 1994 Ford Ranger Parts
 1994 Ford Ranger Oil Filter
 1994 Ford Ranger Drain Plug
 1994 Ford Ranger Dipstick Tube
 1994 Ford Ranger Crankshaft Pulley
 1994 Ford Ranger Oil Cooler
 1994 Ford Ranger Oil Pressure Switch
 1994 Ford Ranger Oil Pump
 1994 Ford Ranger Rod Bearing
 1994 Ford Ranger Crankshaft Thrust Washer Set