Make sure this part fits

Ford 9L8Z-3A329-B Shaft

2009-2012 Ford 9L8Z3A329B

Customer Questions & Expert Answers (3)
9L8Z-3A329-B Ford Shaft Product Photo 1 of 5
  • Part Description
    Shaft
  • Base No.
    3B414A
  • Manufacturer
    Ford
Make sure this part fits
$248.60 MSRP: $366.67
You Save: $118.07 (33%)
1
ADD TO CART
  • Related Parts
  • Specifications
  • Fitment
  • Q&A
  • Product Specifications

    BrandGenuine Ford
    Base No.3B414A
    Manufacturer Part Number9L8Z-3A329-B, 9L8Z3A329B
    Part DescriptionShaft
    Other NamesIntermed Shaft, Intermediate Shaft
    Item Dimensions21.6 x 6.3 x 4.2 inches
    Item Weight6.50 Pounds
    ConditionNew
    Fitment TypeDirect Replacement
    ManufacturerFord
    SKU9L8Z-3A329-B
    WarrantyThis genuine Ford part is guaranteed by Ford's factory warranty.
    Shipping & ReturnShipping Policy Return Policy
    Warning: California's Proposition 65
  • Vehicle Fitment

    Year Make Model Engine Important vehicle option details
    2009-2012 Ford Escape4 Cyl 2.5L Duratec (110kW/150PS), 4 Cyl 2.5L PFI Gas/Electric, 6 Cyl 3.0L OHC Duratec6-Speed Automatic Transmission 6F Mid-Range, Four-Wheel Drive (Full Time) (Left Hand Drive), Left Hand Drive
    2009-2011 Mercury Mariner4 Cyl 2.5L Duratec (110kW/150PS), 4 Cyl 2.5L PFI Gas/Electric, 6 Cyl 3.0L OHC Duratec6-Speed Automatic Transmission 6F Mid-Range, Four-Wheel Drive (Full Time) (Left Hand Drive), Left Hand Drive
  • Customer Questions & Expert Answers

    Q:
    I would like to know is this part gonna fit with my car Posted by FordPartsGiant Specialist
    A:
    You can Select Your Vehicle to check if 9L8Z-3A329-B fits your vehicle.
    Posted by FordPartsGiant Specialist
    Q:
    How to remove the front axle shaft from the drive axle/hub assembly on Mercury Mariner? Posted by Customer
    A:
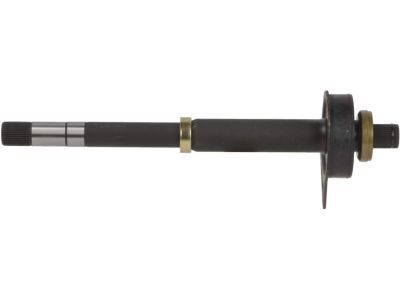
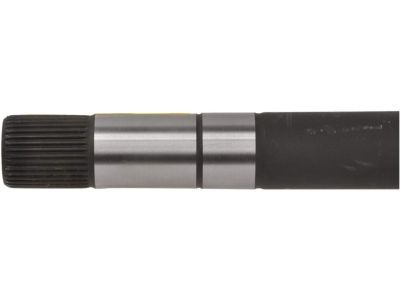
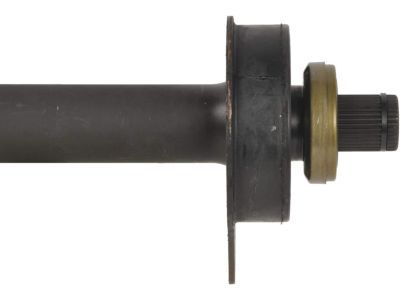
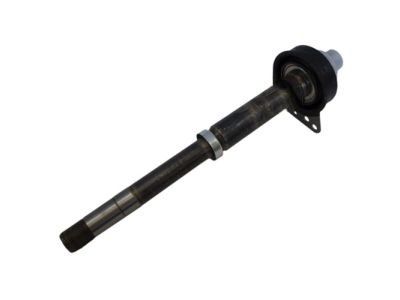
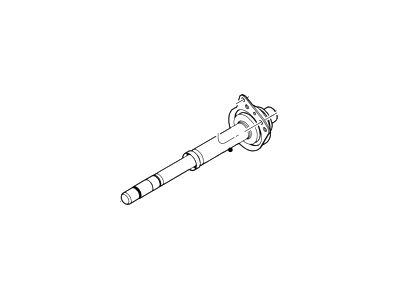
    To detach the front axle on 2005 and new-model Jeeps, securely block the car, remove the wheel nuts, lift the car by the jack, then use jackstands to keep it suspended before unscrewing the front axle. Before working on the Axle Shaft, take off its hub nut and throw it away, then unlatch the wheel sensor if you have antilock brakes. Free up the control arm and push the steering knuckle hub unit toward the engine until the driveaxle comes loose from the rest of the suspension. When the driveaxle splines get stuck inside, tap the end with a plastic hammer while holding the other end steady with a wire. For right side driveaxles, remove the inner CV joint from the intermediate shaft; on left side driveaxles, pull it away from the transaxle, being cautious to avoid damaging the differential seal. Support the CV joints and remove the driveaxle. First, get rid of the old spring clip from the driveaxle's inner end or the intermediate shaft's outer end. Put on a fresh clip, and remember to give both the differential or the intermediate shaft seal some lubricating. Put the extension with grooved end into either the differential or the middle shaft, making sure the spring hook fixes by itself. Rub the grease into the splines of the outer CV joint before pulling the steering knuckle back into place and slotting the stub axle into the hub. Threading the ball joint stud through the knuckle, it needs to be tightened down. As advised, switch out the pinch bolt with a fresh one. Also tighten a new driveaxle hub nut before putting the vehicle on the ground. This will keep the wheel bearing from being hurt. Hold the inside of the CV joint housing firmly before putting the wheel and nuts on, then drop the vehicle back down and tighten the nuts last. To work on the intermediate shaft, first take off the right wheel cover, loosen the hub nut, relax the wheel nuts, lift the car, and hold it securely with jackstands before pulling out the wheel. Gently separate the entire lower control arm from the steering knuckle. Then, take off the driveaxle/hub nut, move the knuckle/hub assembly aside until you can lift out the driveaxle. Take out the driveaxle, unscrew its bearing support nuts carefully from the transaxle, guide the intermediate shaft out without damaging the differential's seal. Look at how the support bearing runs and swap it out when needed. Apply grease on the seal, push the shaft through the transaxle side gear opening, and bolt the bearing support with its mounting nuts, tightening them all. After taking out all parts, we simply put them back together, reversing the steps we just took. Before you change the rear wheel, grab the front tires to keep them stopped. Take off the rear wheel lug nuts, use a jack to lift the car, then put it on stable jackstands. Take off the coilspring wire, the mounting bolt for the wheel speed sensor harness, and the four bolts holding the stabilizer bar bracket, then throw out all those bolts. Put a floor jack under the knuckle to hold it up, unscrew the bolt from the lower ball joint, then pull it away from the knuckle. Pull apart the parts connecting the driveshaft to the differential and the wheel hub without hurting the CV joints and their protective covers. You secure the driveaxle/hub nut tightly first, before putting the car back down, to protect the wheel bearing from harm during installation.
    Posted by FordPartsGiant Specialist
    Q:
    What are the steps to install the rear driveaxle in the 2010 Ford Escape? Posted by Customer
    A:
    To install the rear driveaxle in 2004 and earlier models, follow these steps. Pry the old spring clip from the inner end of the driveaxle and install a new one. Apply a light film of grease to the area on the inner CV joint stub shaft where the seal rides, then insert the splined end of the inner CV joint into the differential. Make sure the spring clip locks in its groove. Apply a light film of grease to the outer CV joint splines, pry the trailing arm outward, and insert the outer end of the driveaxle into the hub. Install the coil spring. Connect the trailing arm to the lower suspension arm and install the nut. Using a floor jack, raise the trailing arm to simulate normal ride height and then tighten the nut. Install a new driveaxle/hub nut and tighten it before lowering the vehicle to prevent wheel bearing damage. Install the wheel and lug nuts, then lower the vehicle and tighten the lug nuts. Block the front wheels to keep the vehicle from rolling. Loosen the rear wheel lug nuts, raise the vehicle on jackstands, then remove the wheel. Remove the rear wheel driveaxle hub nut and discard it. Remove the coil spring. Remove the wheel speed sensor wiring harness mounting bolt. Remove the four bolts from the stabilizer bar bracket and discard them. Place a floor jack under the knuckle and support it. Remove the bolt from the lower ball joint, then separate the ball joint from the knuckle. Separate the inner and outer ends of the driveaxle from the differential and the hub. Work carefully to avoid damaging the CV joints and boots. Installation is the reverse of removal.
    Posted by FordPartsGiant Specialist
    See expert answers on similar Axle Shaft
    If you have any questions about this product, please don't hesitate to ask us. We will be happy to help you!

Genuine Ford Part 9L8Z-3A329-B, the Right Choice

To ensure reliability, purchase part # 9L8Z-3A329-B Shaft. It is also called Axle Shaft. OEM parts are of high quality and known for their longevity. This is because they are built to the Ford standards which are relatively high and undergo rigorous quality control testing. This part fits specific Ford Escape models. It fits Mercury Mariner.

FordPartsGiant.com is a leading supplier of genuine components and accessories such as 9L8Z3A329B Shaft. Looking to purchase quality low-cost OEM Ford parts? You have just found the right place. For detailed Ford parts information, click here.

Why choose Ford Parts Giant

  • Dedicated Service

    Your complete satisfaction is our #1 goal

  • Lowest Prices

    Best deals on genuine OE parts from dealerships

  • Fast Delivery

    Orders are processed and delivered promptly