My Garage
My Account
Cart
Genuine Ford Ranger Transfer Case
Speed Transfer Case- Select Vehicle by Model
- Select Vehicle by VIN
Select Vehicle by Model
orMake
Model
Year
Select Vehicle by VIN
For the most accurate results, select vehicle by your VIN (Vehicle Identification Number).
38 Transfer Cases found


Ford Ranger Transmission Extension Housing
Part Number: FOTZ-7A039-B$193.80 MSRP: $283.33You Save: $89.53 (32%)


Ford Ranger Transmission Extension Housing
Part Number: 5L5Z-7A039-CA$205.10 MSRP: $302.50You Save: $97.40 (33%)


Ford Ranger Transmission Extension Housing
Part Number: F77Z-7A039-CA$205.10 MSRP: $302.50You Save: $97.40 (33%)Ships in 1-3 Business Days
Ford Ranger Transmission Case Assembly
Part Number: F77Z-7005-DB$2877.28 MSRP: $3952.31You Save: $1075.03 (28%)Ships in 1-3 Business Days
Ford Ranger Case Assembly-Transmission
Part Number: 1L5Z-7005-BB$747.04 MSRP: $1026.15You Save: $279.11 (28%)Ships in 1-3 Business DaysFord Ranger Case Assembly Transmission
Part Number: F77Z7005FA$19.62 MSRP: $27.26You Save: $7.64 (29%)Ships in 1-2 Business Days
Ford Ranger Transmission Case Assembly
Part Number: JR3Z-7005-A$823.20 MSRP: $1130.77You Save: $307.57 (28%)Ford Ranger Transmission Case Assembly
Part Number: AB3Z-7005-J$335.61 MSRP: $456.92You Save: $121.31 (27%)Ships in 1-3 Business DaysFord Ranger Transmission Case Assembly
Part Number: 3L5Z-7005-CB$191.45 MSRP: $265.95You Save: $74.50 (29%)Ships in 1-2 Business DaysFord Ranger Transmission Case Assembly
Part Number: KB3Z-7005-A$474.83 MSRP: $646.46You Save: $171.63 (27%)Ships in 1-3 Business Days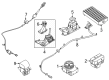
Ford Ranger Transfer Case Assembly
Part Number: MB3Z-7A195-T$2231.04 MSRP: $3064.62You Save: $833.58 (28%)Ships in 1-2 Business DaysFord Ranger Transfer Case Assembly
Part Number: MB3Z-7A195-J$1302.56 MSRP: $1789.23You Save: $486.67 (28%)Ships in 1-2 Business DaysFord Ranger Transfer Case Assembly
Part Number: KB3Z-7A195-A$2824.64 MSRP: $3880.00You Save: $1055.36 (28%)


| Page 1 of 2 |Next >
1-20 of 38 Results
Ford Ranger Transfer Case
The Ford Ranger Transfer Case channels engine torque to both front and rear axles, letting drivers switch between sure footed four wheel drive and fuel saving two wheel drive. Across the model's generations, Ford paired it with part time designs that give a choice of 2H, 4H, and 4L, while some later Ranger trucks adopted an electric shift Transfer Case controlled by a dash knob instead of the classic floor lever. Both styles carry a High and Low range, use gears or a sturdy chain inside the Transfer Case to feed the front driveshaft, and allow 4H engagement at slow rolling speeds, but the Transfer Case requires a full stop before selecting 4L. A full time or AWD oriented Transfer Case with a center differential or viscous coupling also appeared on certain Ranger variants, automatically redistributing power when wheels slip and preventing driveline bind, a feature praised for Ford durability. Main trouble spots include worn gears, stretched chains, or loose driveshaft connections, problems that can cause banging noises or delayed mode engagement if ignored by any Ford Ranger owner.
We provide a wide range of Ford Ranger Transfer Case at the optimal prices. If you need Ford Ranger Transfer Case, you can shop with confidence on our website. All our OEM parts come with a manufacturer's warranty and are delivered to your doorstep with a fast delivery service.
Ford Ranger Transfer Case Parts Questions & Experts Answers
- Q: How to remove and install the transfer case on Ford Ranger?A:On 2011 models, ensure the transfer case is in the 2H position before starting the procedure. Begin by raising the vehicle and securely supporting it on jackstands. If applicable, remove the four skid plate-to-frame bolts and take off the skid plate. For models equipped with a damper, remove it from the transfer case. Drain the transfer case lubricant only if disassembling, then reinstall the drain plug. For electronically controlled models, squeeze the locking tabs labeled PUSH toward each other and pull the electrical connector apart, disconnecting it from the transfer case motor and the connector mounting bracket. If applicable, disconnect the speed sensor electrical connector and speedometer cable from the transfer case. Disconnect the front driveshaft, followed by the rear driveshaft. Disconnect the vent hose from the shift lever bracket or mounting bracket. For manually controlled models, remove the nut from the shift lever and take off the shift lever. Remove the large and small bolts retaining the shifter to the extension housing, then pull on the control lever unit until the bushing slides off the transfer case shift lever pin. Place a transmission jack beneath the transfer case and apply pressure to slightly raise it, using safety chains for stability. Remove the five bolts securing the transfer case to the transmission extension housing, then slide the transfer case rearward off the transmission output shaft and lower it from the vehicle. Remove and discard the gasket between the transfer case and extension housing, cleaning and inspecting the mating surfaces. Installation follows the reverse order of removal with some additions: install a new gasket between the transfer case and extension housing, slide the transfer case onto the transmission output shaft ensuring the splines align until it seats over the dowel pin, and install the five bolts securing the transfer case, tightening them to the specified torque. For manually controlled models, always tighten the large bolt securing the shifter to the extension housing before the small bolt. Install the vent assembly so the white marking on the hose is positioned in the notch in the shift lever bracket or mounting bracket, ensuring the upper end of the vent hose is 3/4 inch above the top of the shifter on manually controlled models. Connect the rear driveshaft to the transfer case output flange and tighten the bolts to the specified torque. Finally, refill the transfer case with the proper type of lubricant.

Related Ford Ranger Parts
 Ford Ranger Transfer Case Seal
 Ford Ranger Transfer Case Shim
 Ford Ranger Transfer Case Gear
 Ford Ranger Transfer Case Output Shaft Snap Ring
 Ford Ranger Input Shaft Bearing
 Ford Ranger Output Shaft Bearing
 Ford Ranger Transfer Case Bearing
Browse by Year
2025 Transfer Case 2024 Transfer Case 2023 Transfer Case 2022 Transfer Case 2021 Transfer Case 2020 Transfer Case 2019 Transfer Case 2011 Transfer Case 2010 Transfer Case 2009 Transfer Case 2008 Transfer Case 2007 Transfer Case 2006 Transfer Case 2005 Transfer Case 2004 Transfer Case 2003 Transfer Case 2002 Transfer Case 2001 Transfer Case 2000 Transfer Case 1999 Transfer Case 1998 Transfer Case 1997 Transfer Case 1996 Transfer Case 1995 Transfer Case 1994 Transfer Case 1993 Transfer Case 1992 Transfer Case 1991 Transfer Case 1990 Transfer Case