My Garage
My Account
Cart
Genuine Ford Mustang Exhaust Manifold
Engine Exhaust Manifold- Select Vehicle by Model
- Select Vehicle by VIN
Select Vehicle by Model
orMake
Model
Year
Select Vehicle by VIN
For the most accurate results, select vehicle by your VIN (Vehicle Identification Number).
41 Exhaust Manifolds found


Ford Mustang Exhaust Manifold Assembly
Part Number: FR3Z-9430-A$288.15 MSRP: $425.00You Save: $136.85 (33%)Ships in 1-3 Business Days


Ford Mustang Exhaust Manifold Assembly
Part Number: BX2Z-9430-A$96.56 MSRP: $141.17You Save: $44.61 (32%)Ships in 1-2 Business Days

Ford Mustang Exhaust Manifold And Catalyst
Part Number: JR3Z-5G232-B$532.51 MSRP: $592.86You Save: $60.35 (11%)

Ford Mustang Exhaust Manifold Assembly
Part Number: BX2Z-9431-A$93.17 MSRP: $141.17You Save: $48.00 (34%)Ships in 1-3 Business Days


Ford Mustang Exhaust Manifold And Catalyst Assembly
Part Number: FR3Z-5G232-A$1052.45 MSRP: $1335.71You Save: $283.26 (22%)
Ford Mustang Exhaust Manifold Assembly
Part Number: GR3Z-9430-A$1431.36 MSRP: $2130.00You Save: $698.64 (33%)Ships in 1-3 Business Days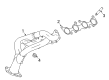
Ford Mustang Exhaust Manifold Assembly
Part Number: GR3Z-9431-B$1466.08 MSRP: $2181.67You Save: $715.59 (33%)Ships in 1-3 Business Days
Ford Mustang Exhaust Manifold Assembly
Part Number: BR3Z-9431-A$230.52 MSRP: $340.00You Save: $109.48 (33%)Ships in 1-3 Business DaysFord Mustang Exhaust Manifold Assembly
Part Number: GR3Z-9431-A$1466.08 MSRP: $2181.67You Save: $715.59 (33%)Ships in 1-3 Business DaysFord Mustang Exhaust Manifold And Catalyst
Part Number: JR3Z-5G232-C$1493.41 MSRP: $1898.16You Save: $404.75 (22%)Ships in 1-3 Business Days
Ford Mustang Exhaust Manifold And Catalyst
Part Number: JR3Z-5G232-A$1124.80 MSRP: $1428.00You Save: $303.20 (22%)Ships in 1-3 Business DaysFord Mustang Exhaust Manifold And Catalyst Assembly
Part Number: FR3Z-5G232-B$1567.83 MSRP: $1993.09You Save: $425.26 (22%)Ships in 1-3 Business DaysFord Mustang Exhaust Manifold And Catalyst Assembly
Part Number: FR3Z-5G232-D$1490.80 MSRP: $1894.83You Save: $404.03 (22%)Ships in 1-3 Business Days

Ford Mustang Exhaust Manifold Assembly
Part Number: 7R3Z-9431-AA$143.64 MSRP: $210.00You Save: $66.36 (32%)

Ford Mustang Exhaust Manifold Assembly
Part Number: 7R3Z-9430-AA$143.64 MSRP: $210.00You Save: $66.36 (32%)


Ford Mustang Exhaust Manifold Assembly
Part Number: BR3Z-9431-C$230.52 MSRP: $340.00You Save: $109.48 (33%)
Ford Mustang Exhaust Manifold Assembly
Part Number: BR3Z-9430-A$230.52 MSRP: $340.00You Save: $109.48 (33%)
Ford Mustang Exhaust Manifold And Catalyst
Part Number: PR3Z-5G232-A$873.25 MSRP: $1107.14You Save: $233.89 (22%)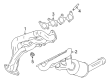
Ford Mustang Exhaust Manifold And Catalyst
Part Number: JR3Z-5G232-E$1493.41 MSRP: $1898.16You Save: $404.75 (22%)
| Page 1 of 3 |Next >
1-20 of 41 Results
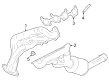
Ford Mustang Exhaust Manifold
The Exhaust Manifold applied in Ford Mustang helps to channel hot exhaust gases from the engine to exhaust system which contributes for better performance of the engine. Located at a variety of positions depending on the organization of engines, manifold is intended to flow exhaust gases through equipment such as the catalytic converter and muffler while insulating against intake reversion that may reduce efficiency in the car. In the different years, the exhaust manifolds of Ford Mustang have changed and differ mainly by the material - cast iron or stainless steel. The standard exhaust systems are easily removable and replaceable by headers which are designed to improve performance by further decreasing flow resistance and escalating the velocity of the exhaust gases. However, there has been improvements on motorcycle engines, the Yamaha EXUP system has been incorporated in certain Mustang models to help in controlling back pressure as well as increasing overall horsepower. In the case of the exhaust manifold, there should be proper maintenance to avoid some of the complications in performance as well as the effects and dangers posed by exhaust leakages to the health of the users of the vehicle.
We provide a wide range of Ford Mustang Exhaust Manifold at the optimal prices. If you need Ford Mustang Exhaust Manifold, you can shop with confidence on our website. All our OEM parts come with a manufacturer's warranty and are delivered to your doorstep with a fast delivery service.
Ford Mustang Exhaust Manifold Parts Questions & Experts Answers
- Q: How to remove the exhaust manifold in V8 engine on Ford Mustang?A:Before attempting to remove the right side manifold on 5.0L, get the AC system discharged by a professional. Pull the engine cover off the rubber grommets and take the cable off the negative terminal of the battery. Remove the alternator if yours is 4.6L engines and, for the 5.0L engines, if equipped remove the strut tower cross brace. Loosen and remove the front wheel and then support the car properly on jack stands and then take out the inner splash shield of the fender well. Use penetrating oil on the catalytic converter to manifold studs and nuts as well as the exhaust manifold mounting nuts due to rust. The nuts on the exhaust manifolds should be unscrewed together with the catalytic converters and the catalytic converter assemblies should then be relocated to the back. Attach an engine support fixture or hoist, then release the nuts of the engine mount upper. To perform for the left exhaust manifold removal, you will need to take out the intake duct and the air filter housing, pull the connection of the rear heated oxygen sensor, and remove the intermediate shaft from the power steering gear. Lift the engine 1 1/2 inches to provide plenty of clearance then unbolt the eight studs and attendant exhaust manifold. For the right exhaust manifold on 4.6 L, engine, the starter has to be taken off and the front and rear heated oxygen sensor connector have to be disconnected, the transmission cooler tube bracket must also be taken off. In case of a 5.0L engine, such parts also have to be detached: sound enhancement pipe, radiator cover, air conditioning compressor, battery and its tray, rear heated oxygen sensor. Some of the mandatory parts to be pulled out include; crossmember brace, lower splash shield and the transmission fluid cooler tube bracket all of which are located under the vehicle. Pull out the wiring harness retainers and pull also the ground strap of the right side mount alongside the right side engine mount. Once more lift the engine for clearance and unbolt the eight nuts on the exhaust manifold. For installation, inspect the exhaust manifolds to see that they are not cracked and make certain that the stud threads are clear. Place a new gasket and slide the exhaust manifold over the studs but put the nuts first before tightening them from the middle then to the extreme ends to the recommended torque. The rest of steps are the steps in the reverse order that you undertook in the removal and start the engine, look for the presence of exhaust leaks.

Related Ford Mustang Parts
 Ford Mustang Headlight
 Ford Mustang Door Handle
 Ford Mustang Catalytic Converter
 Ford Mustang EGR Valve
 Ford Mustang Window Regulator
 Ford Mustang Emblem
 Ford Mustang Bumper
 Ford Mustang Seat Belt
 Ford Mustang Spare Wheel
 Ford Mustang Clock Spring
 Ford Mustang Door Check
 Ford Mustang Lift Support
Browse by Year
2025 Exhaust Manifold 2024 Exhaust Manifold 2023 Exhaust Manifold 2022 Exhaust Manifold 2021 Exhaust Manifold 2020 Exhaust Manifold 2019 Exhaust Manifold 2018 Exhaust Manifold 2017 Exhaust Manifold 2016 Exhaust Manifold 2015 Exhaust Manifold 2014 Exhaust Manifold 2013 Exhaust Manifold 2012 Exhaust Manifold 2011 Exhaust Manifold 2010 Exhaust Manifold 2009 Exhaust Manifold 2008 Exhaust Manifold 2007 Exhaust Manifold 2006 Exhaust Manifold 2005 Exhaust Manifold 2004 Exhaust Manifold 2003 Exhaust Manifold 2002 Exhaust Manifold 2001 Exhaust Manifold 2000 Exhaust Manifold 1999 Exhaust Manifold 1998 Exhaust Manifold 1997 Exhaust Manifold 1996 Exhaust Manifold 1995 Exhaust Manifold 1994 Exhaust Manifold 1993 Exhaust Manifold 1992 Exhaust Manifold 1991 Exhaust Manifold 1990 Exhaust Manifold 1989 Exhaust Manifold 1988 Exhaust Manifold 1987 Exhaust Manifold 1986 Exhaust Manifold 1983 Exhaust Manifold