

My Garage
My Account
Cart
Genuine 2001 Ford Explorer Cylinder Head
Head- Select Vehicle by Model
- Select Vehicle by VIN
Select Vehicle by Model
orMake
Model
Year
Select Vehicle by VIN
For the most accurate results, select vehicle by your VIN (Vehicle Identification Number).
10 Cylinder Heads found
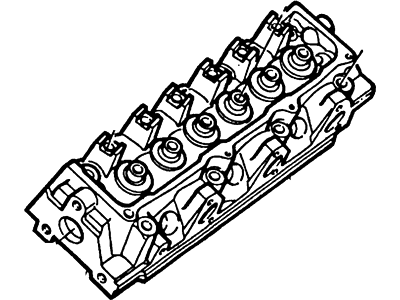
2001 Ford Explorer Cylinder Head
Part Number: 7U7Z-6049-AARH$812.56 MSRP: $1128.78You Save: $316.22 (29%)Ships in 1-2 Business DaysProduct Specifications- Other Name: Cylinder Head Assembly; Cylinder Head
- Position: Passenger Side
- Replaces: 1L2Z-6049-JA, 5L2Z-6049-AA, 7R3Z-6049-A, 5R3Z-6049-AB, 6L2Z-6049-A, XL2Z-6049-CA, YL2Z-6049-CA
- Base No.: 6049
- Item Weight: 30.30 Pounds
- Item Dimensions: 20.6 x 13.7 x 12.1 inches
- Condition: New
- Fitment Type: Direct Replacement
- SKU: 7U7Z-6049-AARH
- Warranty: This genuine part is guaranteed by Ford's factory warranty.
 Product Specifications
- Other Name: Cylinder Head Assy
- Manufacturer Note: RH; With Valves, Cam & Injectors, RHD; Post Office Vehicle
- Position: Passenger Side
- Replaced by: 7U7Z-6049-AARH
- Item Weight: 30.30 Pounds
- Item Dimensions: 20.6 x 14.0 x 12.0 inches
- Condition: New
- Fitment Type: Direct Replacement
- SKU: YL2Z-6049-CA
- Warranty: This genuine part is guaranteed by Ford's factory warranty.
 Product Specifications
- Other Name: Head Assy - Cylinder - With Valves
- Manufacturer Note: RH; With Valves, Cam & Injectors, RHD; Post Office Vehicle
- Position: Passenger Side
- Replaced by: 7U7Z-6049-AARH
- Item Weight: 31.50 Pounds
- Item Dimensions: 21.4 x 13.3 x 12.0 inches
- Condition: New
- Fitment Type: Direct Replacement
- SKU: XL2Z-6049-CA
- Warranty: This genuine part is guaranteed by Ford's factory warranty.
- Product Specifications
- Other Name: Cylinder Head Assy
- Manufacturer Note: LH; Without Valves, RHD; Post Office Vehicle
- Position: Driver Side
- Replaced by: 7U7Z-6049-B
- Item Weight: 29.90 Pounds
- Item Dimensions: 9.8 x 6.7 x 11.3 inches
- Condition: New
- Fitment Type: Direct Replacement
- SKU: YL2Z-6049-DA
- Warranty: This genuine part is guaranteed by Ford's factory warranty.
 Product Specifications
- Other Name: Head Assy - Cylinder - With Valves
- Manufacturer Note: LH; With Valves, Cam & Injectors, RHD; Post Office Vehicle
- Position: Driver Side
- Replaced by: 7U7Z-6049-AALH
- Item Weight: 32.30 Pounds
- Item Dimensions: 6.7 x 7.7 x 20.0 inches
- Condition: New
- Fitment Type: Direct Replacement
- SKU: YL2Z-6049-AA
- Warranty: This genuine part is guaranteed by Ford's factory warranty.
 Product Specifications
- Other Name: Head Assy - Cylinder - With Valves
- Manufacturer Note: LH; With Valves, Cam & Injectors, RHD; Post Office Vehicle
- Position: Driver Side
- Replaced by: 7U7Z-6049-AALH
- Item Weight: 34.10 Pounds
- Item Dimensions: 6.5 x 7.8 x 20.0 inches
- Condition: New
- Fitment Type: Direct Replacement
- SKU: XL2Z-6049-DA
- Warranty: This genuine part is guaranteed by Ford's factory warranty.
- Product Specifications
- Other Name: Cylinder Head Assy
- Replaced by: F87Z-6049-BARM
- Item Weight: 39.90 Pounds
- Item Dimensions: 6.1 x 6.3 x 18.1 inches
- Condition: New
- Fitment Type: Direct Replacement
- Require Quantity: 2
- SKU: F87Z-6049-DA
- Warranty: This genuine part is guaranteed by Ford's factory warranty.
- Product Specifications
- Other Name: Cylinder Head Assy
- Manufacturer Note: Without valves, OHV
- Replaced by: F87Z-6049-BARM
- Item Weight: 40.30 Pounds
- Item Dimensions: 6.1 x 6.1 x 18.8 inches
- Condition: New
- Fitment Type: Direct Replacement
- Require Quantity: 2
- SKU: F87Z-6049-CA
- Warranty: This genuine part is guaranteed by Ford's factory warranty.
 Product Specifications
- Other Name: Cylinder Head Assy; Cylinder Head
- Manufacturer Note: Excls. valves
- Condition: New
- Fitment Type: Direct Replacement
- Require Quantity: 2
- SKU: F87Z-6049-BA
- Warranty: This genuine part is guaranteed by Ford's factory warranty.
- Product Specifications
- Other Name: Cylinder Head Assy; Cylinder Head
- Position: Driver Side
- Replaces: 1L2Z-6049-FA, 6L5Z-6049-A, 5R3Z-6049-AA, 5H2Z-6049-A, YL2Z-6049-AA, XL2Z-6049-DA
- Base No.: 6049
- Item Weight: 32.90 Pounds
- Item Dimensions: 6.5 x 7.7 x 19.6 inches
- Condition: New
- Fitment Type: Direct Replacement
- SKU: 7U7Z-6049-AALH
- Warranty: This genuine part is guaranteed by Ford's factory warranty.
2001 Ford Explorer Cylinder Head
At FordPartsGiant.com, you will find an extensive inventory of genuine 2001 Ford Explorer Cylinder Head offered at competitive prices online. These manufacturer-backed OEM 2001 Ford Explorer Cylinder Head ensure your satisfaction with their quality and come with a hassle-free return policy and expedited delivery service, guaranteeing a delightful shopping experience.
2001 Ford Explorer Cylinder Head Parts Questions & Experts Answers
- Q:What steps should be taken for thorough cleaning and inspection of cylinder heads and valve train components during an engine overhaul on 2001 Ford Explorer?Posted by Misoly O.A:Complete removal of the cylinder head(s) and the cleaning of the valve train with its related parts would then allow the decision on what valve service work would be required during the course of the engine rebuild. Start off by rubbing off all the old gasket material and sealing compound from the head gasket, intake manifold and exhaust manifold sealing surfaces but without disturbing the Cylinder head. Clean the coolant passages with a dentilitating Scotch Brite pad and use a piece of strongly bristled wire to clean the various holes. Thread a suitable size tap into each of the threaded hole to remove the corrosion and thread sealant, and blow it out with Compressed air all while wearing eye protection. Remove and clean the exhaust manifold stud threads if installed, the cylinder head should be cleaned with solvent and allowed to dry possibly with the use of compressed air. Use the decarbonizing chemicals in the appropriate manner indicated in the methods section, with care. Lubricate the valve train components and valve springs, and spring seats, stem locks, and retainers with solvent and then clean with the appropriate solvent that is not to be interchanged. Remove thick layers of deposits from the valves and wire brush the heads and stems of the valves them keeping the valves in order. Check head for cracks, leaks of coolant, and other damages and in case of doubt consult an automotive machine shop. A straightedge and a feeler gauge should be used to determine whether the head gasket mating surface is warped, looking both from head to head, and from side to side, and if warpage is beyond allowable, then resurfacing will be needed. Visually inspect the valve seats for pitting, cracking or burning, and check the valve stem to guide clearance with a dial indicator when the valve is in the guide and approximately 1/16 inch off seat. Examine all valve face for signs of wear, distortion or cracks, pits and burned areas, on the same valve stem look for signs of scuffing and galling: Measure the margin width and replace any valve where there is margin width of less than 1/32-inch. Inspect each valve spring for indications of wear and pits, and the free length of each spring should conform to factory standards; all the springs used should be suitable for use in a rebuilt engine. Use a level every spring and by feeling with your hands look for out-of- square, distorted or sagged springs. Check condition of springs retainers and stem locks and replace any part that seems to be worn out or to have developed cracks. All rocker arm components should be cleaned thoroughly also making sure that oil ways are clear, and there is a check on worn out or damaged faces on the rockers. Check rocker arm pivot contact areas and fulcrums for cracks, inspect the push rod ends of tramp and bear and rocker arm studs for damaged threads and evidence of scuffing and excessive wear. Remove and replace any worn or damaged valves and if inspection further reveals that the valve components are bad, they should be replaced and the valves assembled back in the head of the cylinder.Answered by Ford Parts Specialist Joseph / Apr 14, 2022
Related 2001 Ford Explorer Parts
 2001 Ford Explorer Rocker Arm
 2001 Ford Explorer Cylinder Head Bolts
 2001 Ford Explorer Timing Cover
 2001 Ford Explorer Exhaust Valve
 2001 Ford Explorer Intake Valve
 2001 Ford Explorer Camshaft
 2001 Ford Explorer Cylinder Head Gasket
 2001 Ford Explorer Crankshaft Seal