

My Garage
My Account
Cart
Genuine 1998 Ford Ranger Control Arm
Suspension Arm- Select Vehicle by Model
- Select Vehicle by VIN
Select Vehicle by Model
orMake
Model
Year
Select Vehicle by VIN
For the most accurate results, select vehicle by your VIN (Vehicle Identification Number).
2 Control Arms found
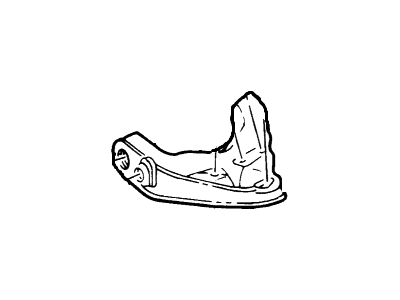 Product Specifications
- Other Name: Arm Assy - Front Suspension; Lower Control Arm
- Manufacturer Note: L.H., coil spring suspension
- Position: Driver Side
- Base No.: 3079
- Item Weight: 8.80 Pounds
- Item Dimensions: 19.6 x 7.1 x 14.9 inches
- Condition: New
- Fitment Type: Direct Replacement
- SKU: F87Z-3079-AA
- Warranty: This genuine part is guaranteed by Ford's factory warranty.
- Product Specifications
- Other Name: Arm Assy - Front Suspension; Lower Control Arm
- Manufacturer Note: R.H., coil spring suspension
- Position: Passenger Side
- Base No.: 3078
- Item Weight: 2.30 Pounds
- Item Dimensions: 19.1 x 7.1 x 15.2 inches
- Condition: New
- Fitment Type: Direct Replacement
- SKU: F87Z-3078-AA
- Warranty: This genuine part is guaranteed by Ford's factory warranty.
1998 Ford Ranger Control Arm
At FordPartsGiant.com, you will find an extensive inventory of genuine 1998 Ford Ranger Control Arm offered at competitive prices online. These manufacturer-backed OEM 1998 Ford Ranger Control Arm ensure your satisfaction with their quality and come with a hassle-free return policy and expedited delivery service, guaranteeing a delightful shopping experience.
1998 Ford Ranger Control Arm Parts Questions & Experts Answers
- Q:How to remove and install the lower control arm on 1998 Ford Ranger?Posted by Durrell B.A:To remove the lower control arm, first loosen the wheel lug nuts, raise the front of the vehicle, and securely support it on jackstands before removing the front wheel. For 2WD models, take off the Brake Rotors and dust shield, then remove the shock absorber. Disconnect the stabilizer bar from the lower control arm. For 2WD models, compress the coil spring using a typical aftermarket internal spring compressor tool. For 4WD models, remove the torsion bar. Position a floor jack under the lower control arm for support during removal. Remove and discard the cotter pin from the lower control arm balljoint stud, loosen the castellated nut, and use a small puller to separate the balljoint from the spindle/steering knuckle. Carefully remove the compressed coil spring for 2WD models and set it aside. Loosen the two control arm pivot nuts and bolts to remove the lower control arm, ensuring to support the steering knuckle and driveaxle assembly on 4WD models to prevent damage to the CV joints. Inspect the bushings for cracks and tears; if damaged, take the control arm to an automotive machine shop for new bushings, as this requires specialized tools. If the balljoint is worn, the entire control arm must be replaced. For installation, reverse the removal steps, ensuring to tighten the pivot bolts and nuts finger-tight only during assembly, and do not fully tighten until the vehicle is lowered to the ground. For 2WD models, ensure the end of the coil spring covers the first hole in the lower control arm but is not visible through the second hole. After lowering the vehicle, tighten the lower control arm pivot bolts and nuts to the specified torque and have the front-end alignment checked by a dealer service department or an alignment shop.Answered by Ford Parts Specialist John / Nov 06, 2025
Related 1998 Ford Ranger Parts
 1998 Ford Ranger Torsion Bar
 1998 Ford Ranger Control Arm Bushing
 1998 Ford Ranger Ball Joint
 1998 Ford Ranger Trailing Arm Bushing
 1998 Ford Ranger Radius Arm Bushing