My Garage
My Account
Cart
This part fits
2024 Ford Mustang
Check another vehicleFord FR3Z-1007-G Wheel Assembly
2015-2025 Ford Mustang FR3Z1007G
Customer Questions & Expert Answers (2)

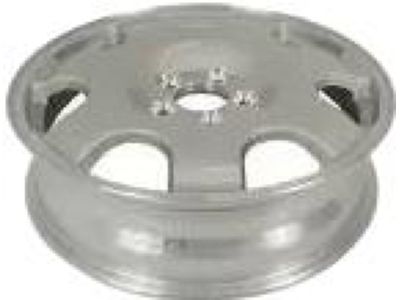
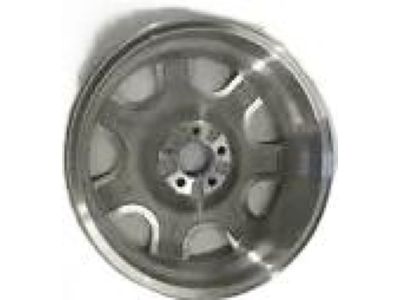
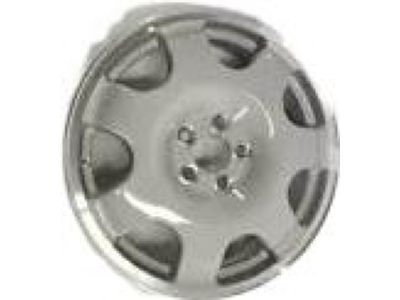
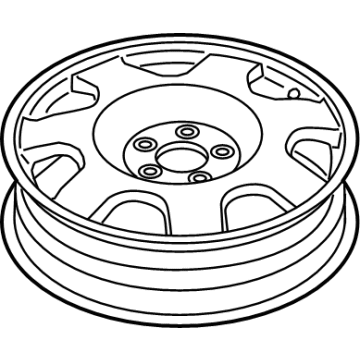
- Part DescriptionWheel Assy
- 17"
- 18"
- 20"
- 19" GT Models
- 19" Dark Horse
- 19" Ecoboost Models
- ManufacturerFord
This part fits
2024 Ford Mustang
Check another vehicle$468.20 MSRP: $1035.77
You Save: $567.57 (55%)
Ships in 1-3 Business Days
1
- Related Parts
- Specifications
- Q&A
Product Specifications
Brand Genuine Ford Manufacturer Part Number FR3Z-1007-G, FR3Z1007G Part Description Wheel Assy Other Names Compact Spare Manufacturer Note For Spare Wheel Item Dimensions 7.6 x 24.8 x 21.4 inches Item Weight 22.10 Pounds Condition New Fitment Type Direct Replacement Manufacturer Ford SKU FR3Z-1007-G Warranty This genuine Ford part is guaranteed by Ford's factory warranty. Shipping & Return Shipping Policy Return Policy Warning: California's Proposition 65Customer Questions & Expert Answers
- Q:Is the the correct part for the attached VIN? Posted by FordPartsGiant Specialist
- A:You can Select Your Vehicle to check if FR3Z-1007-G fits your vehicle.Posted by FordPartsGiant Specialist
- Installation and Repair Tips by AI Expert
- Removal 1. Park on level ground, set the parking brake, and chock the wheels opposite the work area. 2. Wear eye protection and gloves; use good lighting and clear the work area. 3. Consult the owner's manual for the spare location and any model-specific release instructions. 4. If the spare is retained by an electrical winch or if you will be working near electrical connectors, disconnect the negative battery terminal and wait a few minutes before proceeding. 5. Loosen wheel lug nuts slightly before lifting the vehicle if the spare is mounted under/behind the vehicle or on the hub. 6. Raise and support the vehicle with a proper jack and jack stands when required; position supports per the vehicle manual. 7. Remove any trim/panels or covers that secure access to the spare compartment or carrier. 8. Remove the spare's retaining hardware or release the carrier mechanism (hardware type varies by design) using the correct tools. 9. Carefully lower or remove the spare wheel from its carrier; support its weight and set it down flat in a safe location. 10. Inspect the spare, carrier, and fasteners for corrosion, damage, and proper function before reinstalling. Installation 1. Verify the spare tire's condition and air pressure before installing; repair or replace if damaged. 2. Position the spare into the carrier or storage location without forcing; align it with the retention points. 3. Reinstall the retaining hardware or engage the carrier mechanism, hand-threading fasteners to avoid cross-threading. 4. If the spare mounts to the hub, raise the vehicle as needed so the wheel seats properly before snugging fasteners. 5. Tighten lug nuts or retention fasteners progressively in the recommended pattern until snug, then final-tighten to the manufacturer's torque specification (consult the manual or a dealer for the exact value). 6. Reinstall any trim, panels, or covers removed earlier and stow tools securely. 7. If the battery was disconnected, reconnect the negative terminal and verify any affected electrical components operate normally. 8. After driving a short distance, recheck and re-torque lug nuts to the manufacturer's specification. Repair tip: Keep all removed fasteners and small parts together and clean mating surfaces before reassembly; replace damaged retainers or heavily corroded hardware.
- Q:
Why choose Ford Parts Giant
- Dedicated Service
Your complete satisfaction is our #1 goal
- Lowest Prices
Best deals on genuine OE parts from dealerships
- Fast Delivery
Orders are processed and delivered promptly