

My Garage
My Account
Cart
This part fits
2007 Ford Edge 6 Cyl 3.5L DOHC VCT SMPI
Check another vehicle- The location this part fits: Driver Side
- Fit Note: Bright Greenhouse DLO Moulding
- Production Date: 11/2006-03/2011
Ford 7T4Z-7825597-B Weather-strip Door
2007-2011 Ford 7T4Z7825597B
Customer Questions & Expert Answers (2)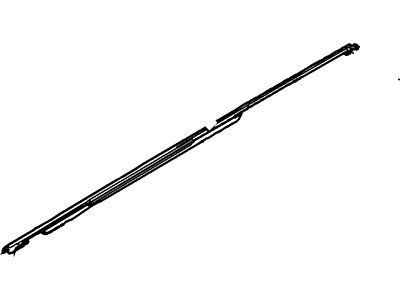
- Part DescriptionWeatherstrip - Door Glass Channel
- Weatherstrip - Door Glass
- PositionDriver Side
- ManufacturerFord
- Manufacturer's NotesThis part is discontinued.
This part fits
2007 Ford Edge 6 Cyl 3.5L DOHC VCT SMPI
Check another vehicle- The location this part fits: Driver Side
- Fit Note: Bright Greenhouse DLO Moulding
- Production Date: 11/2006-03/2011
- Related Parts
- Specifications
- Q&A
Product Specifications
Brand Genuine Ford Manufacturer Part Number 7T4Z-7825597-B, 7T4Z7825597B Part Description Weatherstrip - Door Glass Channel Item Weight 1.20 Pounds Position Driver Side Condition New Fitment Type Direct Replacement Manufacturer Ford SKU 7T4Z-7825597-B Warranty This genuine Ford part is guaranteed by Ford's factory warranty. Shipping & Return Shipping Policy Return Policy Warning: California's Proposition 65Customer Questions & Expert Answers
- Q:Does the PN fit my vehicle? Posted by FordPartsGiant Specialist
- A:You can Select Your Vehicle to check if 7T4Z-7825597-B fits your vehicle.Posted by FordPartsGiant Specialist
- Installation and Repair Tips by AI Expert
- Removal 1. Park on level ground, set the parking brake, wear gloves and eye protection, and protect painted edges with tape or a cover. 2. Inspect how the weather strip is attached - designs commonly use clips, channels, or adhesive; method varies by location. 3. Disconnect the negative battery terminal and tuck it aside to prevent electrical issues with door sensors or locks; wait several minutes before continuing. 4. Remove any trim or moldings that cover the weather strip using plastic trim tools, taking care not to damage clips or finish. 5. Start at an accessible end and peel the weather strip away; if adhesive holds it, soften the adhesive with a heat source on low (heat gun or hair dryer) to avoid tearing. 6. Use a plastic scraper and an approved adhesive remover to clean residual adhesive; avoid metal tools that can scratch the surface. 7. Clean the mounting surface with isopropyl alcohol or a recommended cleaner and allow it to dry. 8. Inspect the mounting channel, clips, and surrounding trim for damage and replace any worn components before installing the new strip. Installation 1. Compare the new weather strip to the removed piece for fit and length; trim only if design and fitment require it and you have the correct pattern. 2. Ensure the mounting surface is clean and dry before fitting. 3. If the design requires adhesive, apply a thin, even bead of manufacturer-recommended weatherstrip adhesive to the mating surfaces; if clip-in or push-in, skip adhesive. 4. Begin seating the weather strip at the recommended start point (designs vary) and work along the length, pressing the seal into the channel or onto the adhesive as you go. 5. Use consistent hand pressure or a small roller to ensure full contact without overstretching the rubber. 6. Reinstall any trim or retainers removed earlier, replacing broken clips as needed. 7. If adhesive was used, hold the weather strip in place with masking tape or clamps at intervals and allow the adhesive to cure per product directions (curing time varies). 8. Reconnect the negative battery terminal and ensure it is secure. 9. Close the door and check for even compression, proper alignment, and operation of electrical components; perform a visual or light/water test for wind or water leaks. 10. Repair tip: gently warm the new weather strip before fitting to improve flexibility and reduce the chance of twisting or gaps; do not overheat.
- Q:
Why choose Ford Parts Giant
- Dedicated Service
Your complete satisfaction is our #1 goal
- Lowest Prices
Best deals on genuine OE parts from dealerships
- Fast Delivery
Orders are processed and delivered promptly