

My Garage
My Account
Cart
This part fits
2019 Ford Ranger 4 Cyl 2.3L TIVCT DI TC; 10-Speed Automatic Transmission (10R80)
Check another vehicle- Fit Note: 4 Cyl 2.3L TIVCT DI TC
- Production Date: From 11/2018
Ford LB5Z-9J433-A Exhaust Gas Recirculation Valve
2019 Ford Ranger LB5Z9J433A
Customer Questions & Expert Answers (2)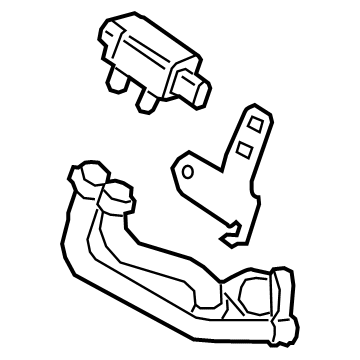
- Part DescriptionValve - Exhaust Gas Recirculation
- Replaced By
- ManufacturerFord
This part fits
2019 Ford Ranger 4 Cyl 2.3L TIVCT DI TC; 10-Speed Automatic Transmission (10R80)
Check another vehicle- Fit Note: 4 Cyl 2.3L TIVCT DI TC
- Production Date: From 11/2018
$139.87 MSRP: $206.67
You Save: $66.80 (33%)
1
- Related Parts
- Specifications
- Q&A
Product Specifications
Brand Genuine Ford Manufacturer Part Number LB5Z-9J433-A, LB5Z9J433A Part Description Exhaust Gas Recirculation Valve; Valve - Exhaust Gas Recirculation Condition New Fitment Type Direct Replacement Manufacturer Ford SKU LB5Z-9J433-A Warranty This genuine Ford part is guaranteed by Ford's factory warranty. Shipping & Return Shipping Policy Return Policy Warning: California's Proposition 65Customer Questions & Expert Answers
- Q:Is this the correct part for the attached VIN? Posted by FordPartsGiant Specialist
- A:You can Select Your Vehicle to check if LB5Z-9J433-A fits your vehicle.Posted by FordPartsGiant Specialist
- Installation and Repair Tips by AI Expert
- Removal steps 1. Park on level ground, set the parking brake, chock wheels, shut off ignition, and allow the engine to cool completely. 2. Disconnect the negative battery terminal and isolate the vehicle electrical system before touching any sensors or connectors. 3. If the EGR assembly uses engine coolant, relieve cooling-system pressure and drain enough coolant into a suitable container to avoid spills; plug or cap open coolant lines as removed (varies by design). 4. Photograph and label electrical connectors, vacuum lines, and pipes to preserve routing and orientation. 5. Remove any covers, air-intake parts, or obstructing components that must be moved for access (these items and removal sequence vary by vehicle). 6. Carefully unplug electrical connectors and detach vacuum or pressure lines; protect terminals and prevent contamination. 7. Support the EGR assembly as needed, then loosen and remove the mounting fasteners and any connecting pipes or hoses; keep hardware organized and separate. 8. Remove the EGR filter/assembly, taking care not to damage mating surfaces, nearby sensors, or fragile hoses. 9. Inspect mating surfaces, gasket faces, and the unit for heavy carbon buildup, cracks, or damage; clean mating surfaces with appropriate cleaners and replace any damaged gaskets or seals. Installation steps 1. Confirm mating surfaces are clean and dry and compare the new or serviced EGR filter to the removed unit to ensure correct fit and orientation. 2. Install new gaskets or seals where required and position the EGR assembly; support it while aligning bolt holes and mating pipes. 3. Reinstall mounting fasteners and connecting pipes/hoses loosely to allow final alignment, then snug evenly (do not use guessed torque values; follow factory specs if available). 4. Reconnect electrical connectors, vacuum/pressure lines, and any sensors in their original positions; replace damaged clips or clamps. 5. Reinstall any intake or cover components that were removed for access. 6. If coolant was drained, refill the cooling system to the proper level and purge air per common bleeding procedures (bleeding method may vary). 7. Reconnect the negative battery terminal. 8. Start the engine and check for coolant, vacuum, and exhaust leaks and listen for abnormal noises; allow the engine to reach operating temperature while monitoring. 9. Use a scan tool to read and clear fault codes, then monitor EGR-related parameters and readiness status; perform a short road test to confirm normal operation. 10. Recheck fasteners and fluid levels after the test run and retighten or top off as necessary. Repair tip: Always replace EGR gaskets, sealing rings, and any soft hoses or clamps disturbed during the job; if heavy carbon buildup is present, consider cleaning or replacing the EGR valve/filtered components rather than reusing severely clogged parts.
- Q:
Why choose Ford Parts Giant
- Dedicated Service
Your complete satisfaction is our #1 goal
- Lowest Prices
Best deals on genuine OE parts from dealerships
- Fast Delivery
Orders are processed and delivered promptly