My Garage
My Account
Cart
Additional information needed to check if this part fits
2016 Ford Fiesta
Check another vehicle- Fitting Vehicle Options: 6-Speed Manual Transmission - B6
- Production Date: 06/2013-05/2018
Ford C1BZ-7002-B Transaxle Assembly
2014-2018 Ford Fiesta C1BZ7002B
Customer Questions & Expert Answers (2)
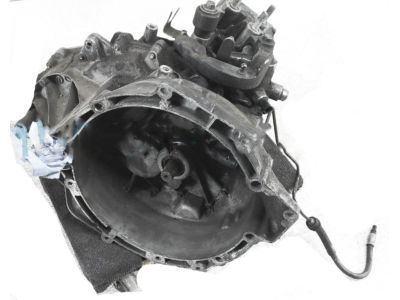

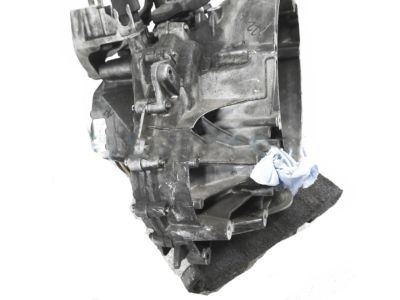
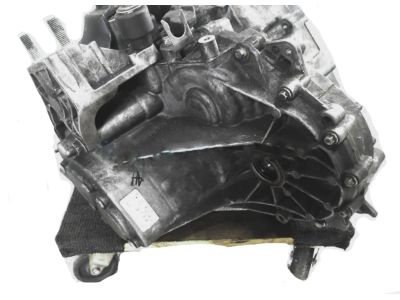
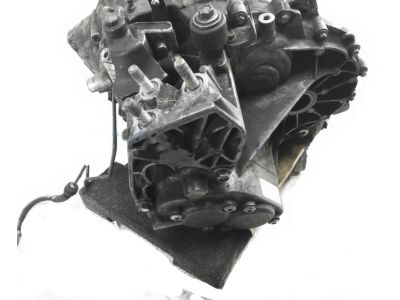
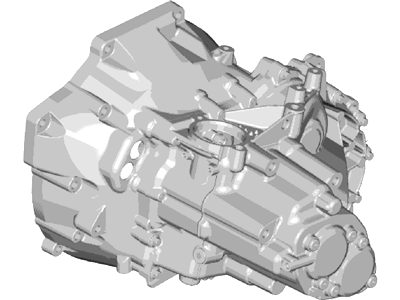
- Part DescriptionTransaxle Assy
- Replaced By
- ManufacturerFord
Additional information needed to check if this part fits
2016 Ford Fiesta
Check another vehicle- Fitting Vehicle Options: 6-Speed Manual Transmission - B6
- Production Date: 06/2013-05/2018
$2996.28 MSRP: $3552.00
You Save: $555.72 (16%)
Core Charge: $600.00
Ships in 1-2 Business Days
1
- Related Parts
- Specifications
- Q&A
Product Specifications
Brand Genuine Ford Manufacturer Part Number C1BZ-7002-B, C1BZ7002B Part Description Transaxle Assy Item Weight 114.00 Pounds Condition New Fitment Type Direct Replacement Manufacturer Ford SKU C1BZ-7002-B Warranty This genuine Ford part is guaranteed by Ford's factory warranty. Shipping & Return Shipping Policy Return Policy Warning: California's Proposition 65Customer Questions & Expert Answers
- Q:Does the PN fit my vehicle? Posted by FordPartsGiant Specialist
- A:You can Select Your Vehicle to check if C1BZ-7002-B fits your vehicle.Posted by FordPartsGiant Specialist
- Installation and Repair Tips by AI Expert
- Removal: 1. Park on a level surface, set the parking brake, chock wheels, wear safety glasses and gloves, and relieve any load from the transmission area. 2. Disconnect the negative battery terminal and follow the vehicle manufacturer's guidance for any required wait time before working on electrical systems. 3. Raise and support the vehicle securely on lift or jack stands and support the engine as needed with an engine support or jack under the oil pan and a block of wood. 4. Drain the transmission fluid into a suitable container if applicable, then reinstall the drain plug or cap to avoid excessive spillage during removal. 5. Remove any splash shields, heat shields, or service covers that restrict access to the transmission and associated components. 6. Label and photograph electrical connectors, vacuum lines, and routing of harnesses, then disconnect all transmission wiring, speed sensors, solenoids, and the park/shift linkage or selector cable. 7. Disconnect cooler lines or hoses from the transmission; be prepared to capture remaining fluid and plug lines to limit contamination. 8. Detach driveline components that connect to the transmission (axles, CV shafts, or prop shaft) following the design used; support removed axles to avoid stress on seals. 9. Support the transmission with a transmission jack or suitable support, then remove transmission-to-engine fasteners and any starter/accessory brackets needed for access. 10. Remove transmission mounts and crossmember(s) while keeping the transmission securely supported. 11. Carefully separate the transmission from the engine and lower it straight down on the jack, watching for snagging wiring or lines. Installation: 1. Inspect mating surfaces, seals, dowels, pilot bearing or bushing (if applicable), clutch/torque converter condition, and replace any worn components or seals before installation. 2. Clean and position the transmission so input shaft and mating components align; use alignment tools or guide pins as required by the design. 3. Raise the transmission into place on the jack and carefully engage it with the engine, sliding it straight in until it seats; install a few fasteners by hand to hold alignment. 4. Reinstall transmission-to-engine fasteners and any starter or accessory brackets; tighten fasteners to the manufacturer's specified torques using a calibrated tool (do not guess torque values). 5. Reinstall transmission mounts and crossmember(s) and lower the support while ensuring the transmission sits properly. 6. Reattach driveline components (axles, CV shafts, prop shaft) and verify proper seating of splines and retaining hardware. 7. Reconnect cooler lines, all electrical connectors, sensors, vacuum lines, and shift linkage or selector cable, restoring factory routing and clips. 8. Reinstall any shields or covers removed during disassembly. 9. Refill the transmission with the correct type and approximate amount of fluid; check the manufacturer's procedure for exact fill and level method. 10. Reconnect the negative battery terminal. 11. Start the engine, check for fluid leaks, and cycle through gears with the vehicle securely restrained to circulate fluid and verify proper operation of linkage and selectors. 12. Lower the vehicle, perform a short low-risk road test to confirm shift quality and absence of leaks, then recheck fluid level and final fastener security. Repair tip: Replace any soft lines, mount bushings, and the transmission filter or pan gasket when accessible during service, and keep fasteners and connectors organized and labeled to simplify reassembly.
- Q:
Why choose Ford Parts Giant
- Dedicated Service
Your complete satisfaction is our #1 goal
- Lowest Prices
Best deals on genuine OE parts from dealerships
- Fast Delivery
Orders are processed and delivered promptly