

My Garage
My Account
Cart
This part fits
2021 Ford Bronco Sport
Check another vehicleFord LX6Z-8A080-A Radiator Overflow Tank Assembly
2020-2025 Ford LX6Z8A080A
Customer Questions & Expert Answers (2)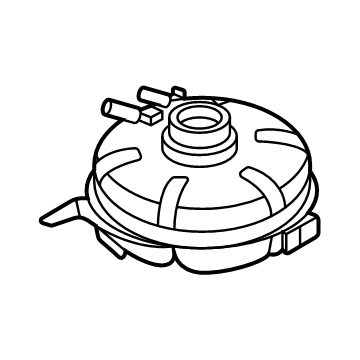
- Part DescriptionTANK ASY - RADIATOR OVERFLOW
- Bronco Sport
- 1.5 Liter
- 2.0 Liter
- ManufacturerFord
This part fits
2021 Ford Bronco Sport
Check another vehicle$51.02 MSRP: $73.30
You Save: $22.28 (31%)
Ships in 1-2 Business Days
1
- Related Parts
- Specifications
- Q&A
Product Specifications
Brand Genuine Ford Manufacturer Part Number LX6Z-8A080-A, LX6Z8A080A Part Description TANK ASY - RADIATOR OVERFLOW Other Names Expansion Tank, Reservoir Condition New Fitment Type Direct Replacement Manufacturer Ford SKU LX6Z-8A080-A Warranty This genuine Ford part is guaranteed by Ford's factory warranty. Shipping & Return Shipping Policy Return Policy Warning: California's Proposition 65Customer Questions & Expert Answers
- Q:Is this the correct part for the attached VIN? Posted by FordPartsGiant Specialist
- A:You can Select Your Vehicle to check if LX6Z-8A080-A fits your vehicle.Posted by FordPartsGiant Specialist
- Installation and Repair Tips by AI Expert
- Removal: 1. Park on level ground, set the parking brake, chock wheels, wear eye protection and gloves, and allow the engine to cool fully. 2. Disconnect the negative battery cable and isolate it from the terminal. 3. Only when cold, carefully loosen the reservoir cap to relieve any residual pressure; stop if there is noticeable pressure or steam. 4. Place a suitable drain pan under the reservoir area and remove a controlled amount of coolant (siphon or loosen a hose connection) to lower the level and minimize spills. 5. Disconnect any electrical connector(s) at the reservoir (level/sensor); label or photograph connectors for orientation. 6. Loosen hose clamps and carefully detach the inlet/outlet hoses from the reservoir, catching remaining fluid in the drain pan and plugging hoses if needed to prevent contamination. 7. Remove mounting fasteners or clips securing the reservoir and lift the reservoir out with care, noting any routing for hoses or wiring. 8. Clean the mounting area and inspect hoses, clamps, and electrical connectors for damage; cap or plug open lines to keep debris out. Installation: 1. Verify the replacement reservoir matches the original and transfer any required sensors, grommets, or seals if they are not preinstalled. 2. Position the reservoir in place following original hose/wiring routing and loosely install mounting fasteners to get proper alignment. 3. Reconnect hoses fully onto their fittings and secure with properly seated clamps. 4. Reattach electrical connector(s) to the reservoir sensor(s) and confirm they are locked in place. 5. Refill the cooling system with the correct type and concentration of coolant for the vehicle until the reservoir reaches the recommended level. 6. Reconnect the negative battery cable. 7. Start the engine, run the heater on high, and warm the engine to normal operating temperature while checking for leaks around the reservoir, hoses, and fittings. 8. Purge air from the cooling system-use the vehicle's bleed procedure if available, or allow air to escape with the cap off while gently squeezing hoses until the level stabilizes-then top off the reservoir to the proper level. 9. After cooling, recheck coolant level and inspect for leaks, tighten fittings as needed. 10. Repair tip: replace brittle hoses, worn clamps, and the reservoir cap while accessible, and collect and dispose of drained coolant per local regulations.
- Q:
Why choose Ford Parts Giant
- Dedicated Service
Your complete satisfaction is our #1 goal
- Lowest Prices
Best deals on genuine OE parts from dealerships
- Fast Delivery
Orders are processed and delivered promptly