My Garage
My Account
Cart
This part fits
2014 Ford Fusion
Check another vehicle- Fit Note: Less Sync, Sync II, Sync III, With Sync
- Production Date: 07/2013-11/2013
Ford DS7Z-18936-C Radio Aerial Support
2013-2014 Ford DS7Z18936C
Customer Questions & Expert Answers (2)
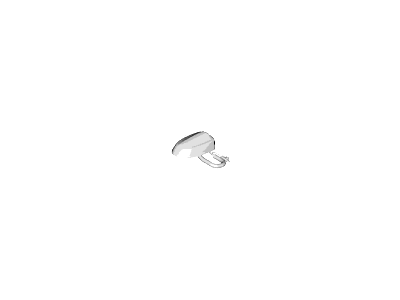
- Part DescriptionStanchion - Radio Antenna ; Support - Radio Aerial
- Replaced By
- ManufacturerFord
This part fits
2014 Ford Fusion
Check another vehicle- Fit Note: Less Sync, Sync II, Sync III, With Sync
- Production Date: 07/2013-11/2013
$75.30 MSRP: $110.08
You Save: $34.78 (32%)
Ships in 1 Business Day
1
- Related Parts
- Specifications
- Q&A
Product Specifications
Brand Genuine Ford Manufacturer Part Number DS7Z-18936-C, DS7Z18936C Part Description Stanchion - Radio Antenna ; Support - Radio Aerial Item Dimensions 5.1 x 4.4 x 3.0 inches Item Weight 1.00 Pounds Condition New Fitment Type Direct Replacement Manufacturer Ford SKU DS7Z-18936-C Warranty This genuine Ford part is guaranteed by Ford's factory warranty. Shipping & Return Shipping Policy Return Policy Warning: California's Proposition 65Customer Questions & Expert Answers
- Q:I am wondering if this is the exact part that fits in Posted by FordPartsGiant Specialist
- A:You can Select Your Vehicle to check if DS7Z-18936-C fits your vehicle.Posted by FordPartsGiant Specialist
- Installation and Repair Tips by AI Expert
- Removal steps 1. Park on level ground, set the parking brake, chock wheels, and wear eye protection and gloves. 2. Gather common hand tools, trim tools, a flashlight, and a container for fasteners; have replacement gasket/sealant available. 3. Disconnect the negative battery terminal and wait a few minutes to clear vehicle electronics before touching antenna wiring. 4. Gain access to the antenna base from the interior or roof area by removing the necessary trim or headliner pieces; the access method varies by vehicle. 5. Identify and label the antenna coax and any electrical connector(s) and note the routing before disconnecting them. 6. Remove the mounting fasteners that secure the antenna base to the body; hardware type and access will differ by design, so work carefully. 7. Lift the antenna base off, taking care not to damage the paint, trim, or cable insulation; preserve any grommets or seals for inspection. 8. Clean the mating surface of old sealant or debris and inspect the cable, connector, and roof opening for damage or corrosion. Installation steps 1. Inspect the replacement antenna base and fit a new gasket or prepare a compatible sealant per parts guidance. 2. Route the coax and electrical leads through the roof opening the same way they were removed, avoiding sharp bends and pinch points. 3. Reconnect the coaxial connector and any electrical connectors; consider a small amount of dielectric grease on exposed connectors to resist corrosion. 4. Seat the antenna base onto the roof, aligning it so the gasket sits flat and the cable is not pinched. 5. Start and gradually tighten the mounting hardware by hand, then snug evenly to compress the gasket-do not overtighten or use unspecified torque values. 6. Reinstall interior trim or headliner pieces and secure all fasteners removed for access. 7. Reconnect the negative battery terminal. 8. Test radio reception and any antenna-dependent systems for proper operation and listen for noise or dropouts. 9. Check the roof area for proper sealing by inspecting visually and, if practical, performing a light water test to confirm no leaks. 10. Repair tip: replace the gasket and use dielectric grease on connectors; tighten mounting hardware evenly in stages to avoid distortion.
- Q:
Why choose Ford Parts Giant
- Dedicated Service
Your complete satisfaction is our #1 goal
- Lowest Prices
Best deals on genuine OE parts from dealerships
- Fast Delivery
Orders are processed and delivered promptly