

My Garage
My Account
Cart
Additional information needed to check if this part fits
2004 Lincoln LS
Check another vehicle- Fitting Vehicle Options: 8 Cyl 3.9L DOHC EFI NA
- Production Date: 11/2002-04/2006
Ford 3W4Z-6C258-AA Sprocket - Crankshaft
2003-2006 Ford 3W4Z6C258AA
Customer Questions & Expert Answers (2)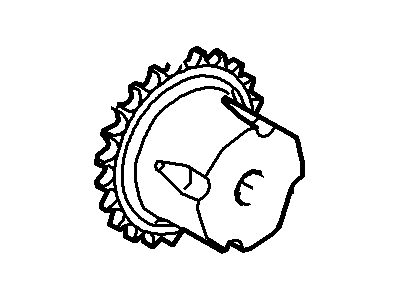
- Part DescriptionSprocket - Crankshaft
- Exhaust
- Base No.6256B
- Replaced By
- ManufacturerFord
- Manufacturer's NotesThis part is discontinued.
Additional information needed to check if this part fits
2004 Lincoln LS
Check another vehicle- Fitting Vehicle Options: 8 Cyl 3.9L DOHC EFI NA
- Production Date: 11/2002-04/2006
- Related Parts
- Specifications
- Q&A
Product Specifications
Brand Genuine Ford Base No. 6256B Manufacturer Part Number 3W4Z-6C258-AA, 3W4Z6C258AA Part Description Sprocket - Crankshaft Item Weight 1.30 Pounds Condition New Fitment Type Direct Replacement Manufacturer Ford SKU 3W4Z-6C258-AA Warranty This genuine Ford part is guaranteed by Ford's factory warranty. Shipping & Return Shipping Policy Return Policy Warning: California's Proposition 65Customer Questions & Expert Answers
- Q:I would like to know is this part gonna fit with my car. Posted by FordPartsGiant Specialist
- A:You can Select Your Vehicle to check if 3W4Z-6C258-AA fits your vehicle.Posted by FordPartsGiant Specialist
- Installation and Repair Tips by AI Expert
- Removal: 1. Park on level ground, chock wheels, wear eye protection and gloves, and allow the engine to cool. 2. Disconnect the negative battery terminal and wait a few minutes before touching electrical components. 3. Remove or move aside accessory items that block access (serpentine belt, pulleys, splash shields, covers) - the exact items and order vary by design. 4. Remove the timing cover or access cover that exposes the variable timing sprocket, following the vehicle's service procedures; designs differ so consult reference material as needed. 5. Relieve chain/belt tension by releasing the timing tensioner per the tensioner's service method; if the design requires locking tools or a specific sequence, use the manufacturer procedure. 6. Bring the engine to the required orientation and secure the crank/cam to prevent rotation if the procedure calls for it; methods vary by engine. 7. Loosen and remove the sprocket retaining fastener(s) using appropriate tools while preventing shaft rotation; retain any hardware for reference. 8. Carefully remove the sprocket from the shaft and slide the timing chain/belt aside as needed. 9. Inspect the sprocket mating surface, chain/belt, tensioner, and guides for wear or damage and set aside parts to be replaced. Installation: 1. Verify the replacement sprocket and any replacement parts are correct for the engine before beginning assembly. 2. Clean mating surfaces and remove old gasket material or debris from the shaft and surrounding area. 3. Position timing marks and align the cam/crank and chain/belt per the engine's timing procedure; note that alignment method and marks vary by design. 4. Fit the new sprocket onto the shaft and install the retaining fastener(s) by hand to ensure proper engagement. 5. Reinstall or reset the timing tensioner and any guides, setting tension according to the tensioner's service procedure (preload or index method as applicable). 6. If required, release any locking tools and allow the timing system to take up slack, then re-secure cams/crank as specified by the manufacturer. 7. Manually rotate the engine two full revolutions and recheck timing alignment and clearances; verify no interference or binding occurs. 8. Reinstall timing cover, accessory components, drive belt, and any removed shields or pulleys. 9. Reconnect the negative battery terminal. 10. Start the engine, listen for unusual noises, watch for leaks, and scan for diagnostic codes; re-check timing if abnormal symptoms appear. Repair tip: Whenever replacing a variable timing sprocket, commonly replace the tensioner and guides and use new fasteners as recommended by the parts supplier; consult the factory service manual for the exact timing procedure and all torque values.
- Q:
Why choose Ford Parts Giant
- Dedicated Service
Your complete satisfaction is our #1 goal
- Lowest Prices
Best deals on genuine OE parts from dealerships
- Fast Delivery
Orders are processed and delivered promptly