My Garage
My Account
Cart
Additional information needed to check if this part fits
2005 Ford F-150
Check another vehicle- Fitting Vehicle Options: 4.6L, Four-Wheel Drive
- Fit Note: 126"/3200MM Wheelbase, 133"/3378MM Wheelbase, 139"/3531MM Wheelbase, 145"/3675MM Wheelbase, 150" Wheelbase, With 8.8 Axle
- Production Date: 11/2004-08/2007
Ford 5L3Z-4602-EA Drive Shaft Assembly
2005-2008 Ford 5L3Z4602EA
Customer Questions & Expert Answers (4)
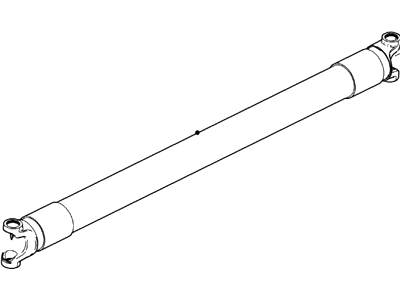
- Part DescriptionShaft Assembly - Drive
- Base No.4602
- Replaces
- ManufacturerFord
- Manufacturer's NotesThis part is discontinued.
Additional information needed to check if this part fits
2005 Ford F-150
Check another vehicle- Fitting Vehicle Options: 4.6L, Four-Wheel Drive
- Fit Note: 126"/3200MM Wheelbase, 133"/3378MM Wheelbase, 139"/3531MM Wheelbase, 145"/3675MM Wheelbase, 150" Wheelbase, With 8.8 Axle
- Production Date: 11/2004-08/2007
- Related Parts
- Specifications
- Q&A
Product Specifications
Brand Genuine Ford Base No. 4602 Manufacturer Part Number 5L3Z-4602-EA, 5L3Z4602EA Part Description Shaft Assembly - Drive Other Names Drive Shaft Item Dimensions 8.7 x 13.5 x 57.6 inches Item Weight 26.50 Pounds Condition New Fitment Type Direct Replacement Replaces 4L3Z-4602-EC Manufacturer Ford SKU 5L3Z-4602-EA Warranty This genuine Ford part is guaranteed by Ford's factory warranty. Shipping & Return Shipping Policy Return Policy Warning: California's Proposition 65Customer Questions & Expert Answers
- Q:Will these fit my car and if not which part will? Thank you. Posted by FordPartsGiant Specialist
- A:You can Select Your Vehicle to check if 5L3Z-4602-EA fits your vehicle.Posted by FordPartsGiant Specialist
Installation and Repair Tips- Q:How to install a drive shaft on the Ford F-150? Posted by Customer
- A:The manufacturer recommends replacing driveshaft fasteners with new ones when installing the driveshaft, if new fasteners are not available, coat the threads with a thread locking compound. For a two-piece driveshaft, the rear shaft must be removed before the front shaft. Raise the vehicle and support it securely on jackstands. Use chalk or a scribe to "index" the relationship of the driveshaft to the differential axle assembly mating flange. This ensures correct alignment when the driveshaft is reinstalled. Remove the bolts securing the driveshaft flange or universal joint clamps to the differential pinion flange. Pry the universal joint away from its mating flange and remove the shaft from the flange. Be careful not to let the caps fall off of the universal joint. Lower the rear of the driveshaft. If the driveshaft is a one-piece unit, slide the front end of the driveshaft out of the transmission extension housing. Wrap a plastic bag over the extension housing and hold it in place with a rubber band. This will prevent loss of fluid and protect against contamination while the driveshaft is out. Remove the plastic bag from the transmission or transfer case extension housing and wipe the area clean. Inspect the oil seal carefully. If it's leaking, now is the time to replace it. Inspect the center support bearing, if equipped. If it is rough or noisy, replace it. Insert the front end of the driveshaft assembly into the Transmission or transfer case extension housing. If the driveshaft is a one-piece unit, raise the rear of the driveshaft into position, checking to be sure the marks are in alignment. If not, turn the pinion flange until the marks line up. If the driveshaft is a two-piece unit, raise the center support bearing and bolt it loosely into place, raise the rear end of the rear shaft into position and make sure the alignment marks are in alignment. If not, turn the pinion flange until they do. Remove the tape securing the bearing caps and install the clamps, if equipped, and fasteners. Tighten these fasteners and the center supports bearing bolts to the torque. The front driveshaft on 2009 and later models uses CV joints instead of U-joints, but the removal procedure is essentially the same. Raise the vehicle and support it securely on jackstands. If equipped, remove the driveshaft shield. Use chalk or a scribe to mark the relationship of the driveshaft to the differential axle assembly mating flange. Remove the bolts that secure the front end of the driveshaft to the differential mating flange. Mark the relationship of the driveshaft to the transfer case flange. Unbolt the flange that secures the driveshaft universal joint to the transfer case, then remove the driveshaft. Installation is the reverse of removal. If the shaft cannot be lined up due to the components of the differential or transfer case having been rotated, put the vehicle in Neutral or rotate one wheel to allow the original alignment to be achieved. Make sure the universal joint caps are properly placed in the flange seat. Tighten the fasteners to the torque.Posted by FordPartsGiant Specialist
- Q:What is the purpose and maintenance of the drive shaft on the Ford F-150? Posted by Customer
- A:A driveshaft is a tube that transmits power between the transmission or transfer case and the differential(s). Universal joints are located at either end of the driveshaft and allow the driveshaft to operate at different angles as the suspension moves. There are three different types of universal joints: single-cardan, double-cardan and constant velocity. Some models have a two-piece driveshaft, connected at a center support bearing. The rear driveshaft employs a splined yoke at the front, which slips into the extension housing of the transmission. The front driveshaft on 4WD models, and the rear half of the driveshaft on models with a two-piece driveshaft, incorporates a slip yoke as part of the shaft. This arrangement allows the driveshaft to alter its length during vehicle operation. On models with a one-piece rear driveshaft, the slip yoke is splined to the transmission output shaft. An oil seal prevents fluid from leaking out of the extension housing and keeps dirt from entering the transmission or transfer case. If leakage is evident at the front of the driveshaft, replace the extension housing oil seal. The driveshaft assembly requires very little service. Factory U-joints are lubricated for life and must be replaced if problems develop. The driveshaft must be removed from the vehicle for this procedure. Some aftermarket universal joints have grease fittings to allow periodic lubrication. Since the driveshaft is a balanced unit, it's important that no undercoating, mud, etc. be allowed to accumulate on it. When the vehicle is raised for service, it's a good idea to clean the driveshaft and inspect it for any obvious damage. Also, make sure the small weights used to originally balance the driveshaft are in place and securely attached. Whenever the driveshaft is removed, it must be reinstalled in the same relative position to preserve the balance. Problems with the driveshaft are usually indicated by a noise or vibration while driving the vehicle. A road test should verify if the problem is the driveshaft or another vehicle component.Posted by FordPartsGiant Specialist
- Additional Installation and Repair Tips by AI Expert
- Removal: 1. Park on a level surface, chock wheels, set the parking brake, and lift and support the vehicle on properly rated jack stands placed at safe support points. 2. Wear eye protection and gloves and disconnect the negative battery terminal to disable electrical systems. 3. If present, drain a small amount of differential or transmission fluid if necessary to avoid spills when separating the driveshaft; have a drain pan ready. 4. Support the driveshaft with a transmission jack or second jack/stands to prevent it from dropping once fasteners are released. 5. Mark the relationship between the driveshaft and mating flanges or slip yoke (matchmarks) to preserve driveline balance and orientation for reinstallation. 6. Loosen and remove the fasteners that connect the driveshaft to the differential flange or companion flange, keeping the driveshaft supported as you separate it. 7. For two-piece shafts or shafts with a center support bearing, unbolt the center bearing or flange support and lower the shaft assembly as a unit if applicable. 8. Slide the slip yoke or transmission end of the driveshaft out of the transmission/transfer case output carefully; support and lower the shaft clear of the vehicle. 9. Inspect U-joints, splines, seals, and the removed shaft for wear or damage and note any parts that should be replaced. Installation: 1. Clean mating surfaces and inspect sealing areas, splines, and yokes; replace worn U-joints, carrier bearings, or seals before installing the shaft. 2. Align matchmarks made during removal and slide the driveshaft slip yoke into the transmission/transfer case output without forcing the seal; ensure the shaft is fully supported. 3. Reposition the driveshaft so the flanges and center support (if present) align with their mounting points. 4. Install fasteners finger-tight to hold the shaft in place, using new fasteners if the manufacturer specifies single-use hardware. 5. With the driveshaft supported and centered, torque all fasteners to the manufacturer's specified values (do not guess torque); tighten in a cross pattern if applicable. 6. Refill any fluid previously drained to the proper level per the vehicle's service information. 7. Reconnect the negative battery terminal and clear any stored codes if required by your scan tool. 8. Lower the vehicle, remove wheel chocks, and perform a careful road test to check for vibration, noise, or leaks. 9. After a short drive, recheck fastener tightness and fluid level; retorque to spec if the service procedure calls for a post-test check. Repair tip: Replace U-joints and center bearing assemblies in pairs or as a set if wear is present, and always preserve matchmarks to maintain driveline balance.
- Q:
Why choose Ford Parts Giant
- Dedicated Service
Your complete satisfaction is our #1 goal
- Lowest Prices
Best deals on genuine OE parts from dealerships
- Fast Delivery
Orders are processed and delivered promptly