My Garage
My Account
Cart
This part fits
2013 Ford F-150
Check another vehicle- The location this part fits: Driver Side
- Fit Note: (-) SVT
- Production Date: 11/2010-12/2014
Ford BL3Z-2C190-F Sensor Assembly
2011-2014 Ford BL3Z2C190F
Customer Questions & Expert Answers (2)
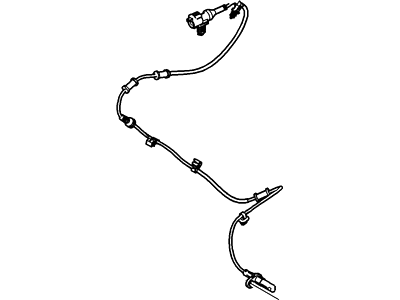
- Part DescriptionSensor Assy
- Service Part May Differ From Production
- Base No.2C190
- PositionDriver Side
- Replaces
- ManufacturerFord
This part fits
2013 Ford F-150
Check another vehicle- The location this part fits: Driver Side
- Fit Note: (-) SVT
- Production Date: 11/2010-12/2014
$63.65 MSRP: $103.11
You Save: $39.46 (39%)
Ships in 1-2 Business Days
1
- Related Parts
- Specifications
- Q&A
Product Specifications
Brand Genuine Ford Base No. 2C190 Manufacturer Part Number BL3Z-2C190-F, BL3Z2C190F Part Description Sensor Assy Other Names ABS Sensor, Rear Speed Sensor Manufacturer Note Service Part May Differ From Production Item Dimensions 7.6 x 2.7 x 7.6 inches Item Weight 0.70 Pounds Position Driver Side Condition New Fitment Type Direct Replacement Replaces BL3Z-2C190-D, BRAB-321 Manufacturer Ford SKU BL3Z-2C190-F Warranty This genuine Ford part is guaranteed by Ford's factory warranty. Shipping & Return Shipping Policy Return Policy Warning: California's Proposition 65Customer Questions & Expert Answers
- Q:Can you tell me if this part is correct for my car? Posted by FordPartsGiant Specialist
- A:You can Select Your Vehicle to check if BL3Z-2C190-F fits your vehicle.Posted by FordPartsGiant Specialist
- Installation and Repair Tips by AI Expert
- Removal steps 1. Park on level ground, engage the parking brake, block wheels, wear eye protection and gloves. 2. Loosen wheel lug nuts slightly, raise the vehicle and support it securely on jack stands, then remove the wheel. 3. Disconnect the negative battery terminal to prevent electrical shorts before touching the sensor wiring. 4. Locate the ABS sensor harness and follow it from the wheel hub to the connector; release any clips or retainers to give slack. 5. Unplug the electrical connector by pressing the locking tab and pulling straight apart-avoid pulling on the wires. 6. Remove any retaining hardware securing the sensor to the hub/knuckle (bolt, screw, or clamp); note that fastener type and location vary by design. 7. Carefully extract the sensor from its bore or mount; if seized, apply penetrating fluid and gently twist while pulling to avoid damaging the housing. 8. Inspect the sensor tip and surrounding reluctor/tone ring for corrosion, debris, missing teeth, or damage and check the wiring for chafing or broken insulation. Installation steps 1. Compare the new sensor to the old unit to confirm match and ensure the connector and mounting orientation are correct. 2. Clean the sensor mounting bore and adjacent area of rust and debris; avoid contaminating the sensing tip with grease or oil. 3. If manufacturer guidance allows, apply a light, appropriate anti-seize to the sensor mounting surface (do not coat the sensing face). 4. Seat the sensor gently into place, making sure it fully engages the bore or bracket without forcing. 5. Install and snug the retaining fastener(s); follow vehicle-specific tightening practices (do not guess torque values). 6. Route the harness along the original path, secure with clips/retainers, and reconnect the electrical connector until it locks. 7. Reinstall the wheel, lower the vehicle, and tighten lug nuts in the proper sequence to final snugness per your normal practice. 8. Reconnect the negative battery terminal. 9. Clear ABS codes with a scan tool if present, then perform a low-speed road test to verify ABS warning light behavior and proper function. 10. Repair tip: if an ABS warning persists after replacement, inspect the tone ring and wiring continuity and secure all harness routing to prevent future chafe.
- Q:
Why choose Ford Parts Giant
- Dedicated Service
Your complete satisfaction is our #1 goal
- Lowest Prices
Best deals on genuine OE parts from dealerships
- Fast Delivery
Orders are processed and delivered promptly