My Garage
My Account
Cart
Additional information needed to check if this part fits
2016 Ford Mustang
Check another vehicle- Fitting Vehicle Options: 50th Anniversary Edition, Base, GT, Sub C
- Fit Note: North American Markets
- Production Date: From 08/2014
Ford CCPZ-3B477-F Retainer
2015-2019 Ford CCPZ3B477F
Customer Questions & Expert Answers (2)
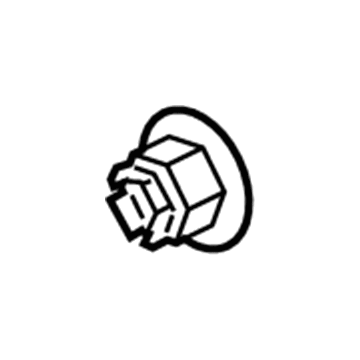
- Part DescriptionRetainer
- M22 x 1.50 , Nut And Washer
- PositionPassenger Side/Driver Side
- Replaced By
- ManufacturerFord
- Require Quantity2
- Package Quantity1
Additional information needed to check if this part fits
2016 Ford Mustang
Check another vehicle- Fitting Vehicle Options: 50th Anniversary Edition, Base, GT, Sub C
- Fit Note: North American Markets
- Production Date: From 08/2014
$3.11 MSRP: $4.43
You Save: $1.32 (30%)
Ships in 1 Business Day
1
- Related Parts
- Specifications
- Q&A
Product Specifications
Brand Genuine Ford Manufacturer Part Number CCPZ-3B477-F, CCPZ3B477F Part Description Retainer Item Weight 0.50 Pounds Position Passenger Side/Driver Side Condition New Fitment Type Direct Replacement Require Quantity 2 Manufacturer Ford SKU CCPZ-3B477-F Warranty This genuine Ford part is guaranteed by Ford's factory warranty. Shipping & Return Shipping Policy Return Policy Warning: California's Proposition 65Customer Questions & Expert Answers
- Q:Does the PN fit my vehicle? Posted by FordPartsGiant Specialist
- A:You can Select Your Vehicle to check if CCPZ-3B477-F fits your vehicle.Posted by FordPartsGiant Specialist
- Installation and Repair Tips by AI Expert
- Removal: 1. Park on level ground, engage park/gear, apply parking brake, chock opposite wheels and wear eye protection and gloves. 2. Loosen wheel lug nuts slightly while vehicle is on the ground. 3. Raise the vehicle with a jack and support on rated jack stands placed under safe lift points. 4. Remove the wheel to access the hub/spindle area. 5. Disconnect the negative battery terminal and wait the manufacturer-specified time before touching SRS/ABS wiring or connectors. 6. If present, unplug any nearby wheel speed sensor or ABS connectors before further dismantling. 7. Remove any brake caliper or retaining hardware necessary to gain access to the spindle nut; support the caliper so it does not hang by the hose. 8. Remove the brake rotor or dust shield as needed to expose the spindle nut or axle nut area. 9. Remove any dust cap, cotter pin, locking tab, or locking device that secures the spindle nut (designs vary). 10. Loosen and remove the spindle/axle nut using appropriate tools; be prepared for the hub or axle to move once the nut is released. 11. Slide the nut off and remove any washers or retainers; remove the hub or drive flange if that is required for your repair and design. Installation: 1. Clean mating surfaces on the hub, spindle, and any washers or retainers; inspect bearings, seals, and splines for wear and replace as needed. 2. If the spindle nut is single-use in your design, install a new nut; otherwise install the correct rated nut for the vehicle. 3. Assemble any washers or retainers in the correct order and hand-thread the spindle/axle nut to seat the hub. 4. Preload and tighten the nut following the vehicle manufacturer's procedure and torque specification (do not guess torque values). 5. Install and secure any cotter pins, locking tabs, or locking devices required by the design. 6. Reinstall dust cap, rotor, and brake components; torque caliper and mounting hardware to manufacturer specifications. 7. Reconnect any wheel speed/ABS connectors that were unplugged. 8. Reconnect the negative battery terminal and wait the manufacturer-specified time if required before performing system checks. 9. Reinstall the wheel, lower the vehicle, and torque wheel lug nuts to the manufacturer's specified value. 10. Test drive carefully to verify smooth operation, no unusual noises, proper braking, and no warning lights; recheck fasteners after initial road test. Repair tip: 1. Use a proper torque wrench and follow the vehicle's specified torque and nut retention method; replace single-use nuts and cotter pins rather than reusing them.
- Q:
Why choose Ford Parts Giant
- Dedicated Service
Your complete satisfaction is our #1 goal
- Lowest Prices
Best deals on genuine OE parts from dealerships
- Fast Delivery
Orders are processed and delivered promptly