

My Garage
My Account
Cart
This part fits
2008 Ford Expedition 8 Cyl 5.4L
Check another vehicle- Fit Note: With Manual Liftgate
- Production Date: 08/2006-09/2007
Ford 7L1Z-7843150-D Tailgate Latch Assembly
2007-2019 Ford 7L1Z7843150D
Customer Questions & Expert Answers (6)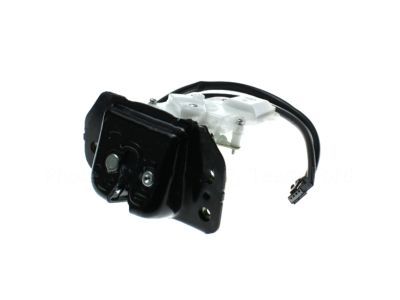
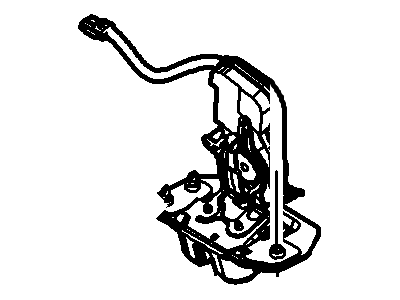
- Part DescriptionLatch Assembly - Tailgate
- Ajar Switch Is Not Serviced Separately , Includes Door Ajar Switch
- Base No.<43150A
- Replaces
- ManufacturerFord
This part fits
2008 Ford Expedition 8 Cyl 5.4L
Check another vehicle- Fit Note: With Manual Liftgate
- Production Date: 08/2006-09/2007
$118.54 MSRP: $175.15
You Save: $56.61 (33%)
Ships in 1-3 Business Days
1
- Related Parts
- Specifications
- Q&A
Product Specifications
Brand Genuine Ford Base No. <43150A Manufacturer Part Number 7L1Z-7843150-D, 7L1Z7843150D Part Description Latch Assembly - Tailgate Other Names Gate Latch, Latch Assembly, Lock, Lock Actuator Item Dimensions 9.5 x 7.4 x 5.2 inches Item Weight 5.40 Pounds Condition New Fitment Type Direct Replacement Replaces 7L1Z-7843150-A Manufacturer Ford SKU 7L1Z-7843150-D Warranty This genuine Ford part is guaranteed by Ford's factory warranty. Shipping & Return Shipping Policy Return Policy Warning: California's Proposition 65Customer Questions & Expert Answers
- Q:Does the PN fit my vehicle? Posted by FordPartsGiant Specialist
- A:You can Select Your Vehicle to check if 7L1Z-7843150-D fits your vehicle.Posted by FordPartsGiant Specialist
Installation and Repair Tips- Q:How to remove and install the Door Handle, Door Latch Assembly and Door Lock Cylinder on the Ford Expedition? Posted by Customer
- A:To address the door latch, first raise the window and remove the door trim panel along with the watershield. Next, take out the screws that secure the latch to the door, detach the locking rods and cable, and pull the latch assembly through the access hole. While working through the large access hole, position the latch to disengage the outside door handle and lock cylinder from the latch rods, as well as the inside handle from the latch cable. All door locking rods are attached by plastic clips, which can be removed by unsnapping the portion engaging the connecting rod and pulling the rod out of its locating hole. Adjust the latch to disengage the door lock actuator hook, then remove the latch assembly from the door, with installation being the reverse of removal. For the outside handle and door lock cylinder assembly, raise the window and remove the door trim panel and watershield. Through the large access hole, disengage the plastic clips securing the lock cylinder to the latch rod and the door handle to the latch rod. Disconnect any electrical connectors that may interfere with removal, then remove the outside handle retaining nuts accessible through the access hole in the door frame and pull the handle and lock cylinder assembly from the door, with installation being the reverse of removal. For the inside handle and cable, remove the door trim panel and peel away the watershield. Take out the bolt securing the inside handle and pull rearward to disengage it from the inner door panel. Detach the latch rod from the backside of the handle and remove it from the vehicle, rotating the handle out and detaching the latch rod retaining clip, with installation being the reverse of removal.Posted by FordPartsGiant Specialist
- Q:How often should the Door Hinge, Door Latch Assembly, Door Lock, Hood Hinge, Hood Latch and Trunk Latch be lubricated on Ford Expedition? Posted by Customer
- A:Once every 3000 miles or every three months, the hinges and latch assemblies on the doors, hood, and trunk should receive a few drops of light oil or lock lubricant. Additionally, the door latch strikers should be lubricated with a thin coat of grease to minimize wear and ensure smooth operation. It is also recommended to lubricate the door and trunk locks with spray-on graphite lubricant.Posted by FordPartsGiant Specialist
- Q:How to remove and install the tailgate handle and tailgate latch on the Ford Expedition? Posted by Customer
- A:Lower the tailgate and remove the access cover by taking out the screws to reach the inside of the tailgate. Next, remove the latch mounting screws, which may require an impact driver to loosen. Disconnect the control rods from the latch and take the latch out of the door. For the handle and lock cylinder, disconnect the control rods by disengaging the handle-to-latch rods and remove the handle retaining nuts. Detach the retaining nuts to take out the handle and lock cylinder assembly from the tailgate. Installation follows the reverse order of removal.Posted by FordPartsGiant Specialist
- Q:How often should the Door Hinge, Door Latch Assembly, Door Lock, Hood Hinge, Hood Latch and Trunk Latch be lubricated on Ford Expedition? Posted by Customer
- A:Once every 3000 miles or every three months, the hinges and latch assemblies on the doors, hood, and trunk should receive a few drops of light oil or lock lubricant. Additionally, the door latch strikers should be lubricated with a thin coat of grease to minimize wear and ensure smooth operation. It is also recommended to lubricate the door and trunk locks with spray-on graphite lubricant.Posted by FordPartsGiant Specialist
- Additional Installation and Repair Tips by AI Expert
- Removal steps 1. Park on level ground, set parking brake, wear eye protection and gloves. 2. Disconnect the negative battery cable to prevent accidental power operation of locks or windows. 3. Lower the window or support it in a safe position if required; secure the glass before removing the door panel. 4. Remove the interior door trim and any vapor/water barrier as needed to access the latch area - fastening methods vary by design. 5. Disconnect electrical connectors for power locks, door ajar sensors, and any courtesy lamps; label connectors if helpful. 6. Detach interior lock/handle rods or cables from the latch; note or mark their orientation because connections vary by design. 7. Support the latch assembly from inside the door and remove the fasteners holding the latch to the door shell - fastener type and access vary by vehicle. 8. Carefully withdraw the latch assembly from the door, taking care not to snag wiring or damage the door skin; set the old latch aside. Installation steps 1. Confirm replacement latch matches the removed unit and that actuators/sensors are compatible. 2. Position the new latch into the door and support it while aligning it to the mounting area; fastener locations and sizes vary by design. 3. Install and snug the latch fasteners by hand; tighten securely using appropriate tools (do not guess torque values). 4. Reconnect lock/handle rods or cables in their original orientation and verify smooth movement. 5. Reconnect electrical connectors to the latch and any sensors; ensure connectors click or seat fully. 6. Reinstall the vapor/water barrier and interior door trim, ensuring clips and fasteners are properly engaged and the window is properly seated. 7. Reconnect the negative battery cable. 8. Test all latch functions: manual and power locking/unlocking, interior and exterior handles, key/remote operation, door ajar indication, and child lock if equipped; cycle several times and listen for binding or unusual noises. 9. If alignment or engagement is poor, adjust striker position or latch orientation as required (adjustment methods vary); retest after each change. 10. Repair tip: photograph linkages and connector positions before disassembly and replace any damaged clips or gaskets to maintain water sealing.
- Q:
Why choose Ford Parts Giant
- Dedicated Service
Your complete satisfaction is our #1 goal
- Lowest Prices
Best deals on genuine OE parts from dealerships
- Fast Delivery
Orders are processed and delivered promptly