×
- Live Chat
- 1-888-788-9341


My Garage
My Account
Cart
This part fits
2013 Ford Taurus (VIN: 1FAHP2KT5DG183206) 6 Cyl 3.5L DOHC T/C; 6-Speed Automatic Transmission 6F55; Four-Wheel Drive (Full Time) (Left Hand Drive); SHO
Check another vehicle- The location this part fits: Driver Side
- Fit Note: SHO, SHO Package 1
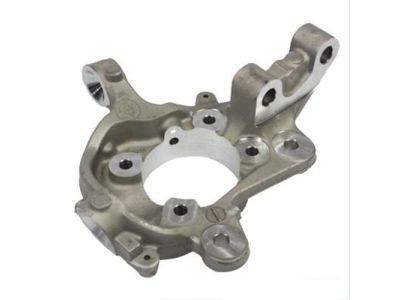
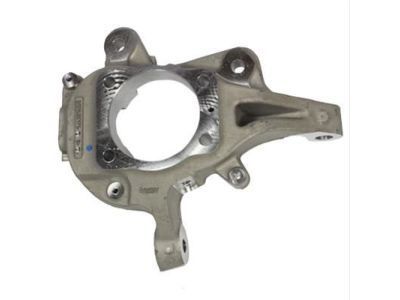
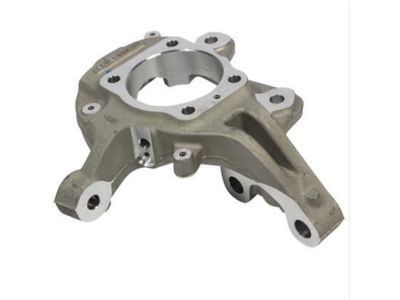
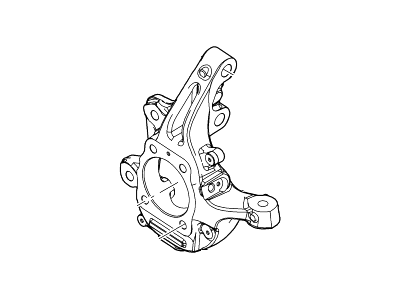
Ford DE9Z-3K186-B Front Wheel Knuckle
2013-2019 Ford DE9Z3K186B
Customer Questions & Expert Answers (3)
- Part DescriptionKnuckle - Front Wheel
- Knuckle - Front Wheel
- Base No.3K185
- PositionDriver Side
- ManufacturerFord
This part fits
2013 Ford Taurus (VIN: 1FAHP2KT5DG183206) 6 Cyl 3.5L DOHC T/C; 6-Speed Automatic Transmission 6F55; Four-Wheel Drive (Full Time) (Left Hand Drive); SHO
Check another vehicle- The location this part fits: Driver Side
- Fit Note: SHO, SHO Package 1
$129.80 MSRP: $214.55 1
You Save: $84.75 (40%)
Ships in 1-2 Business Days
- Related Parts
- Product Specifications
- Customer Questions & Expert Answers
Product Specifications
Brand Genuine Ford Base No. 3K185 Manufacturer Part Number DE9Z-3K186-B, DE9Z3K186B Part Description Knuckle - Front Wheel Other Names Knuckle Item Dimensions 5.9 x 15.4 x 12.7 inches Item Weight 8.10 Pounds Position Driver Side Condition New Fitment Type Direct Replacement Manufacturer Ford SKU DE9Z-3K186-B Warranty This genuine Ford part is guaranteed by Ford's factory warranty. Shipping & Return Shipping Policy Return Policy Warning: California’s Proposition 65Customer Questions & Expert Answers
- Q:I am wondering if this is the exact part that fits in Posted by FordPartsGiant Specialist
- A:You can Select Your Vehicle to check if DE9Z-3K186-B fits your vehicle.Posted by FordPartsGiant Specialist
- Q:How to remove and install the steering knuckle on Ford Taurus? Posted by Customer
- A:For 2012 and earlier models, the steering knuckle removal and installation procedure is part of the strut removal procedure. For 2013 and later models, the removal process involves loosening the wheel lug nuts, raising the vehicle and removing the wheel. The driveaxle/hub nut is then removed, followed by separating the tie rod from the steering knuckle. The brake disc and ABS wheel speed sensor are removed, and the lower arm is separated from the steering knuckle. The driveaxle is then separated from the hub, and the strut-to-steering knuckle bolts are removed to separate the knuckle from the strut. To install, the steering knuckle and hub assembly are guided into position, with the driveaxle inserted into the hub. The strut-to-knuckle bolts and nuts are tightened, and the balljoint and tie-rod end are connected and tightened. The wheel speed sensor and harness bracket are installed, followed by the brake disc and caliper/mounting bracket assembly. The driveaxle is seated using the old driveaxle/hub nut and washer, which is then replaced with a new nut and tightened to the specified torque. The wheel is installed, the vehicle is lowered, and the lug nuts are tightened. Finally, the front-end alignment is checked and adjusted if necessary.Posted by FordPartsGiant Specialist
- Q:How do you remove and install the rear Steering Knuckle on Ford Taurus? Posted by Customer
- A:Measure the distance from the center of the rear wheel hub to the fender lip with the vehicle sitting on level ground, under its own weight. Loosen the rear wheel lug nuts. Raise the rear of the vehicle and support it securely on jackstands, then remove the wheel. Support the lower arm with a floor jack. Raise the jack until the distance between the center of the hub and the lip of the fender is the same. If you're working on an all-wheel drive model, have an assistant apply the brakes while you remove the driveaxle/hub nut. Remove the brake caliper but leave the brake line attached. Use wire to support the caliper - don't let it hang by the hose. Remove the hub and bearing assembly. Disconnect the lower end of the shock absorber from the knuckle. Detach the outer end of the upper control arm from the knuckle. Detach the toe link from the knuckle. Detach the trailing arm from the knuckle. Detach the lower arm from the knuckle, and remove the knuckle. Installation is the reverse of the removal procedure, tightening all suspension fasteners to the torque values with the suspension at normal ride height. Tighten the brake fasteners to the torque value. If you're working on an all-wheel drive model, tighten the driveaxle/hub nut(s) to the torque. Install the wheel and lug nuts, then lower the vehicle. Tighten the lug nuts to the torque.Posted by FordPartsGiant Specialist
If you have any questions about this product, please don't hesitate to ask us. We will be happy to help you!- Q:
Why choose Ford Parts Giant
- Dedicated Service
Your complete satisfaction is our #1 goal
- Lowest Prices
Best deals on genuine OE parts from dealerships
- Fast Delivery
Orders are processed and delivered promptly


