This part fits the vehicle you selected:
My Vehicle: 1FAHP2KT2DG150017 2013 Ford Taurus 6 Cyl 3.5L DOHC T/C; 6-Speed Automatic Transmission 6F55; Four-Wheel Drive (Full Time) (Left Hand Drive); SHO
Change VehicleThe vehicle options this part fits:
- Production Date: 02/2012-06/2014
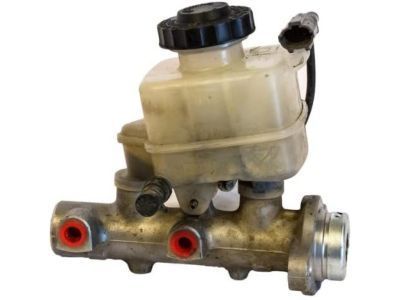
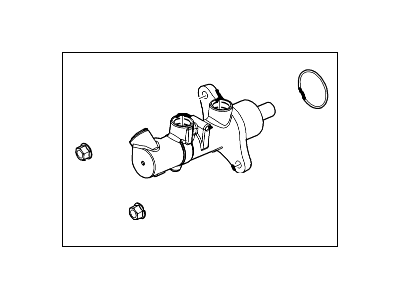
Ford DG1Z-2140-A Kit - Master Cylinde
2013-2015 Ford DG1Z2140A

- Part DescriptionKit - Master Cylinder Repair
- Replaced ByDG1Z-2140-B
- ManufacturerFord
This part fits the vehicle you selected:
1FAHP2KT2DG150017 2013 Ford Taurus 6 Cyl 3.5L DOHC T/C; 6-Speed Automatic Transmission 6F55; Four-Wheel Drive (Full Time) (Left Hand Drive); SHO
The vehicle options this part fits:
- Production Date: 02/2012-06/2014
$192.93 MSRP: $321.82 1
You Save: $128.89 (41%)
Ships in 1-2 Business Days
Product Specifications
| Brand | Genuine Ford |
| Manufacturer Part Number | DG1Z-2140-A, DG1Z2140A |
| Part Description | Kit - Master Cylinder Repair |
| Item Dimensions | 10.4 x 8.2 x 9.0 inches |
| Item Weight | 2.60 Pounds |
| Condition | New |
| Fitment Type | Direct Replacement |
| Manufacturer | Ford |
| SKU | DG1Z-2140-A |
| Warranty | This genuine Ford part is guaranteed by Ford's factory warranty. |
| Shipping & Return | Shipping Policy Return Policy |
Warning: California’s Proposition 65
Customer Questions & Answers
- Q:I am wondering if this is the exact part that fits in Posted by FordPartsGiant Specialist
- A:You can Select Your Vehicle to check if DG1Z-2140-A fits your vehicle.Posted by FordPartsGiant Specialist
- Q:How to remove and install a master cylinder in a Ford Taurus? Posted by Customer
- A:The brake master cylinder is located in the engine compartment, mounted to the power brake booster. With the engine OFF, deplete the vacuum from the power brake booster by depressing the brake pedal several times. Remove the battery and the battery tray. Remove the air filter housing and intake duct. Remove as much fluid as you can from the reservoir with a syringe. Disconnect the electrical connector at the brake fluid level switch on the brake master cylinder reservoir. Place rags under the fluid fittings and prepare caps or plastic bags to cover the ends of the lines once they are disconnected. Loosen the fittings at the ends of the brake lines where they enter the brake master cylinder. Pull the brake lines slightly away from the brake master cylinder and plug the ends to prevent contamination. Remove and discard the nuts attaching the brake master cylinder to the power booster. Pull the brake master cylinder off the studs and out of the engine compartment along with the brake master cylinder-to-booster seal. If a new brake master cylinder is being installed, remove the reservoir from the old brake master cylinder and transfer it to the new brake master cylinder. Install new seals when transferring the reservoir. Bench bleed the new brake master cylinder before installing it. Mount the brake master cylinder in a vise, with the jaws of the vise clamping on the mounting flange. Attach a pair of brake master cylinder bleeder tubes to the outlet ports of the brake master cylinder. Fill the reservoir with brake fluid. Slowly push the pistons into the brake master cylinder to expel air from the pressure chambers and into the reservoir. Repeat the procedure until no more air bubbles are present. Remove the bleed tubes and install plugs in the open ports. Install the reservoir cap. Install the brake master cylinder over the studs on the power brake booster. Use new nuts and tighten them only finger tight at this time. Install a new seal into the sleeve of the brake master cylinder. Thread the brake line fittings into the brake master cylinder. Tighten the mounting nuts to the specified torque, then tighten the brake line fittings securely. Fill the brake master cylinder reservoir with fluid, then bleed the brake master cylinder and the brake system. To bleed the cylinder on the vehicle, have an assistant depress the brake pedal and hold the pedal to the floor. Loosen the fitting to allow air and fluid to escape. Repeat this procedure on both fittings until the fluid is clear of air bubbles. Test the operation of the brake system carefully before placing the vehicle into normal service.Posted by FordPartsGiant Specialist
If you have any questions about this product, please don't hesitate to ask us. We will be happy to help you!
Why choose Ford Parts Giant
- Dedicated Service
Your complete satisfaction is our #1 goal
- Lowest Prices
Best deals on genuine OE parts from dealerships
- Fast Delivery
Orders are processed and delivered promptly


