My Garage
My Account
Cart
Additional information needed to check if this part fits
2011 Ford Mustang
Check another vehicle- Fitting Vehicle Options: 8 Cyl 5.0L DOHC EFI Modular, 8 Cyl 5.0L MOD DOHC SEFI NA
- Production Date: 03/2010-06/2014
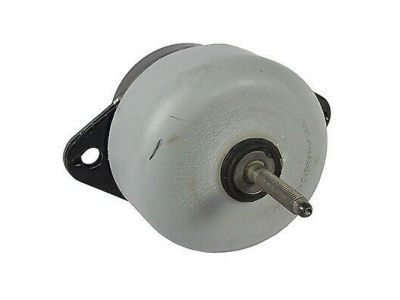
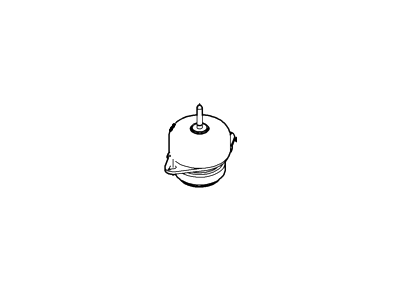
Ford BR3Z-6038-C Insulator Assembly
2011-2014 Ford Mustang BR3Z6038C
Customer Questions & Expert Answers (4)
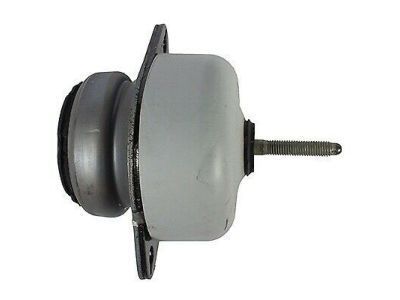
- Part DescriptionInsulator Assy
- Base No.6038
- ManufacturerFord
- Require Quantity2
- Package Quantity1
Additional information needed to check if this part fits
2011 Ford Mustang
Check another vehicle- Fitting Vehicle Options: 8 Cyl 5.0L DOHC EFI Modular, 8 Cyl 5.0L MOD DOHC SEFI NA
- Production Date: 03/2010-06/2014
$136.05 MSRP: $198.90
You Save: $62.85 (32%)
Currently UnavailableDue to manufacturer supply shortage, this item isn't currently available for ordering.
- Related Parts
- Product Specifications
- Customer Questions & Expert Answers
Product Specifications
Brand Genuine Ford Base No. 6038 Manufacturer Part Number BR3Z-6038-C, BR3Z6038C Part Description Insulator Assy Other Names Motor Mount, Mount Item Dimensions 8.5 x 7.9 x 6.1 inches Item Weight 4.50 Pounds Condition New Fitment Type Direct Replacement Manufacturer Ford SKU BR3Z-6038-C Warranty This genuine Ford part is guaranteed by Ford's factory warranty. Shipping & Return Shipping Policy Return Policy Warning: California's Proposition 65Customer Questions & Expert Answers
- Q:Can you tell me if this part is correct for my car? Posted by FordPartsGiant Specialist
- A:You can Select Your Vehicle to check if BR3Z-6038-C fits your vehicle.Posted by FordPartsGiant Specialist
- Q:How to check and replace a worn transmission mount on the Ford Mustang, including the motor and transmission mount? Posted by Customer
- A:To check the transmission mount, insert a large screwdriver or prybar into the space between the transmission and the crossmember and attempt to pry the transmission up; any separation of the rubber indicates that the mount is worn out. For replacement, first remove the transmission crossmember, then take off the nuts attaching the mount to the crossmember and remove the mount. Installation follows the reverse order of removal, ensuring that the nuts and bolts are tightened to the specified torque.Posted by FordPartsGiant Specialist
- Q:How should engine mounts be checked and replaced in V8 engine on Ford Mustang? Posted by Customer
- A:Engine mounts seldom require attention, but broken or deteriorated mounts should be replaced immediately to prevent damage or wear on the drive line components. To check the mounts, raise the vehicle securely on jack stands and position a jack under the engine oil pan, using a wood plank to protect the oil pan while slightly raising the engine to relieve weight from the mounts. Inspect the mounts for cracked or hardened rubber, and have an assistant raise the jack to see if the upper portion of the mount lifts off the lower portion; if it does, replacement is necessary. Check for any relative movement between the mount plates and the engine or frame using a large screwdriver or pry bar, and if movement is noted, lower the engine and tighten the mount fasteners. For replacement, disconnect the cable from the negative battery terminal, detach the air intake duct from the throttle body, and if replacing the left-side mount, remove the air filter housing for better access. Remove the throttle body and alternator, then install an engine support fixture or hoist with chains connected to the alternator mounting studs, ensuring proper anchoring and secure tightening of nuts. Avoid placing the legs of the engine support fixture on the fenders; instead, position them on the body near the suspension strut tower to prevent damage. Remove the fasteners holding the mount to the mount bracket and chassis, and if removing the left-side mount, unbolt the mount bracket from the engine. Raise the engine approximately 1-1/2 inches to remove the mount, and for installation, reverse the removal process, applying thread-locking compound on the mount fasteners and tightening them to the specified torque.Posted by FordPartsGiant Specialist
- Q:How should engine mounts be checked and replaced in V6 engine on Ford Mustang? Posted by Customer
- A:Engine mounts seldom require attention, but broken or deteriorated mounts should be replaced immediately to prevent damage or wear on driveline components. To check the mounts, the engine must be raised slightly to remove the weight from them. Begin by raising the vehicle and securely supporting it on jackstands, then position a jack under the engine oil pan with a wood plank between the jack head and the oil pan, carefully raising the engine just enough to relieve the weight on the mounts. It is crucial to avoid placing any part of the body under the engine when it is only supported by a jack. If the jack and wood fit under the vehicle, raising the vehicle may not be necessary. Inspect the mounts for cracked or hardened rubber, noting that splits can occur down the center. An assistant should raise the jack to see if the upper portion of the mount lifts off the lower portion; if it does, the mount needs replacement. Check for relative movement between the mount plates and the engine or frame using a large screwdriver or pry bar. If movement is detected, lower the engine and tighten the mount fasteners. To replace the mount, disconnect the cable from the negative battery terminal, detach the air intake duct from the throttle body, and if replacing the left-side mount, remove the air filter housing for better access. Remove the throttle body and the accessory bracket bolt from the front of the left cylinder head. Install an engine support fixture or hoist, securing the chain with the previously removed bolt, ensuring proper anchoring and tightness. Alternatively, a floor jack with a piece of wood under the oil pan can be used, but avoid placing the legs of the engine support fixture on the fenders; they should be positioned on the body closest to the suspension strut tower to prevent damage. Remove the fasteners holding the mount to the mount bracket and chassis, unbolt the mount bracket from the engine, and then remove the mount. Installation follows the reverse order of removal, using thread-locking compound on the mount fasteners and tightening them to the specified torque.Posted by FordPartsGiant Specialist
If you have any questions about this product, please don't hesitate to ask us. We will be happy to help you!- Q:
Why choose Ford Parts Giant
- Dedicated Service
Your complete satisfaction is our #1 goal
- Lowest Prices
Best deals on genuine OE parts from dealerships
- Fast Delivery
Orders are processed and delivered promptly