

My Garage
My Account
Cart
This part fits
2009 Ford F53 Stripped Chassis 10 Cyl 6.8L EFI; 5-Speed Automatic Transmission 5R110W NAAO
Check another vehicle- Fit Note: 24, 000 LB. GVW, 26000 LB. GVW
- Production Date: 10/2007-06/2012
Ford 8U9Z-2C219-A Control Module
2008-2012 Ford F53 Stripped Chassis 8U9Z2C219A
Customer Questions & Expert Answers (2)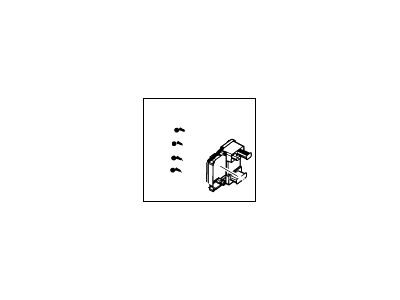
- Part DescriptionControl
- Electronic , Module Brake (Anti Lock Control)
- Base No.2C219
- ManufacturerFord
- Manufacturer's NotesThis part is discontinued.
This part fits
2009 Ford F53 Stripped Chassis 10 Cyl 6.8L EFI; 5-Speed Automatic Transmission 5R110W NAAO
Check another vehicle- Fit Note: 24, 000 LB. GVW, 26000 LB. GVW
- Production Date: 10/2007-06/2012
- Related Parts
- Specifications
- Q&A
Product Specifications
Brand Genuine Ford Base No. 2C219 Manufacturer Part Number 8U9Z-2C219-A, 8U9Z2C219A Part Description Control Item Weight 3.10 Pounds Condition New Fitment Type Direct Replacement Manufacturer Ford SKU 8U9Z-2C219-A Warranty This genuine Ford part is guaranteed by Ford's factory warranty. Shipping & Return Shipping Policy Return Policy Warning: California's Proposition 65Customer Questions & Expert Answers
- Q:I am wondering if this is the exact part that fits in. Posted by FordPartsGiant Specialist
- A:You can Select Your Vehicle to check if 8U9Z-2C219-A fits your vehicle.Posted by FordPartsGiant Specialist
- Installation and Repair Tips by AI Expert
- Removal steps 1. Park on level ground, chock wheels, set parking brake, and support vehicle with jack stands if undercarriage access is needed. 2. Wear eye protection and gloves; keep brake fluid absorbent and rags ready to catch spills. 3. Disconnect the negative battery cable and allow time for any stored electrical energy to dissipate per vehicle guidance. 4. Relieve residual brake system pressure by pumping the brake pedal with engine off until firm, or follow the manufacturer's recommended depressurization procedure. 5. Clean the area around the ABS control module and brake hydraulic connections to prevent contamination of the system. 6. Label and photograph all electrical connectors and brake lines before disconnecting to ensure correct reassembly. 7. Carefully disconnect electrical connectors from the module; use release tabs - do not pry pins. 8. Disconnect hydraulic lines from the unit, catching fluid in a suitable container and immediately cap or plug openings to keep contaminants out. 9. Remove mounting fasteners and retainers securing the module; support the module while removing the last fastener to avoid dropping it. 10. Extract the module from the vehicle, keeping it upright to minimize fluid loss, and place it on a clean surface. Installation steps 1. Compare the replacement unit to the removed module to confirm correct connections and orientation before fitting. 2. Position the module and secure mounting hardware snugly; use manufacturer torque values if available. 3. Reconnect hydraulic lines, ensuring fittings are clean and seals are intact; hand-start threads to avoid cross-threading. 4. Reattach electrical connectors according to your labels/photos and confirm they are fully seated and latched. 5. Reconnect the negative battery cable only after all connectors are properly installed. 6. Top up master cylinder with correct brake fluid type and clean the reservoir cap area before opening. 7. Bleed the brake system following the vehicle-specific procedure; note that ABS modules commonly require a specific bleed or activation sequence or use of a scan tool to cycle the pump/valves. 8. Inspect all fittings for leaks while pressurizing the system; fix any leaks before proceeding. 9. Use a diagnostic scanner to read and clear ABS-related fault codes and, if required by the vehicle, perform module programming or relearn procedures. 10. Perform a low-speed, controlled road test in a safe area to verify brake operation and that the ABS warning light is off. 11. Dispose of used brake fluid and contaminated materials according to local regulations. 12. Repair tip: keep lines capped and the module upright during transfer, and record connector positions with photos to reduce reassembly errors.
- Q:
Why choose Ford Parts Giant
- Dedicated Service
Your complete satisfaction is our #1 goal
- Lowest Prices
Best deals on genuine OE parts from dealerships
- Fast Delivery
Orders are processed and delivered promptly