My Garage
My Account
Cart
Additional information needed to check if this part fits
2013 Ford Mustang
Check another vehicle- Fitting Vehicle Options: 6 Cyl 3.7L PFI NA
- Production Date: 02/2011-06/2014
Ford AT4Z-6C525-B Cam
2011-2019 Ford AT4Z6C525B
Customer Questions & Expert Answers (4)
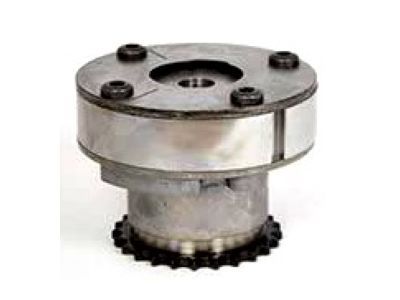
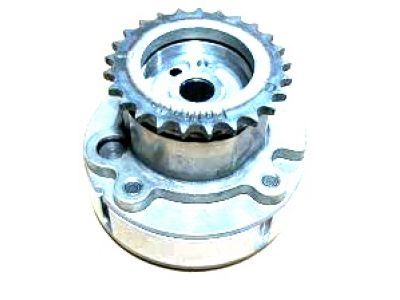
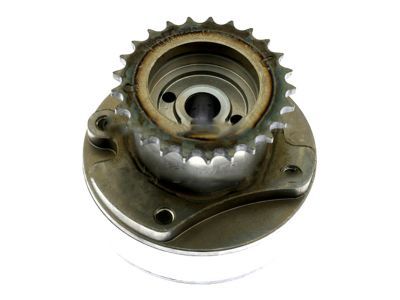
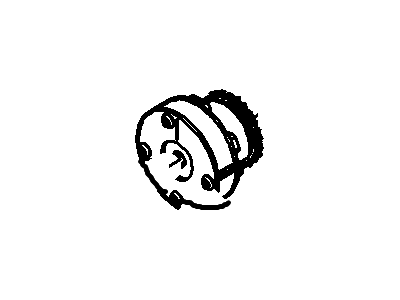
- Part DescriptionCam
- Exhaust
- Base No.6256B
- Replaced By
- ManufacturerFord
- Require Quantity2
- Package Quantity1
Additional information needed to check if this part fits
2013 Ford Mustang
Check another vehicle- Fitting Vehicle Options: 6 Cyl 3.7L PFI NA
- Production Date: 02/2011-06/2014
$157.50 MSRP: $233.33
You Save: $75.83 (33%)
Ships in 1 Business Day
1
- Related Parts
- Product Specifications
- Customer Questions & Expert Answers
Product Specifications
Brand Genuine Ford Base No. 6256B Manufacturer Part Number AT4Z-6C525-B, AT4Z6C525B Part Description Cam Item Dimensions 6.2 x 6.0 x 4.5 inches Item Weight 4.10 Pounds Condition New Fitment Type Direct Replacement Manufacturer Ford SKU AT4Z-6C525-B Warranty This genuine Ford part is guaranteed by Ford's factory warranty. Shipping & Return Shipping Policy Return Policy Warning: California's Proposition 65Customer Questions & Expert Answers
- Q:Will these fit my car and if not which part will? Thank you. Posted by FordPartsGiant Specialist
- A:You can Select Your Vehicle to check if AT4Z-6C525-B fits your vehicle.Posted by FordPartsGiant Specialist
- Q:How to remove and install the Timing Chain, Timing Chain Tensioner and Variable Timing Sprocket on the Ford Mustang? Posted by Customer
- A:These engines are challenging to work on and require special tools for many procedures. When dealing with timing chains, camshafts, or cylinder head removal, it is crucial to read the instructions carefully and use the appropriate tools to avoid engine damage. The timing system is complex, and mistakes can lead to severe engine damage; therefore, only highly experienced individuals should attempt these repairs, and consulting an expert is advisable if there is any uncertainty. Double-check all work to ensure correctness before starting the engine. As this is an "interference" engine design, a broken chain will cause damage to the valves and possibly the pistons, necessitating cylinder head removal. Begin by disconnecting the negative battery terminal, removing the spark plugs, and positioning the number one cylinder at TDC. Next, remove the valve covers and timing chain cover, noting the configuration of timing chains for 4.6L and 5.0L engines. For the 4.6L engine, remove the crankshaft position sensor toothed wheel, rotate the crankshaft to the correct position, and remove the rocker arms from designated cylinders. Proceed to remove the timing chain tensioners and chains, followed by the camshafts if desired. For the 5.0L engine, use a special tool to rotate the crankshaft, compress the tensioners, and remove the primary timing chains and VCT assemblies carefully to avoid mixing them up. Inspect sprocket teeth, chains, and tensioners for wear and damage, replacing any defective parts. During installation for the 4.6L engine, ensure proper alignment of timing marks and install the timing chain guides and tensioners, followed by the rocker arms. For the 5.0L engine, align VCT assembly marks with secondary chains, install primary timing chains, and ensure all components are seated correctly. Finally, rotate the crankshaft to check for resistance and complete the installation in reverse order of removal.Posted by FordPartsGiant Specialist
- Q:How to remove and install the timing chain and variable timing sprocket in the 3.7L engine on Ford Mustang? Posted by Customer
- A:These engines are difficult to work on and require special tools. Any procedure involving the timing chains must be approached with care, as improper disassembly can lead to engine damage. This is an interference engine design, so a broken timing chain can cause damage to the valves and possibly the pistons, necessitating the removal of the cylinder heads. The timing system is complex, and mistakes can result in severe engine damage; therefore, only highly experienced individuals should attempt this repair, and it is advisable to consult an expert if there is any uncertainty. Double-check all work to ensure accuracy before starting the engine. Two special camshaft holding tools are required for the procedure. Begin by disconnecting the negative battery terminal, removing the valve covers, and the timing chain cover. Reinstall the crankshaft sprocket bolt and set the engine to TDC for cylinder number 1, noting that the TDC position will be approximate at this stage. Turn the engine clockwise until the VCT units on each intake camshaft are positioned at 90 degrees relative to the cylinder heads. Remove the bolts securing the valve train oil tubes and install the special camshaft locking tools. If the timing marks on the timing chain are not visible, add a paint dot for alignment. Remove the primary timing chain tensioner and the lower chain guides, followed by the bolts securing the VCT solenoids, keeping them in clean bags marked with their locations. Remove the primary timing chain and the upper chain guides. The camshafts are driven by a secondary timing chain, which requires locking the tensioner before removing the VCT units and secondary timing chains. If the primary timing chain sprocket is to be replaced, remove the bolts securing the channel plate. For installation, clean the mounting surfaces and install the sprocket and plate with a new gasket if removed. New secondary timing chain tensioners must be installed if the old ones were removed. The tensioner is correctly installed when a snap is heard, followed by the installation of the tensioner shoe. Align the colored links of the secondary timing chain with the marks on the VCT units and install the chain, ensuring the VCT units are aligned with the dowel pins on the camshafts. Use new bolts for the VCT units and tighten them to the specified torque. After installing and aligning the secondary chains and VCT units, install the primary timing chain, aligning the colored links with the marks on the sprockets. Once all components are installed and aligned, pull the pins holding back the primary chain tensioners and reinstall the remaining parts in reverse order. Carefully rotate the crankshaft by hand through at least two full revolutions, and if any resistance is felt, stop immediately to investigate potential issues. Finally, install a new oil filter, add engine oil and coolant, and run the engine to check for leaks.Posted by FordPartsGiant Specialist
- Q:How to remove and install the timing chain and variable timing sprocket in the 4.0L engine on Ford Mustang? Posted by Customer
- A:This procedure is complex and requires special tools along with the removal of the engine from the vehicle, focusing on the timing chain, cassettes, and sprockets. Begin by removing the rocker arms and valve lash adjusters before any repairs on the cylinder heads, timing chains, and jackshaft chains. After removing the engine and mounting it on an engine stand, take off the lower oil pan cover, oil pump pickup tube, and crankcase reinforcement section. Detach the front cover from the engine block, noting that the water pump may remain attached if desired. The engine utilizes a jackshaft to drive the camshaft timing chains and oil pump, with the left cylinder bank camshaft driven by a chain at the front and the right by a chain from the rear of the jackshaft. Remove the bolts for the jackshaft chain tensioner and guide, then take out the bolt in the center of the jackshaft sprocket and remove the sprocket with the jackshaft chain. If not already done, remove the left-side upper cassette bolt and lower cassette bolt, then take out the cassette and chain with the jackshaft and camshaft sprockets. For the right camshaft chain, remove the camshaft sprocket bolt and upper cassette bolt. Remove the large plug at the rear of the jackshaft, ensuring to obtain a new plug for reassembly, and then take out the Torx bolt and spacer, followed by the lower cassette bolt and right-side cassette and chain. If the crankshaft has been rotated, ensure the number one piston is at the top of its stroke with the crankshaft keyway pointing straight up, avoiding counterclockwise rotation to prevent incorrect engine timing. Install the right camshaft timing chain cassette, followed by the rear jackshaft sprocket bolt, and then the left camshaft cassette, tightening all bolts to the specified torque. Drape the jackshaft chain over the jackshaft sprocket, engage it onto the crankshaft sprocket, and secure the jackshaft sprocket with its bolt. Install the jackshaft chain guide and tensioner, cleaning the front surface of the engine block and front cover before installing a new gasket and tightening the front cover bolts. Set the camshaft timing for both camshaft sprockets using the special tools, and complete the installation in reverse order of removal. Finally, fill the crankcase with oil, change the filter, add engine coolant, and run the engine to check for any leaks.Posted by FordPartsGiant Specialist
If you have any questions about this product, please don't hesitate to ask us. We will be happy to help you!- Q:
Why choose Ford Parts Giant
- Dedicated Service
Your complete satisfaction is our #1 goal
- Lowest Prices
Best deals on genuine OE parts from dealerships
- Fast Delivery
Orders are processed and delivered promptly