Make sure this part fits

Ford F3TZ-3A360-C Adjustment Arm

1993-1994 Ford F3TZ3A360C

Customer Questions & Expert Answers (3)
F3TZ-3A360-C Ford Adjustment Arm Product Photo 1 of 3
  • Part Description
    Arm - Adjustment
  • Base No.
    3A360
  • Position
    Passenger Side & Driver Side
  • Manufacturer
    Ford
  • Manufacturer's Notes
    This part is discontinued.
Make sure this part fits
  • Related Parts
  • Product Specifications
  • Vehicle Fitment
  • Customer Questions & Expert Answers
  • Product Specifications

    BrandGenuine Ford
    Base No.3A360
    Manufacturer Part NumberF3TZ-3A360-C, F3TZ3A360C
    Part DescriptionArm - Adjustment
    Other NamesRadius Arm
    Item Dimensions24.2 x 12.7 x 8.5 inches
    Item Weight13.90 Pounds
    PositionPassenger Side & Driver Side
    ConditionNew
    Fitment TypeDirect Replacement
    Require Quantity2
    ManufacturerFord
    SKUF3TZ-3A360-C
    WarrantyThis genuine Ford part is guaranteed by Ford's factory warranty.
    Shipping & ReturnShipping Policy Return Policy
    Warning: California's Proposition 65
  • Vehicle Fitment

    Year Make Model Engine Important vehicle option details
    1993-1994 Ford Explorer6 Cyl 4.0L4AT A4LD, 5MT
    1993-1994 Ford Ranger4 Cyl 2.3L, 6 Cyl 3.0L, 6 Cyl 4.0L4AT A4LD, 5MT
  • Customer Questions & Expert Answers

    Q:
    Is the the correct part for the attached VIN? Posted by FordPartsGiant Specialist
    A:
    You can Select Your Vehicle to check if F3TZ-3A360-C fits your vehicle.
    Posted by FordPartsGiant Specialist
    Q:
    How to remove and install the radius arm on Ford Explorer? Posted by Customer
    A:
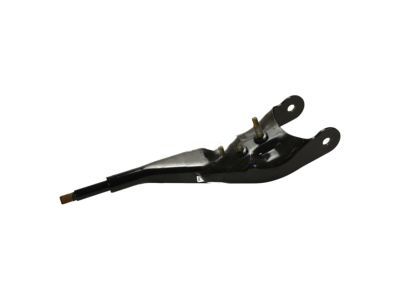
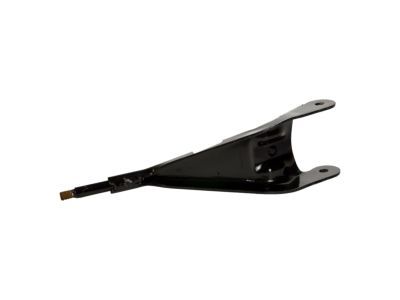
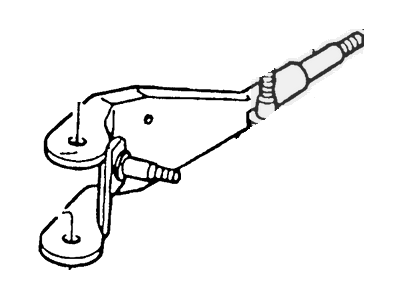
    To remove the spring assembly, first take out the spring lower seat from the radius arm on 2WD models, then remove the bolt and nut securing the radius arm to the front axle and front bracket while supporting the vehicle on jackstands and using a floor jack to raise and lower the front axle. For 4WD models, remove the spring lower seat and stud, followed by the bolts securing the radius arm to the front axle bracket. Next, from the rear side of the radius arm bracket, remove the nut, rear washer, shield (on the passenger side only), and insulator, then take out the radius arm along with the inner insulator and retainer from the threaded end. For installation, place the front-end of the radius arm onto the front axle, and on 2WD models, install the attaching bolt and a new nut from underneath the axle, tightening the nut only finger tight at this stage. For 4WD models, position the front-end of the radius arm onto the bracket and axle, then install the bolts and stud (with a washer on the left axle only) in the bracket, also tightening them only finger tight. Next, install the rear retainer and insulator onto the threaded end of the radius arm, then insert the radius arm into the rear bracket and attach the rear insulator, washer, and new nut, tightening the nut to the specified torque. Finally, tighten the bolts and nuts installed earlier to the specified torque, install the spring lower seat onto the radius arm for 2WD models or the spring lower seat and insulator onto the left radius arm for 4WD models, and then install the spring assembly. It is recommended to have the front-end alignment checked by a dealer service department or an alignment shop.
    Posted by FordPartsGiant Specialist
    Q:
    How to remove and install the radius arm on Ford Ranger? Posted by Customer
    A:
    Before dismantling the coil spring assembly, one has to take off the spring lower seat in the radius arm of the 2WD models or to take off the bolt/nut of the radius arm to the front axle and front bracket, and also two bolts for the radius arm to the front bracket for the earlier model. In the case of 4WD models, it is necessary to remove the spring lower seat as well as the stud, and after that, the bolts which attach the radius arm to the front axle bracket. Subsequently, from the rear side of the radius arm bracket, or from the outside of the automobile, remove the nut, rear washer, the shield which is only applicable to the shield side, and the insulator before pulling out the radius arm together with the inner insulator and the retainer from the threaded side. To install the radius arm insert the front end of the radius arm to the front axle of the vehicle as described above. For 2WD models, there is the attaching bolt which has to be fitted together with a new nut from beneath the axle; the nut at this stage should only be tightened by hand. In the 4WD models, place the front end of the radius arm on the bracket and axle and then screw in the bolts and stud (with a washer only on the left axle) in the bracket but only to the extent of being hand tight. Then please put the rear retainer and the insulator onto the thread end of the radius arm and then placing the radius arm into the bracket then put the insulator washer and new nut then tightening nut to the torque stated. Last of all, make tight the bolts and nuts which are fitted earlier to required torque, and for 2WD model fit the spring lower seat on the radius arm and for 4WD model fit the spring lower seat and insulator on the left radius arm and then fit the spring assembly.
    Posted by FordPartsGiant Specialist
    If you have any questions about this product, please don't hesitate to ask us. We will be happy to help you!

Genuine Ford Part F3TZ-3A360-C, the Right Choice

To ensure reliability, purchase part # F3TZ-3A360-C Adjustment Arm. It is also called Radius Arm. OEM parts are of high quality and known for their longevity. This is because they are built to the Ford standards which are relatively high and undergo rigorous quality control testing. This part fits specific Ford Explorer, Ranger models.

FordPartsGiant.com is a leading supplier of genuine components and accessories such as F3TZ3A360C Adjustment Arm. Looking to purchase quality low-cost OEM Ford parts? You have just found the right place. For detailed Ford parts information, click here.

Why choose Ford Parts Giant

  • Dedicated Service

    Your complete satisfaction is our #1 goal

  • Lowest Prices

    Best deals on genuine OE parts from dealerships

  • Fast Delivery

    Orders are processed and delivered promptly