My Garage
My Account
Cart
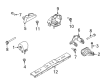
Genuine Lincoln Navigator Engine Mount
Engine Motor Mount- Select Vehicle by Model
- Select Vehicle by VIN
Select Vehicle by Model
orMake
Model
Year
Select Vehicle by VIN
For the most accurate results, select vehicle by your VIN (Vehicle Identification Number).
42 Engine Mounts found


Lincoln Navigator Insulator Assembly
Part Number: 9L3Z-6038-B$102.08 MSRP: $143.92You Save: $41.84 (30%)Ships in 1-2 Business Days


Lincoln Navigator Motor Mount
Part Number: DL3Z-6038-C$149.60 MSRP: $226.67You Save: $77.07 (34%)Ships in 1-3 Business Days

Lincoln Navigator Engine Support Insulator Assembly
Part Number: 7L1Z-6068-AC$33.19 MSRP: $46.11You Save: $12.92 (29%)Ships in 1-2 Business Days

Lincoln Navigator Engine Support Insulator Assembly
Part Number: 9L3Z-6068-B$74.78 MSRP: $109.33You Save: $34.55 (32%)


Lincoln Navigator Engine Support Insulator Assembly
Part Number: FL3Z-6068-A$123.14 MSRP: $180.03You Save: $56.89 (32%)Ships in 1-3 Business Days


Lincoln Navigator Engine Support Insulator Assembly
Part Number: 9L3Z-6038-A$94.16 MSRP: $137.67You Save: $43.51 (32%)

Lincoln Navigator Insulator Assembly
Part Number: 9L3Z-6038-C$244.08 MSRP: $360.00You Save: $115.92 (33%)


Lincoln Navigator Engine Support Insulator Assembly
Part Number: JL3Z-6038-B$146.72 MSRP: $214.50You Save: $67.78 (32%)

Lincoln Navigator Engine Support Insulator Assembly
Part Number: DL3Z-6038-B$139.08 MSRP: $203.33You Save: $64.25 (32%)Ships in 1-3 Business Days

Lincoln Navigator Front Engine Support Insulator Assembly
Part Number: 5L7Z-6038-CA$93.14 MSRP: $136.17You Save: $43.03 (32%)

Lincoln Navigator Insulator Assembly
Part Number: BL3Z-6038-E$81.13 MSRP: $118.62You Save: $37.49 (32%)Ships in 1-2 Business Days
Lincoln Navigator Engine Support Insulator Assembly
Part Number: JL1Z-6068-H$145.20 MSRP: $220.00You Save: $74.80 (34%)Ships in 1-3 Business Days
Lincoln Navigator Insulator Assembly
Part Number: JL1Z-6038-B$100.57 MSRP: $147.03You Save: $46.46 (32%)Ships in 1-3 Business Days
Lincoln Navigator Engine Support Insulator Assembly
Part Number: JL1Z-6038-A$144.21 MSRP: $210.83You Save: $66.62 (32%)Ships in 1-3 Business DaysLincoln Navigator Engine Support Insulator Assembly
Part Number: NL1Z-6038-C$120.26 MSRP: $175.82You Save: $55.56 (32%)Ships in 1-2 Business Days
Lincoln Navigator Engine Support Insulator Assembly
Part Number: JL1Z-6068-F$131.67 MSRP: $192.50You Save: $60.83 (32%)Ships in 1-3 Business DaysLincoln Navigator Engine Support Insulator Assembly
Part Number: JL1Z-6068-J$131.67 MSRP: $192.50You Save: $60.83 (32%)Ships in 1-3 Business Days


Lincoln Navigator Engine Support Insulator Assembly
Part Number: FL1Z-6068-B$118.38 MSRP: $173.07You Save: $54.69 (32%)
| Page 1 of 3 |Next >
1-20 of 42 Results
Lincoln Navigator Engine Mount
The Lincoln Navigator Engine Mount delivers quiet comfort while ensuring the engine is placed correctly. Further, it also absorbs shake and noise generated during your car's operation. The early Lincoln Navigator models were built using a classic metal and rubber Engine Mount design, where a rubber layer was placed between two steel plates to cushion movement. As the SUV evolved, Lincoln introduced fluid-filled hydraulic versions, each Engine Mount using internal liquid to absorb excess vibration while restraining the motor from straying, in turn increasing ride smoothness. Recent generations of Navigators can feature electronically controlled active mounts that stay soft at idle for maximum isolation but automatically stiffen when revs climb, preventing heavy components from misaligning under load. Despite their differences, every Engine Mount shares a mission to prevent drivetrain drift that could strain hoses or shafts. All Engine Mounts help to keep the cabin serene for passengers as well. As rubber designs age, they can sag or split outright, hydraulic units can leak, and active styles depend on sensors or vacuum lines, so a healthy Engine Mount remains vital to every Lincoln Navigator journey.
We provide a wide range of Lincoln Navigator Engine Mount at the optimal prices. If you need Lincoln Navigator Engine Mount, you can shop with confidence on our website. All our OEM parts come with a manufacturer's warranty and are delivered to your doorstep with a fast delivery service.
Lincoln Navigator Engine Mount Parts Questions & Experts Answers
- Q: Should engine mounts be replaced immediately if they are broken or deteriorated in V6 engine on Lincoln Navigator?A:Engine mounts seldom require attention, but broken or deteriorated mounts should be replaced immediately to prevent damage or wear to driveline components. To check the mounts, raise the vehicle securely on jackstands and position a jack under the engine oil pan with a large wood block in between. Carefully raise the engine just enough to relieve the weight from the mounts, then inspect them for cracks, hardened rubber, or separation from the metal plates, applying rubber preservative to slow deterioration. Check for any relative movement between the mount plates and the engine or frame using a large screwdriver or pry bar; if movement is noted, lower the engine and tighten the mount fasteners. For replacement, disconnect the cable from the negative battery terminal and detach the air cleaner duct. Support the engine from above with an engine support fixture or overhead crane, taking a slight amount of weight off the engine. Remove the engine mount throughbolts and raise the engine high enough to clear the brackets without forcing it too high. Unbolt the mount from the engine block and remove it from the vehicle, replacing self-locking nuts and bolts with new ones whenever disassembled. Before assembly, clean the engine block holes of any hardened residual adhesive. Attach the new mount to the engine block, install the bolts and stud/nuts securely, lower the engine into place, and install the through bolts, tightening them to specifications. Finally, reinstall all parts that were removed to access the mounts.

Related Lincoln Navigator Parts


Browse by Year
2025 Engine Mount 2024 Engine Mount 2023 Engine Mount 2022 Engine Mount 2021 Engine Mount 2020 Engine Mount 2019 Engine Mount 2018 Engine Mount 2017 Engine Mount 2016 Engine Mount 2015 Engine Mount 2014 Engine Mount 2013 Engine Mount 2012 Engine Mount 2011 Engine Mount 2010 Engine Mount 2009 Engine Mount 2008 Engine Mount 2007 Engine Mount 2006 Engine Mount 2005 Engine Mount 2004 Engine Mount 2003 Engine Mount 1998 Engine Mount