My Garage
My Account
Cart
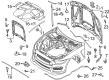
Genuine Ford Mustang Hood
Engine Hood- Select Vehicle by Model
- Select Vehicle by VIN
Select Vehicle by Model
orMake
Model
Year
Select Vehicle by VIN
For the most accurate results, select vehicle by your VIN (Vehicle Identification Number).
22 Hoods found


Ford Mustang Hood Assembly
Part Number: DR3Z-16612-B$953.30 MSRP: $1520.42You Save: $567.12 (38%)Ships in 1-3 Business Days


Ford Mustang Hood Assembly
Part Number: 7R3Z-16612-A$1048.88 MSRP: $1650.62You Save: $601.74 (37%)Ships in 1-3 Business Days


Ford Mustang Hood Assembly
Part Number: JR3Z-16612-A$1111.13 MSRP: $1653.47You Save: $542.34 (33%)Ships in 1 Business Day


Ford Mustang Hood Assembly
Part Number: FR3Z-16612-E$1300.51 MSRP: $1935.28You Save: $634.77 (33%)Ships in 1-3 Business Days


Ford Mustang Hood Assembly
Part Number: AR3Z-16612-B$1031.01 MSRP: $1644.35You Save: $613.34 (38%)Ships in 1-3 Business Days

Ford Mustang Hood Assembly
Part Number: 7R3Z-16612-B$975.51 MSRP: $1451.65You Save: $476.14 (33%)Ships in 1-2 Business Days


Ford Mustang Hood Assembly
Part Number: AR3Z-16612-A$941.08 MSRP: $1400.42You Save: $459.34 (33%)Ships in 1-3 Business Days

Ford Mustang Hood Assembly
Part Number: FR3Z-16612-B$1480.33 MSRP: $2202.87You Save: $722.54 (33%)Ships in 1-3 Business Days
Ford Mustang Hood Assembly
Part Number: KR3Z-16612-A$1305.45 MSRP: $1996.10You Save: $690.65 (35%)Ships in 1-3 Business DaysFord Mustang Hood Assembly
Part Number: FR3Z-16612-F$1480.33 MSRP: $2202.87You Save: $722.54 (33%)Ships in 1-3 Business Days
Ford Mustang Hood Assembly
Part Number: PR3Z-16612-B$1043.88 MSRP: $1553.40You Save: $509.52 (33%)Ships in 1-2 Business DaysFord Mustang Hood Assembly
Part Number: PR3Z-16612-A$1222.24 MSRP: $1818.82You Save: $596.58 (33%)Ships in 1-2 Business DaysFord Mustang Hood Assembly
Part Number: FR3Z-16612-A$1300.51 MSRP: $1935.28You Save: $634.77 (33%)Ships in 1-3 Business Days
Ford Mustang Hood Assembly
Part Number: 5R3Z-16612-AA$975.51 MSRP: $1451.65You Save: $476.14 (33%)Ships in 1-2 Business Days


| Page 1 of 2 |Next >
1-20 of 22 Results
Ford Mustang Hood
The Ford Mustang Hood's main function is to protect the powerplant from the elements while allowing easy access for service. In addition to its functional purpose, the panel acts as a visual focal point that allows every Ford Mustang model to communicate a lively personality. Each Hood has unique lines and mounting points, meaning an ill-fitting copy can either look odd or not latch properly. A Ford panel will only be sourced from someone who has proved their standards to ensure the Mustang's factory alignment and gap consistency is maintained. When the Hood is properly built, it opens smoothly, allowing clear access to the engine components for routine checks and closes to seal out rain, dirt, and debris. Over the decades, a few styling tweaks have occurred, from subtle creases to bold bulges. However, the basic mechanism remains the same, a front hinged design with a secure latch. A Ford approved Hood that is specific to the Mustang year fits flawlessly, protects critical hardware, and preserves the car's signature look. Moreover, the Hood resists rust for long term reliability.
We provide a wide range of Ford Mustang Hood at the optimal prices. If you need Ford Mustang Hood, you can shop with confidence on our website. All our OEM parts come with a manufacturer's warranty and are delivered to your doorstep with a fast delivery service.
Ford Mustang Hood Parts Questions & Experts Answers
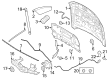
- Q: How to remove and install a hood on Ford Mustang?A:The implementation as well as removal of the hood is quite a cumbersome process and at least two people should be used in the process. First of all, use blankets or pads to cover the cowl area of the body and fenders in order to protect the paint. Scratch or draw a circle, for the fitting of the hood hinge, around it's base or draw a straight line on the side of the hood spring. Remove the windshield washer hose and if there are any cables or wires that will hinder the process of removal, then they should be removed. Having an assistant on the hood side unscrew the hinge to hood bolts and retract the hood. For installation, the procedures will be as follow: The above descriptions are simply the reversal of the removal procedures. For the movement of the hood, it is required to use bolts and nuts for fore-and-aft, and side to side movements of the hinge plate slot. On the hinge plate, draw a line to define direction of movement after that, unscrew the bolts or nuts and align the hood correctly and at the end of the process, screw the hinge bolts. If required tighten/floating the whole Hood Latch assembly up-and-down and side-to-side on the radiator support such that the hood can latch tightly and close flush with the fenders then trace around the latch mounting bolts. After repositioning, tighten the bolts as before and ensure that it fits well by shutting the vehicle hood. Lastly, align the hood bumpers on the radiator support to the hood/fenders interface and every so often, apply graphite on the hood latch assembly and its hinges in order to reduce wear and uphold free movement.


