

My Garage
My Account
Cart
Genuine 2008 Ford Focus Piston
Engine Pistons- Select Vehicle by Model
- Select Vehicle by VIN
Select Vehicle by Model
orMake
Model
Year
Select Vehicle by VIN
For the most accurate results, select vehicle by your VIN (Vehicle Identification Number).
3 Pistons found
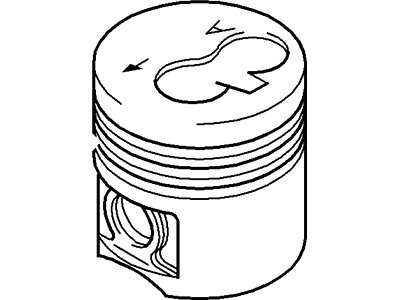
2008 Ford Focus Engine Piston Set
Part Number: 4S4Z-6108-A$82.26 MSRP: $112.41You Save: $30.15 (27%)Ships in 1-2 Business DaysProduct Specifications- Other Name: Piston
- Replaces: 3S7Z-6108-A
- Base No.: 6108
- Item Weight: 1.30 Pounds
- Item Dimensions: 4.3 x 3.7 x 2.4 inches
- Condition: New
- Fitment Type: Direct Replacement
- SKU: 4S4Z-6108-A
- Warranty: This genuine part is guaranteed by Ford's factory warranty.
2008 Ford Focus Engine Piston Set
Part Number: 4S4Z-6108-B$166.94 MSRP: $246.67You Save: $79.73 (33%)Ships in 1-3 Business DaysProduct Specifications- Other Name: Piston
- Replaces: 3S7Z-6108-B
- Base No.: 6108
- Item Weight: 1.30 Pounds
- Condition: New
- Fitment Type: Direct Replacement
- SKU: 4S4Z-6108-B
- Warranty: This genuine part is guaranteed by Ford's factory warranty.
2008 Ford Focus Engine Piston Set
Part Number: 4S4Z-6108-C$181.61 MSRP: $268.33You Save: $86.72 (33%)Ships in 1-3 Business DaysProduct Specifications- Other Name: Piston
- Replaces: 3S7Z-6108-C
- Base No.: 6108
- Item Weight: 1.30 Pounds
- Condition: New
- Fitment Type: Direct Replacement
- SKU: 4S4Z-6108-C
- Warranty: This genuine part is guaranteed by Ford's factory warranty.
2008 Ford Focus Piston
At FordPartsGiant.com, you will find an extensive inventory of genuine 2008 Ford Focus Piston offered at competitive prices online. These manufacturer-backed OEM 2008 Ford Focus Piston ensure your satisfaction with their quality and come with a hassle-free return policy and expedited delivery service, guaranteeing a delightful shopping experience.
2008 Ford Focus Piston Parts Questions & Experts Answers
- Q:How to install piston and connecting rod assemblies on 2008 Ford Focus?Posted by Toshiki S.A:Before the piston and the connecting rods are fitted in place, the cylinder bore should be free from any grit, the top of the cylinder should be given a fine cut and the crank should be fixed in position. Now coming to the Number 1 cylinder connecting rod, unbolt and take out the bearing cap, but while doing so it is important not to lose track of the marks that were made before removal and then clean the bearing recesses with a lint free cloth. Wipe the connecting rod's 'back' face of the new upper bearing and put it in place, while the other half should be placed at the bearing cap with tabs aligning with the bearing cap's notches. Pour some clean engine oil on the piston and rings, fit a piston ring compressor and ensure that the skirt of the piston sticks out slightly to help in the insertion of the piston into the cylinder bore. Turn the crankshaft such that it aligns the Number 1 crankpin journal to the Bottom Dead Center then lubricate the cylinder walls. Rotate the piston assembly as such that the arrow labeled on the piston crown is located at the timing belt side; then gently push the piston into the cylinder bore so that the ring compressor fits tightly onto the inconsistently honed bore. Lightly strike the top edge of the ring compressor and softly strike the piston with a wooden hammer handle while engaging the connecting rod to the crankpin and be careful for any friction. In order to determine the degree of the running clearance of the bearing, a dab of Plastigage should be applied between the Number 1 crankpin journal and the connecting rod bearing cap should be tightened to the stipulated torque and angle whilst the crankpin journal, mating surfaces should be clean. Carefully undo the cap to see that the Plastigage is not shifted before using the width of the crushed section and the scale to see the running clearance. Incorrect clearance, always seek the assistance of an engine reconditioning expert. Remove all excess Plastigage material, spread fresh lubricant evenly on the bearing surfaces, force the piston all the way to the cylinder which exposes the bearing surface, slide the connecting rod back into position and fasten bearing cap screws. The same should be done for the rest of the assemblies in order to have them clean and properly orientated with the piston and rod assemblies. Once installed, turn the crankshaft to see whether it binds; place the lower crankcase and put on a new gasket and hand tighten. Place the lower crankcase in the position on the cylinder block and check for gaps where possible to insert spacer shims; then tighten the bolts to the required torque.Answered by Ford Parts Specialist Don / Mar 25, 2025
Related 2008 Ford Focus Parts
 2008 Ford Focus Power Steering Pump
 2008 Ford Focus Power Steering Hose
 2008 Ford Focus PCV Hose
 2008 Ford Focus PCV Valve Hose
 2008 Ford Focus Pinion Bearing
 2008 Ford Focus Pressure Plate
 2008 Ford Focus Pinion Washer